
Welcome to the Heart of Baking: A Journey to Soft Milk Bread Loaf
Ah, the aroma of freshly baked bread! There’s something truly magical about it. Today, I’m excited to share with you my cherished recipe for a Soft Milk Bread Loaf, a delightful creation that wraps you in warmth and nostalgia, perfect for sharing with loved ones around the table. This bread is not just a recipe; it’s an embrace, a memory, and a promise of comfort that will fill your home with love.
Whether you’re a seasoned baker or just starting your culinary adventure, this recipe will guide you through every step. Let’s dive into the world of baking, where the dough becomes a canvas for your creativity and the finished loaf is a testament to your love and care.
Why You’ll Love This Recipe
- Perfect for All Occasions: This milk bread is versatile enough for breakfast, lunch, or dinner. Whether toasted with butter or transformed into delectable sandwiches, it shines in every setting.
- Simple Ingredients: You don’t need fancy ingredients to create magic! With just a handful of pantry staples, you can bake this wonderful loaf.
- Beginner-Friendly: No need to worry if you’re new to baking. The steps are straightforward, making it a perfect starting point for novice bakers.
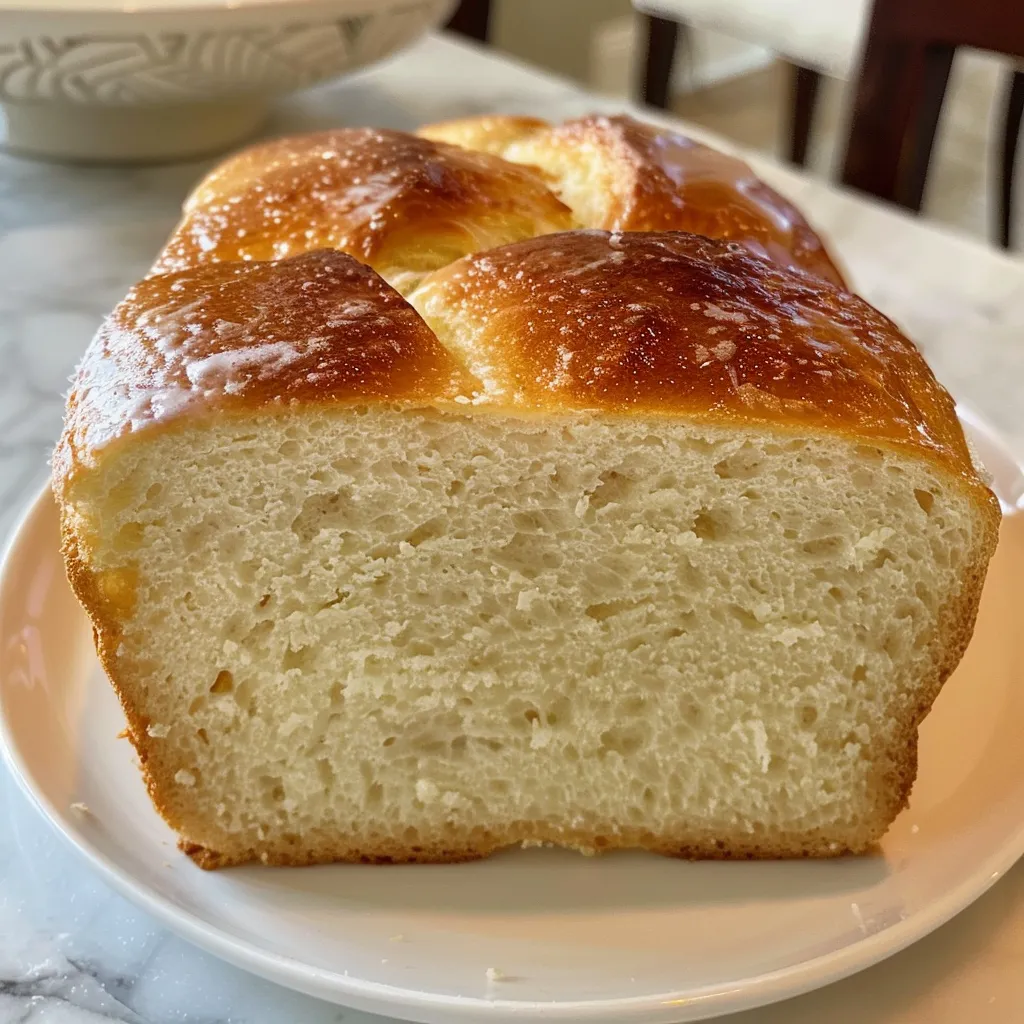
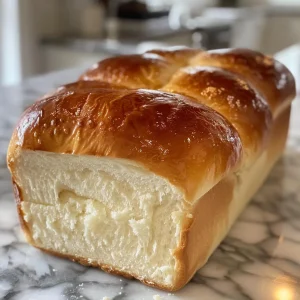
- Deliciously Fluffy: The end result is a soft loaf with a tender crumb, perfect for toasting or enjoying fresh out of the oven.
- Storage-Friendly: This bread stays fresh longer than many standard loaves, making it ideal for meal prep and sharing with family.
Ingredient Breakdown and Substitutions
Before we start kneading, let’s gather our ingredients. Here’s what you’ll need:
- 2/3 cup heavy cream (at room temperature): Adds richness and moisture to the bread.
- 1 cup milk (plus 1 tablespoon, at room temperature): Whole, 1%, or 2% milk works well.
- 1 large egg (at room temperature): Helps bind the ingredients and enrich the flavor.
- Egg wash: Beat 1 egg with 1 teaspoon water for that beautiful golden shine.
- Simple syrup: 1 tablespoon sugar dissolved in 1 tablespoon hot water for brushing the finished loaf.
- 4 cups all-purpose flour: You can also mix 1/2 cup cake flour with 3 1/2 cups bread flour for a delightful texture.
- 1/3 cup sugar: Balances the flavors and adds a hint of sweetness.
- 1 tablespoon active dry yeast: Essential for that lovely rise.
- 1 1/2 teaspoons salt: Enhances the overall flavor of the bread.
Step-by-Step Instructions
Now that we have our ingredients ready, let’s get to the fun part—baking!
- In the bowl of a stand mixer fitted with a dough hook attachment, add the ingredients in the following order: heavy cream, milk, egg, sugar, flour (or the cake and bread flour mixture), yeast, and salt. Turn on the mixer to “stir,” and knead for 15 minutes, stopping occasionally to push the dough together.
- If the dough is sticking to the sides of the bowl, add a little more flour, one tablespoon at a time, until it pulls away from the sides but sticks to the bottom. If kneading by hand, extend the kneading time by 5-10 minutes.
- Cover the dough with a damp towel and place it in a warm spot until it has doubled in size (about 1-2 hours). A great tip is to proof your dough in a closed microwave with a mug of just-boiled water.
- Grease two baking vessels on all sides with butter. You can use two standard loaf pans, two 9-inch round pans, or a combination of both.
- Once the dough has doubled, return it to the mixer and stir for another 5 minutes to eliminate air bubbles. Turn it out onto a lightly floured surface, cut it in half, and shape each half into a rectangle. Cut each rectangle crosswise into three equal pieces and place them in the loaf pan. Alternatively, cut each half into 8 pieces and roll them into balls or ropes, placing them in a round pan.
- Let the shaped dough proof, covered, for another hour.
- Preheat your oven to 350°F (175°C). Brush the risen dough with the egg wash and bake for 23-25 minutes, or until golden brown. To give the bread a lovely shine and sweetness, brush the warm loaf with the simple syrup as soon as it comes out of the oven.
Pro Tips for Perfect Bread
- Temperature Matters: Ensure that all ingredients are at room temperature for better mixing and rise.
- Don’t Rush the Rise: Allow the dough to fully proof; this step is crucial for a soft and airy loaf.
- Knead Well: Proper kneading develops gluten, which is vital for the structure of the bread.
- Check Your Yeast: Always check that your yeast is active for a successful rise. A simple test is to add it to warm water with a bit of sugar; if it bubbles, it’s good to go!
- Experiment with Flours: Mixing different flours can yield unique textures and flavors.
- Brush with Care: Apply the egg wash gently to avoid deflating the dough.
- Use a Thermometer: The internal temperature of the bread should reach around 190°F (88°C) when fully baked.
- Cool Completely: Allow the bread to cool completely before slicing to keep the crumb intact.
Common Mistakes and Troubleshooting
Baking is a journey, and sometimes things don’t go as planned. Here are some common mistakes and how to avoid them:
- Dense Bread: This can happen if the dough was not kneaded enough or if the yeast was inactive. Always ensure your yeast is fresh and knead until the dough is smooth.
- Overproofing: If left to rise too long, the dough can collapse. Keep an eye on it and use a timer if necessary.
- Underbaking: If your bread is doughy inside, ensure you bake it until golden brown and check with a thermometer for doneness.
- Sticking to Pans: Grease your pans well and consider using parchment paper for easy removal.
Delicious Variations
Feel free to get creative with this Soft Milk Bread Loaf. Here are some delightful variations:
- Herbed Milk Bread: Add fresh herbs like rosemary or thyme into the dough for a savory twist.
- Cinnamon Swirl: Sprinkle cinnamon and sugar in the layers when shaping the dough for a sweet breakfast treat.
- Cheese and Chive: Fold in shredded cheese and chopped chives for a flavorful bread perfect for sandwiches.
- Fruit-Infused: Incorporate dried fruits like cranberries or raisins for a sweet surprise in every bite.
Storage and Make-Ahead Instructions
This bread is perfect for making ahead:
- Room Temperature: Store in an airtight container at room temperature for up to 3 days.
- Refrigerator: For longer storage, keep in the fridge for up to a week, but be aware that this may dry it out.
- Freezing: Wrap tightly in plastic wrap and then in foil to freeze. It can last for up to 3 months. Thaw at room temperature before serving.
Frequently Asked Questions
- Can I use whole wheat flour? Yes, you can substitute part of the all-purpose flour with whole wheat flour, but it may change the texture.
- What if my dough doesn’t rise? Ensure your yeast is active and the dough is kept in a warm environment.
- Can I make this without a stand mixer? Absolutely! You can knead by hand; just be prepared for a bit more work.
- How do I know when the bread is done? The bread should be golden brown and sound hollow when tapped on the bottom.
- Can I add nuts or seeds? Definitely! Feel free to mix in your favorite nuts or seeds for added texture.
- How do I achieve a crustier loaf? Try placing a pan of water in the oven to create steam while baking.
- What’s the best way to slice the bread? Use a serrated knife to achieve clean slices without squashing the loaf.
- How can I make this recipe dairy-free? Substitute the milk and cream with plant-based alternatives like almond or oat milk.
Nutritional Tips and Dietary Adaptations
If you’re watching your diet, here are some tips to adapt this recipe:
- Lower Sugar: Reduce the sugar in the dough if desired. The bread will still be deliciously soft.
- Whole Grains: Substitute a portion of the all-purpose flour for whole grain flour for added fiber.
- Dairy-Free Option: Use plant-based milk and cream for a dairy-free version without compromising on taste.
- Gluten-Free Option: Experiment with a gluten-free flour blend, but be sure to add a binding agent like xanthan gum.
Equipment Recommendations
To make your baking experience smoother, here are some essential kitchen tools:
- Stand Mixer: A great investment for consistent mixing and kneading.
- Dough Scraper: Handy for transferring and shaping your dough.
- Loaf Pans: Non-stick pans or glass pans work best for even baking.
- Thermometer: An instant-read thermometer helps ensure your bread is baked perfectly.
Serving Suggestions
What’s better than a warm loaf of bread? Here are some delightful ways to serve it:
- With Butter: Spread a generous amount of butter for a classic treat.
- As French Toast: Use slices of this bread for a rich and fluffy French toast breakfast.
- For Sandwiches: Create delicious sandwiches with your favorite fillings.
- Toasted with Jam: Toast slices and top with your favorite jam or honey for a sweet snack.
As you embark on this baking adventure, remember that every loaf is a story waiting to be shared. The Soft Milk Bread Loaf is more than just a recipe; it’s a celebration of love, warmth, and the joy of cooking for those we hold dear. So roll up your sleeves, gather your loved ones, and create something beautiful together. Happy baking!
Soft Milk Bread Loaf
Ingredients
Dough
- 2/3 cup heavy cream at room temperature
- 1 cup milk plus 1 tablespoon, at room temperature
- 1 large egg at room temperature
- Egg wash beat 1 egg with 1 teaspoon water
- 1 tablespoon simple syrup dissolved in hot water
- 4 cups all-purpose flour or 1/2 cup cake flour + 3 1/2 cups bread flour
- 1/3 cup sugar
- 1 tablespoon active dry yeast or instant yeast
- 1 1/2 teaspoons salt
Instructions
- Combine ingredients in order in a stand mixer, knead for 15 minutes, adding flour if needed.
- Cover and let the dough rise until doubled, about 1-2 hours.
- Shape the dough into loaves or rolls, place in greased pans, and proof for another hour.
- Preheat oven to 350°F (175°C), brush with egg wash, and bake for 23-25 minutes until golden.
- Remove from oven, brush with sugar water for shine, and cool before slicing.