
Creating Heartwarming Memories with Pumpkin Banana Oat Granola Bars
Ah, the aroma of fresh-baked goods wafting through the house, a scent that transports us back to cherished moments spent in the kitchen with loved ones. Today, we’re diving into a delightful recipe that embodies just that: **Pumpkin Banana Oat Granola Bars**. These bars are not just a delicious snack; they are a celebration of flavors, textures, and memories, perfect for sharing around the family table.
Made with wholesome ingredients, these bars are a wonderful way to utilize those overripe bananas sitting on your counter. With the warm notes of pumpkin and a hint of fall spices, they’re a treat that can brighten up any day. Whether you’re looking for a quick breakfast option, a nourishing snack for your little ones, or a delightful addition to your lunchbox, this recipe has got you covered. Let’s get started!
Why You’ll Love This Recipe
- Wholesome Ingredients: Packed with oats, bananas, and pumpkin, these bars offer a nutritious boost, making them perfect for both kids and adults.
- Simple to Make: With straightforward steps and minimal ingredients, you can whip these up quickly, even on a busy morning.
- Customizable: The beauty of this recipe lies in its flexibility. Swap in your favorite ingredients and make it your own!
- Perfect for Meal Prep: These bars can be made in advance and stored, making them ideal for hectic weeks.
- Deliciously Satisfying: The combination of flavors creates a satisfying treat that will keep you coming back for more!
Ingredients Breakdown
Here’s what you’ll need to create these scrumptious Pumpkin Banana Oat Granola Bars:

★ Recommended Kitchen Tool
Glass Mason Jars for Oats
Make this recipe even easier with a quality Glass Mason Jars for Oats — a must-have kitchen staple!
- 2 1/2 cups quick cooking rolled oats: The backbone of the bars, providing texture and chewiness.
- 1/2 teaspoon sea salt: Enhances the flavors of the other ingredients.
- 1/2 teaspoon ground cinnamon: Adds warmth and a classic fall spice.
- 1/4 teaspoon ground nutmeg: A lovely pairing with pumpkin for that cozy flavor.
- 1/4 teaspoon pumpkin pie spice: Intensifies the autumn essence.
- 1 cup overripe bananas, mashed (about 2 medium bananas): Natural sweetness and moisture for the bars.
- 1/4 cup peanut butter*: A creamy base that binds everything together. (*Substitute with almond butter for a nut-free version.)
- 1/4 cup maple syrup or honey: Sweetness without refined sugars.
- 2 teaspoons vanilla extract: A hint of flavor that rounds out the ingredients.
- 2 tablespoons coconut oil: For moisture and a slight tropical taste.
- 1 cup pumpkin puree: The star ingredient that gives these bars their signature flavor.
- 1/2 cup raisins: For a sweet burst of flavor with every bite.
Step-by-Step Instructions
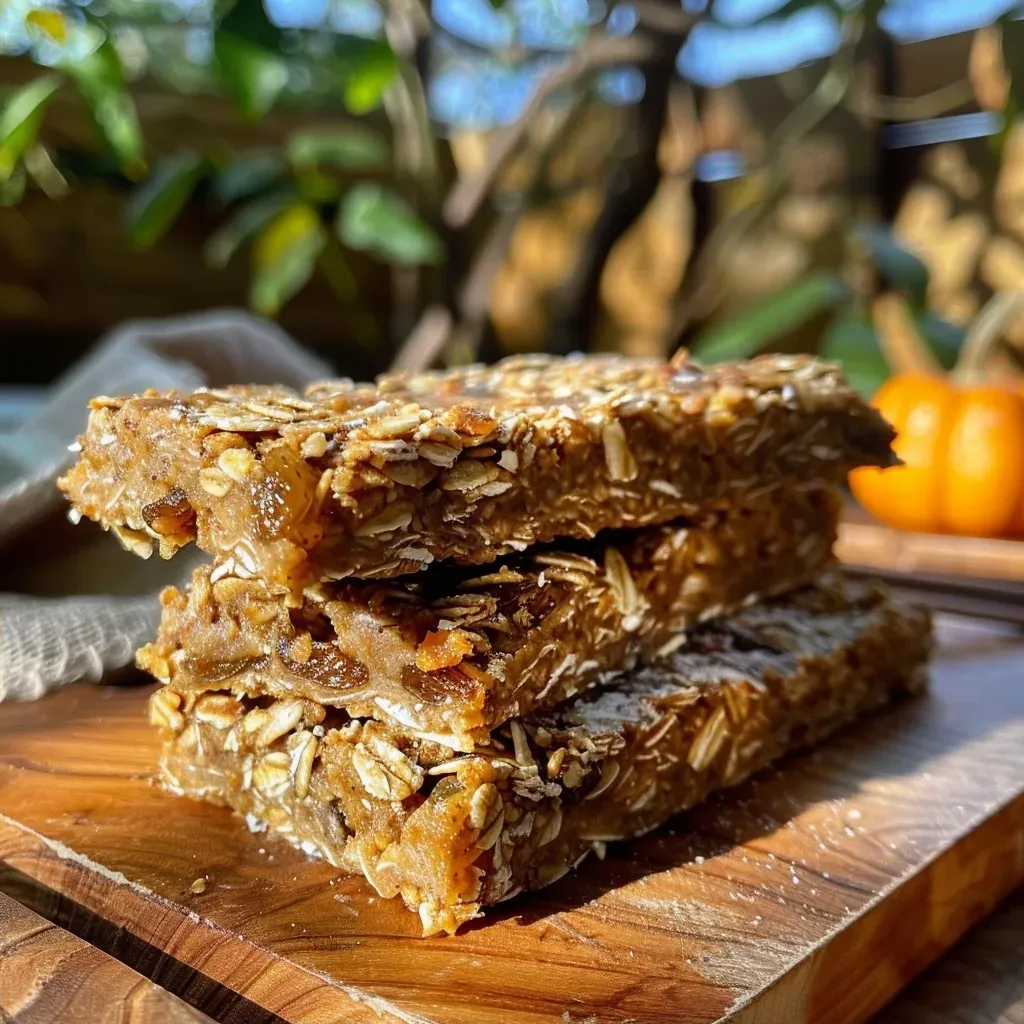
Ready to bring these bars to life? Follow these easy steps:
- Preheat your oven to 350°F (175°C). Prepare an 8×11-inch baking pan lined with parchment paper, leaving some overhang for easy removal.
- Mix dry ingredients: In a large mixing bowl or standing mixer, stir together the oats, sea salt, cinnamon, nutmeg, and pumpkin pie spice until combined.
- Add wet ingredients: Using a paddle attachment or a large spoon, mix in the mashed bananas, peanut butter, maple syrup (or honey), vanilla extract, coconut oil, pumpkin puree, and raisins until everything is well combined.
- Transfer to baking pan: Pour the mixture into the prepared pan. Use a spatula to press it down firmly and evenly; this helps the bars hold together.
- Bake: Place the pan in the center of the oven and bake for 20 to 25 minutes, or until golden and set.
- Cool and slice: Remove from the oven and let cool completely in the pan before slicing. For best results, chill in the fridge for at least 1 hour before cutting into bars or squares.
Pro Tips for Perfect Bars
- Choose ripe bananas: The riper, the better! Overripe bananas add natural sweetness and moisture.
- Don’t skip the chilling: Chilling the bars helps them set better, making them easier to cut.
- Pack them tightly: When pressing the mixture into the pan, ensure it’s packed down firmly to avoid crumbling.
- Try different add-ins: Feel free to mix in nuts, seeds, or chocolate chips for extra flavor and nutrition.
- Store wisely: Keep your bars in an airtight container in the fridge for up to a week.
- Freeze for longevity: These bars freeze beautifully! Wrap them individually and store in a freezer-safe bag for quick snacks.
- Adjust sweetness: If you prefer a sweeter bar, add a bit more maple syrup or honey.
- Experiment with spices: Don’t be afraid to play with spices; a little ginger or allspice can bring a new twist!
Common Mistakes and Troubleshooting
Even the best of us can make little slips in the kitchen. Here are some common pitfalls and how to avoid them:
- Bars falling apart: Ensure you press the mixture down firmly in the pan and allow them to cool completely before slicing.
- Overbaking: Keep an eye on the timer! They should be golden brown and set but not dry.
- Not enough sweetness: Adjust the sweetness to your taste by adding more mashed bananas or sweetener as needed.
Delicious Variations
Feeling adventurous? Here are some delightful variations to try:
- Chocolate Chip Pumpkin Banana Bars: Add 1/2 cup of dark chocolate chips for a richer flavor.
- Nutty Crunch Bars: Mix in 1/2 cup of chopped nuts, such as walnuts or pecans, for added texture.
- Dried Fruit Medley: Swap raisins for dried cranberries or cherries for a tart twist.
- Spiced Apple Oat Bars: Replace pumpkin puree with unsweetened applesauce and add chopped apples for a fresh take.
Storage and Make-Ahead Instructions
These bars are perfect for meal prep! Here’s how to store them:
- In the fridge: Store in an airtight container for up to one week. They make for a quick grab-and-go snack!
- In the freezer: Wrap each bar individually in plastic wrap and place in a freezer-safe bag. They’ll last for up to three months!
Frequently Asked Questions
Let’s answer some common queries about these delicious pumpkin banana oat granola bars:
- Can I use quick oats instead of rolled oats? Yes, quick oats will work, but the texture will be slightly different.
- Can I substitute the peanut butter? Absolutely! Almond or sunflower seed butter are great alternatives for nut-free options.
- How can I make these bars vegan? Substitute honey with maple syrup and ensure your peanut butter is vegan-friendly.
- What can I use instead of pumpkin puree? Unsweetened applesauce or mashed sweet potato can be good substitutes.
- Are these bars gluten-free? If you use certified gluten-free oats, then yes, they can be gluten-free!
- Can I add protein powder? You can! Just mix in your desired amount with the dry ingredients.
- How do I know when they’re done baking? They should be golden on the edges and set in the center. A toothpick inserted should come out clean.
- Can I make these bars nut-free? Yes, simply replace peanut butter with sunflower seed butter or omit entirely.
Nutritional Tips and Dietary Adaptations
These bars are not only delicious but also offer great nutritional value. Here are a few tips:
- Boost protein: Add nuts or seeds to increase the protein content.
- Reduce sugar: Cut down on maple syrup or honey by increasing the mashed bananas for natural sweetness.
- Fiber-rich: The oats and pumpkin provide a wonderful source of fiber, keeping you full longer.
Essential Equipment for Success
To make your baking experience smoother, here’s a quick list of must-have tools:
- Mixing Bowl: A large bowl for combining all the ingredients.
- Baking Pan: An 8×11-inch pan for optimal bar size.
- Parchment Paper: To line the pan for easy removal.
- Spatula: For pressing the mixture down evenly.
- Measuring Cups and Spoons: For accurate ingredient measurement.
Serving Suggestions
These bars can be enjoyed in many delightful ways:
- Breakfast on the go: Pair with a piece of fruit for a complete meal.
- Post-workout snack: Perfect for replenishing energy after exercise.
- Lunchbox treat: Great for kids’ lunches, adding a healthy sweet option.
- With coffee or tea: Enjoy as a cozy afternoon snack with your favorite warm beverage.
In conclusion, these **Pumpkin Banana Oat Granola Bars** are more than just a recipe; they’re an invitation to gather, share, and create lasting memories. Bake a batch today, and let the warmth of home fill your kitchen! Happy cooking!
![['Close-up view of a stack of Pumpkin Banana Oat Granola Bars with a golden-brown texture.', 'Side profile of freshly made Pumpkin Banana Oat Granola Bars featuring visible oats and pumpkin.', 'Deliciously layered Pumpkin Banana Oat Granola Bars topped with raisins and spices.', 'Textured side view of homemade Pumpkin Banana Oat Granola Bars ready to eat.']](https://timetocooks.com/wp-content/uploads/2026/07/pumpkin-banana-oat-granola-bars_1_U1-300x300.webp)
Pumpkin Banana Oat Granola Bars
Ingredients
Dry ingredients
- 2 1/2 cups quick cooking rolled oats
- 1/2 teaspoon sea salt
- 1/2 teaspoon ground cinnamon
- 1/4 teaspoon ground nutmeg
- 1/4 teaspoon pumpkin pie spice
Wet ingredients
- 1 cup overripe bananas, mashed about 2 medium bananas
- 1/4 cup peanut butter
- 1/4 cup maple syrup or honey
- 2 teaspoons vanilla extract
- 2 tablespoons coconut oil
- 1 cup pumpkin puree
- 1/2 cup raisins
Instructions
- Preheat oven to 350°F (175°C). Line a baking pan with parchment paper.
- Mix dry ingredients in a large bowl. In another bowl, combine wet ingredients and stir until smooth.
- Combine wet and dry mixtures, then press into the prepared pan.
- Bake for 20-25 minutes until golden. Cool completely before slicing.