
Welcome to the Heartfelt World of No Knead Bread
There’s something magical about the smell of freshly baked bread wafting through the air. It reminds us of gatherings, warmth, and the love that comes from sharing meals with family and friends. This No Knead Bread Recipe is an invitation to create those cherished moments effortlessly. With just a handful of simple ingredients, you can make this delicious bread that’s perfect for any occasion. Whether you’re a seasoned baker or a novice in the kitchen, this recipe will guide you through a delightful baking journey.
Why You’ll Love This Recipe
Here are just a few reasons why this no knead bread will become a staple in your home:
- Simple Ingredients: With only four ingredients, you won’t need a long shopping list. All you need is flour, water, salt, and yeast.
- Effortless Preparation: Forget kneading! Just mix the ingredients and let time work its magic.
- Perfect for Sharing: This bread is a fantastic companion for soups, stews, or simply slathered with butter. It’s perfect for gatherings and makes a heartwarming gift.
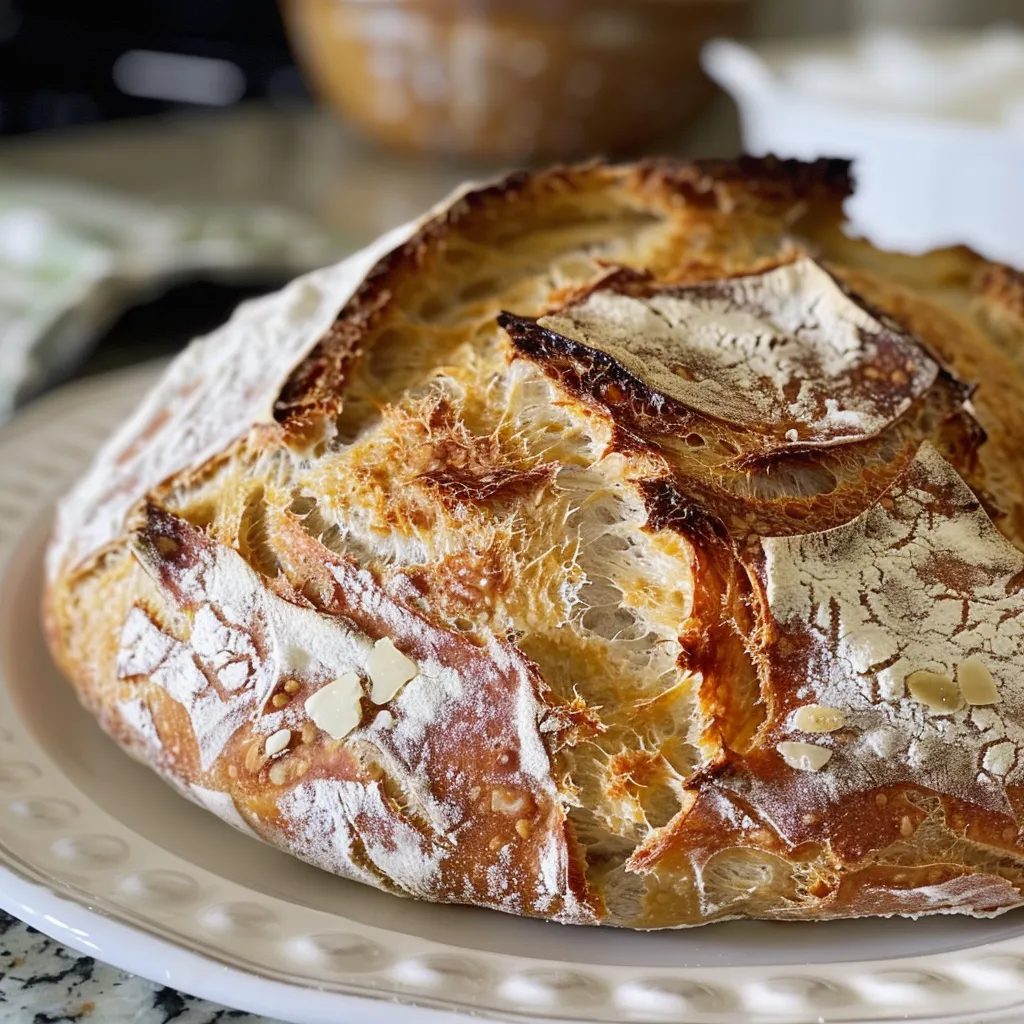
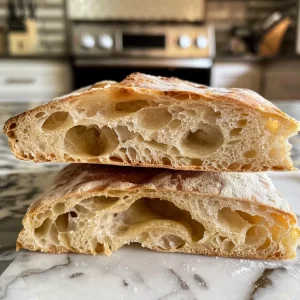
- Artisan Quality at Home: Achieve a crusty exterior and a soft, airy interior without fancy equipment.
- Versatile Variations: Customize this recipe with herbs, cheese, or even whole wheat flour to suit your taste.
Ingredient Breakdown
Let’s dive deeper into the ingredients that make this bread so special:
- 3 cups all-purpose flour: All-purpose flour gives your bread a light and airy texture. For a healthier twist, you can substitute half with whole wheat flour.
- 2 teaspoons coarse sea salt: Sea salt adds flavor and helps control fermentation. Feel free to use table salt if that’s what you have on hand.
- 1/2 teaspoon active dry yeast (or instant yeast): Both types work well, but if using instant yeast, you can skip the proofing step.
- 1 1/2 cups warm water (about 110 degrees F): The ideal temperature for yeast activation. If you don’t have a thermometer, it should feel warm to the touch, but not hot.
How to Make No Knead Bread
Step 1: Prepare the Dough
In a large mixing bowl, combine the flour, salt, and yeast. Pour in the warm water and stir with a wooden spoon until all ingredients are well incorporated. The dough will be sticky, which is perfectly normal. Cover the bowl with plastic wrap and let it rise at room temperature for about 3-4 hours, or in the refrigerator for up to 15 hours for a deeper flavor.
Step 2: Shape the Dough
Once the dough has risen, flour your work surface lightly. Scoop the dough onto the surface and shape it into a ball. Sprinkle a tiny bit of flour on top and place it on a piece of parchment paper. Lightly cover with plastic wrap and allow it to rise again for 30 minutes.
Step 3: Preheat Your Oven
While the dough is rising, place an empty Dutch oven or cast iron pot (with the lid on) into the oven and preheat it to 450 degrees F. This step is crucial for achieving that perfect crust.
Step 4: Bake the Bread
Remove the covering from the dough. Lift the parchment paper with the dough and place it into the preheated pot. Cover with the lid and bake for 30 minutes. This creates steam, which helps the bread rise beautifully.
Step 5: Finish Baking
After 30 minutes, remove the lid and allow the bread to bake uncovered for another 12-15 minutes, until it is golden brown on top. Once baked, transfer to a wire cooling rack to cool completely.
Pro Tips for Perfect No Knead Bread
Here are some expert insights to ensure your bread turns out perfectly every time:
- Don’t rush the rising: Patience is key. Allowing the dough to rise adequately develops flavor and texture.
- Use a kitchen scale: For the best results, weigh your flour for accuracy rather than using measuring cups.
- Experiment with flavors: Add herbs, garlic, or cheese to the dough for a unique twist.
- Check your oven temperature: An oven thermometer can help ensure accurate baking temperatures.
- Keep it covered: While rising, keep the dough covered to prevent it from drying out.
- Use parchment paper: This makes transferring the dough to the pot much easier.
- Store properly: To maintain freshness, store the bread in a paper bag at room temperature.
- Consider a second rise: For a lighter texture, try letting the dough rise a second time before baking.
Common Mistakes and Troubleshooting
Even the best of us can make mistakes. Here are some common pitfalls and how to avoid them:
- Dough too sticky: If your dough is too sticky, try adding a little more flour during the initial mixing phase.
- Dense bread: Ensure your yeast is fresh and proofed correctly. If the dough didn’t rise, the yeast might be inactive.
- Crumbly bread: This can happen if too much flour is added. Aim for a wet, shaggy dough.
- Burnt crust: If your oven runs hot, reduce the baking time or lower the temperature slightly.
Variations to Try
Once you’ve mastered the basic no knead bread, you might want to try some delicious variations:
- Herb and Garlic Bread: Add minced garlic and chopped herbs (like rosemary or thyme) into the dough for a fragrant twist.
- Cheesy Bread: Fold in shredded cheese such as cheddar or parmesan right before the first rise.
- Whole Wheat Bread: Substitute half of the all-purpose flour with whole wheat flour for a heartier option.
- Olive Oil Bread: Drizzle a few tablespoons of olive oil into the dough for a richer flavor and texture.
Storage and Make-Ahead Instructions
To enjoy your no knead bread for days to come, consider these storage tips:
- Room Temperature: Store the bread in a paper bag at room temperature for up to a week. Avoid plastic, as it traps moisture and can make the crust soggy.
- Freezing: Slice the bread and freeze it in an airtight container or freezer bag for up to three months. Thaw at room temperature or toast directly from the freezer.
- Make-Ahead Dough: You can prepare the dough up to 15 hours in advance and let it rise in the fridge for a deeper flavor.
Frequently Asked Questions
Here are some common questions about making no knead bread:
- Can I use whole wheat flour? Yes! You can substitute part of the all-purpose flour with whole wheat flour for added nutrition.
- What if my dough doesn’t rise? Make sure your yeast is fresh and activated in warm water. If it doesn’t bubble, it’s likely inactive.
- How do I know when the bread is done? The bread should be golden brown on top and sound hollow when tapped on the bottom.
- Can I use a different pot? Yes, any oven-safe pot with a lid will work, but a Dutch oven is ideal because it traps steam.
- What’s the best way to slice the bread? Use a serrated knife to slice the bread for clean cuts.
- Can I add mix-ins? Absolutely! Feel free to fold in olives, nuts, or dried fruits into the dough before the first rise.
- How do I store leftover bread? Store in a paper bag at room temperature or freeze it for longer storage.
- Is this recipe gluten-free? You can experiment with gluten-free flour blends, but results may vary.
Nutritional Insights and Dietary Adaptations
This no knead bread can fit into various dietary preferences:
- Vegan Friendly: This recipe is naturally vegan, so you can enjoy it without any animal products.
- Whole Grain Options: As mentioned, substituting whole wheat flour boosts fiber content.
- Low Sodium Adaptations: Reduce the salt to lower sodium content, but be aware this may affect flavor.
Essential Equipment Recommendations
To make this no knead bread, you don’t need fancy tools, but a few essentials can make the process smoother:
- Mixing Bowl: A large bowl for mixing the dough allows for easy stirring and rising.
- Wooden Spoon: Ideal for mixing without scratching your bowls.
- Cast Iron Dutch Oven: Provides even heat and traps steam for a perfect crust.
- Parchment Paper: Makes transferring the dough hassle-free and prevents sticking.
Serving Suggestions
There are countless ways to enjoy your freshly baked no knead bread:
- With Butter: Spread a generous amount of soft butter on warm slices for a simple, delightful treat.
- As a Side: Serve alongside your favorite soups, stews, or salads for a comforting meal.
- For Sandwiches: Use slices to create delicious sandwiches filled with your favorite ingredients.
- Toast it Up: Lightly toast slices and top with avocado, tomatoes, or your favorite spreads.
Conclusion: A Recipe for Memories
Making this no knead bread isn’t just about baking; it’s about creating memories, sharing warmth, and nourishing the soul. Whether it’s the first loaf you bake or the hundredth, each bite carries the love and tradition of home. So gather your loved ones, roll up your sleeves, and let the aroma of freshly baked bread fill your kitchen. Enjoy every moment, and remember, the heart of cooking is all about love and generosity.
No Knead Bread
Ingredients
Dough
- 3 cups all-purpose flour
- 2 teaspoons coarse sea salt
- 1/2 teaspoon active dry yeast
- 1 1/2 cups warm water about 110°F
Instructions
- Mix flour, salt, and yeast in a bowl. Add warm water and stir until combined. Cover and let rise for 3-4 hours or up to 15 hours in the fridge.
- Shape the dough into a ball on a floured surface, cover, and let rise for 30 minutes.
- Preheat oven to 450°F with a cast iron pot inside. Place the dough in the hot pot, cover, and bake for 30 minutes.
- Remove lid and bake uncovered for 12-15 minutes until golden. Cool on a wire rack.
- Store in a paper bag at room temperature for up to 1 week.