
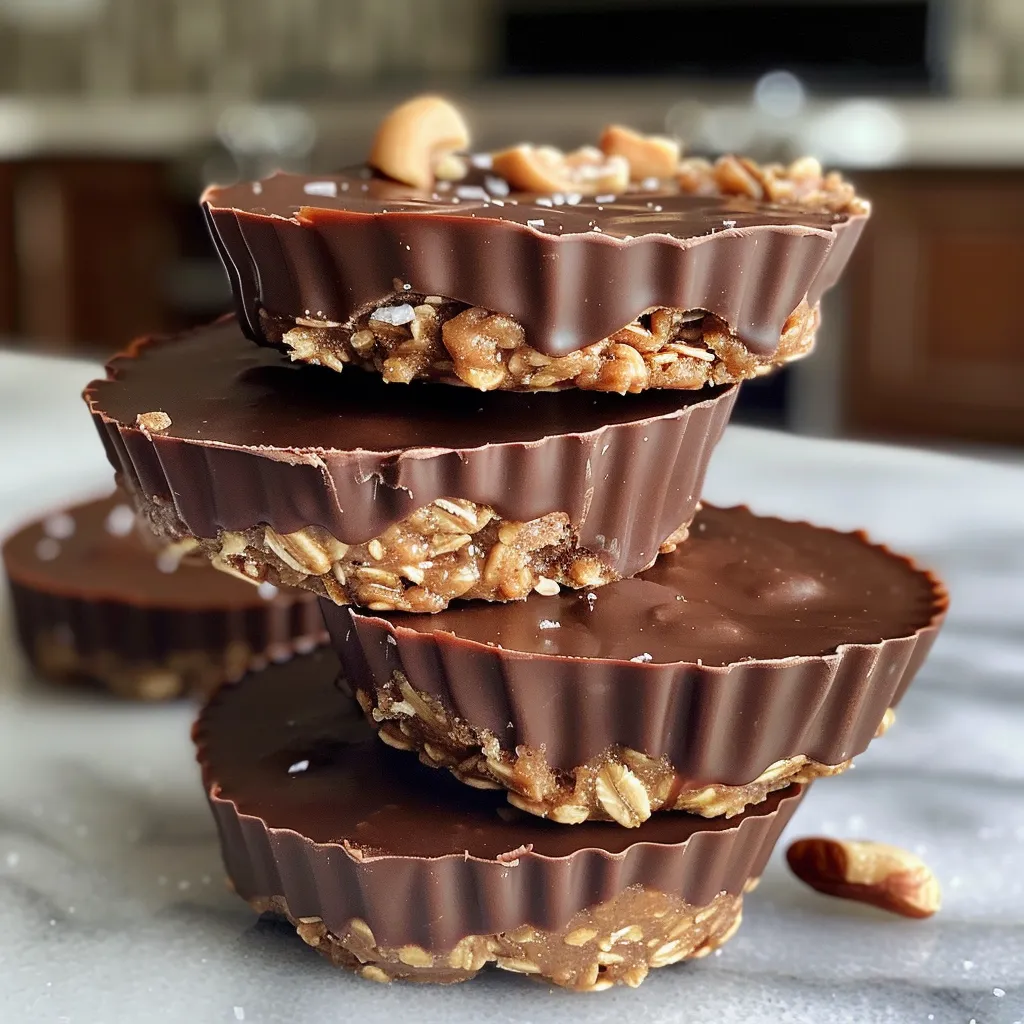
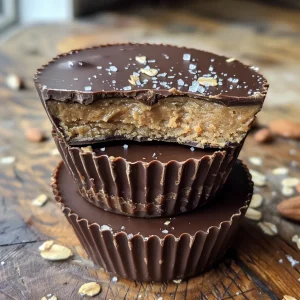
Discover the Joy of Making No-Bake Peanut Butter Protein Cups
Welcome to a delightful journey of flavor and nourishment! In this recipe, I’m excited to share my cherished No-Bake Peanut Butter Protein Cups that bring family and friends together. These treats aren’t just snacks; they are a testament to the love we pour into our kitchens, blending creamy peanut butter and wholesome oats with a hint of sweetness. Perfect for sharing, these protein-packed delights are easy to prepare and filled with warmth and nostalgia. Let’s dive into what makes these cups so special!
Why You’ll Love This Recipe
- Quick and Easy: This recipe comes together in just a few simple steps, making it perfect for busy days or spontaneous cravings.
- Nutritious and Wholesome: Packed with protein from the peanut butter and protein powder, these cups offer a satisfying and nutritious treat that you can feel good about sharing.
- Customizable Ingredients: You can easily substitute ingredients based on dietary preferences or what you have on hand, making this recipe versatile.
- Perfect for Meal Prep: These cups store beautifully in the fridge or freezer, allowing you to prepare a batch in advance for quick snacks throughout the week.
- Family-Friendly Fun: Making these cups can be a joyful activity with kids or loved ones, fostering memories while creating delicious treats together.
Ingredient Breakdown and Substitutions
Before we get cooking, let’s explore the ingredients that make these No-Bake Peanut Butter Protein Cups so special. Each component plays a crucial role in flavor, texture, and nutrition.
- 1 1/2 cups peanut butter (creamy): This is the star ingredient, providing rich flavor and healthy fats. You can substitute with almond butter or sunbutter for a nut-free option.
- 1 cup protein powder: Choose your favorite protein powder, whether it’s whey, casein, or plant-based. This adds a protein punch to the cups.
- 1 cup rolled oats: Whole grain oats add texture and fiber. If you prefer a gluten-free version, opt for certified gluten-free oats.
- 1/3 cup honey or maple syrup: Both serve as natural sweeteners. Maple syrup is a great vegan alternative.
- 2 tbsp coconut oil (melted): This helps bind the ingredients together and adds a subtle coconut flavor. You can substitute with any neutral oil.
- 2 tbsp cocoa powder (optional): For a chocolatey twist, add cocoa powder to the mix. It’s optional but highly recommended!
- 1/4 tsp salt: Enhances all the flavors. Use sea salt for a touch of gourmet flair.
- 1 tsp vanilla extract: Adds depth of flavor; vanilla is a must in most desserts!
- 4 oz dark chocolate (for topping): Melting dark chocolate on top adds a luscious finish. Choose a high-quality chocolate for the best taste.
- Chopped nuts or sea salt (garnish, as needed): Top with your favorite nuts for added crunch or sprinkle with sea salt for contrast.
Step-by-Step Method
Now that we have our ingredients ready, let’s follow these simple steps to create our delicious Peanut Butter Protein Cups.
- Step 1: Prepare the Dry Components: In a large bowl, combine 1 cup protein powder, 1 cup rolled oats, and 1/4 tsp salt. Whisk briefly to remove any clumps.
- Step 2: Mix the Wet Ingredients: In a separate bowl, stir together 1 1/2 cups peanut butter, 1/3 cup honey (or maple syrup), 2 tbsp melted coconut oil, and 1 tsp vanilla until everything is silky and homogenous.
- Step 3: Combine the Mixtures: Add the dry mix to the wet mix in two additions. Use a spatula to fold and press until a firm, slightly tacky dough forms.
- Step 4: Portion Into Molds: Line a standard 12-cup muffin tin with paper liners or use silicone molds. Scoop roughly 2 tablespoons of dough into each cup and press down to form a flat base.
- Step 5: Add the Chocolate Layer (Optional): If you want to add a chocolate topping, melt 4 oz dark chocolate with 1 tsp coconut oil in a double boiler or microwave. Spoon a tablespoon of melted chocolate over each pressed base.
- Step 6: Chill to Set: Place the tray in the refrigerator for at least 30–45 minutes until the cups are firm to the touch.
- Step 7: Garnish and Enjoy!: If desired, sprinkle with flaky sea salt, chopped nuts, or a light dusting of cocoa before the chocolate fully sets. Enjoy your cups chilled or at slightly below-room temperature!
- Step 8: Storage: Transfer to an airtight container with parchment paper between layers for storage. They will stay fresh for about a week in the fridge and can be frozen for longer storage.
Pro Tips for Perfect Peanut Butter Cups
- Texture Matters: If you prefer a creamier texture, use a smooth peanut butter and be cautious not to overmix the dough.
- Don’t Skimp on Chilling: Allowing the cups to chill thoroughly helps them hold their shape and improves the overall texture.
- Experiment with Mix-Ins: Feel free to add in your favorite seeds, dried fruits, or chocolate chips for a personalized touch.
- Adjust Sweetness: Taste the mixture before portioning. If you prefer it sweeter, add a bit more honey or maple syrup.
- Make it Vegan: Substitute the honey with maple syrup and ensure your protein powder is plant-based for a delicious vegan treat.
- Try Different Nut Butters: Switch things up by using almond butter, cashew butter, or even tahini for unique flavors.
- Don’t Overfill the Molds: Press down firmly but avoid overfilling to prevent spilling when you add the chocolate layer.
- Use Quality Chocolate: For the topping, choose a high-quality dark chocolate for a richer flavor that complements the peanut butter.
Common Mistakes and Troubleshooting
Even the best of us make mistakes in the kitchen! Here are some common pitfalls and how to avoid them:
- Dough Too Sticky: If your dough is too sticky, add a little more protein powder or oats until you reach the right consistency.
- Cups Falling Apart: If your cups crumble, they may not have chilled long enough. Ensure they are firm before removing from the molds.
- Chocolate Not Setting: If your chocolate is too warm when poured, it may not set properly. Allow it to cool slightly before adding.
- Flavor Too Mild: If the flavor is not as bold as you’d like, try adding a pinch more salt or vanilla extract to enhance the taste.
Delicious Variations to Try
Want to mix things up? Here are some delightful variations of the original recipe to keep your taste buds excited:
- Chocolate Peanut Butter Cups: Add 1/4 cup cocoa powder into the dry mix for a rich chocolatey flavor.
- Nutty Granola Cups: Fold in 1/2 cup chopped nuts and 1/4 cup dried cranberries for a crunchy texture.
- Coconut Bliss Cups: Incorporate 1/4 cup shredded coconut into the dough for a tropical twist.
- Spiced Pumpkin Cups: Mix in 1/2 cup pumpkin puree and 1 tsp cinnamon for a seasonal delight.
Storage and Make-Ahead Instructions
These No-Bake Peanut Butter Protein Cups are perfect for meal prep! Here’s how to store them:
- Refrigerate: Store in an airtight container in the fridge for up to 1 week.
- Freeze: For longer storage, freeze the cups for up to 3 months. Layer with parchment paper between cups to prevent sticking.
- Make Ahead: Prepare the mixture and portion into molds, then freeze. When ready to enjoy, simply top with chocolate and chill.
Frequently Asked Questions
- Can I use a different protein powder?: Absolutely! Use any protein powder you prefer. Just note that flavors may vary.
- Are these cups gluten-free?: They can be gluten-free if you use certified gluten-free oats and protein powder.
- How can I make these vegan?: Substitute honey with maple syrup, and choose a plant-based protein powder.
- What can I use instead of peanut butter?: Almond butter, cashew butter, or sunbutter are great alternatives.
- Do I have to use chocolate on top?: No! You can skip the chocolate or use a yogurt coating for a different flavor.
- How do I know when they’re ready to eat?: They should be firm to the touch after chilling. You can take one out and give it a gentle squeeze.
- Can I add protein powder to other recipes?: Yes! Feel free to add protein powder to smoothies, oatmeal, or baked goods for an extra boost.
- How do I make them festive?: Use festive liners or press the dough into cookie cutter shapes for special occasions!
Nutritional Tips and Dietary Adaptations
These cups not only satisfy your sweet tooth but also offer a boost of nutrition. Here are some tips to maximize their health benefits:
- Protein Boost: Adding protein powder helps with muscle recovery and keeps you feeling full longer. Choose a powder with minimal additives.
- Healthy Fats: Peanut butter is rich in healthy fats, which help with nutrient absorption and improve heart health.
- Fiber-Rich: Oats provide fiber, promoting digestive health and keeping you satisfied.
- Customizable Sweetness: Adjust the sweetness according to your dietary needs. Use less sweetener for a lower sugar option.
Essential Equipment Recommendations
Before you begin, here are a few kitchen essentials that will make your cooking experience smoother:
- Mixing Bowls: A set of different sizes is useful for separating dry and wet ingredients.
- Spatula: A rubber spatula helps in folding and mixing ingredients without damaging them.
- Muffin Tin or Silicone Molds: Choose whichever you prefer for easy removal.
- Measuring Cups and Spoons: Accurate measurements are key to successful baking.
- Microwave or Double Boiler: Required for melting chocolate smoothly.
Serving Suggestions
Enjoy these Peanut Butter Protein Cups as a delightful snack or dessert. Here are some ideas on how to serve them:
- On a Platter: Arrange them on a festive platter for gatherings. They make a great addition to any dessert table.
- With Fresh Fruit: Serve with banana slices or strawberries for a refreshing contrast.
- As a Breakfast Treat: Pair with a smoothie for a quick on-the-go breakfast.
- With Coffee or Tea: Enjoy alongside your favorite hot beverage for a cozy treat.
Conclusion: A Recipe to Cherish
These No-Bake Peanut Butter Protein Cups are more than just a recipe; they are a way to connect with loved ones, reminisce about cherished moments, and create new memories around the kitchen table. As you prepare these delightful treats, remember that cooking is about love, care, and the joy of sharing. Enjoy every bite, and may these cups bring warmth and happiness to your home!
No-Bake Peanut Butter Protein Cups
Ingredients
dry ingredients
- 1.5 cups peanut butter (creamy)
- 1 cup protein powder
- 1 cup rolled oats
- 0.33 cup honey or maple syrup
- 2 tbsp coconut oil (melted)
- 2 tbsp cocoa powder (optional, for chocolate layer)
- 0.25 tsp salt
- 1 tsp vanilla extract
- 4 oz dark chocolate (for topping)
- as needed Chopped nuts or sea salt (garnish)
Instructions
- Mix dry ingredients: protein powder, oats, and salt in a bowl.
- Combine wet ingredients: peanut butter, honey, coconut oil, and vanilla until smooth.
- Fold dry into wet to form a firm dough.
- Press 2 tbsp of dough into muffin liners or molds.
- Melt chocolate with coconut oil, spoon over cups, then refrigerate until firm.
- Optional: garnish with nuts or sea salt before chocolate sets. Enjoy chilled.