
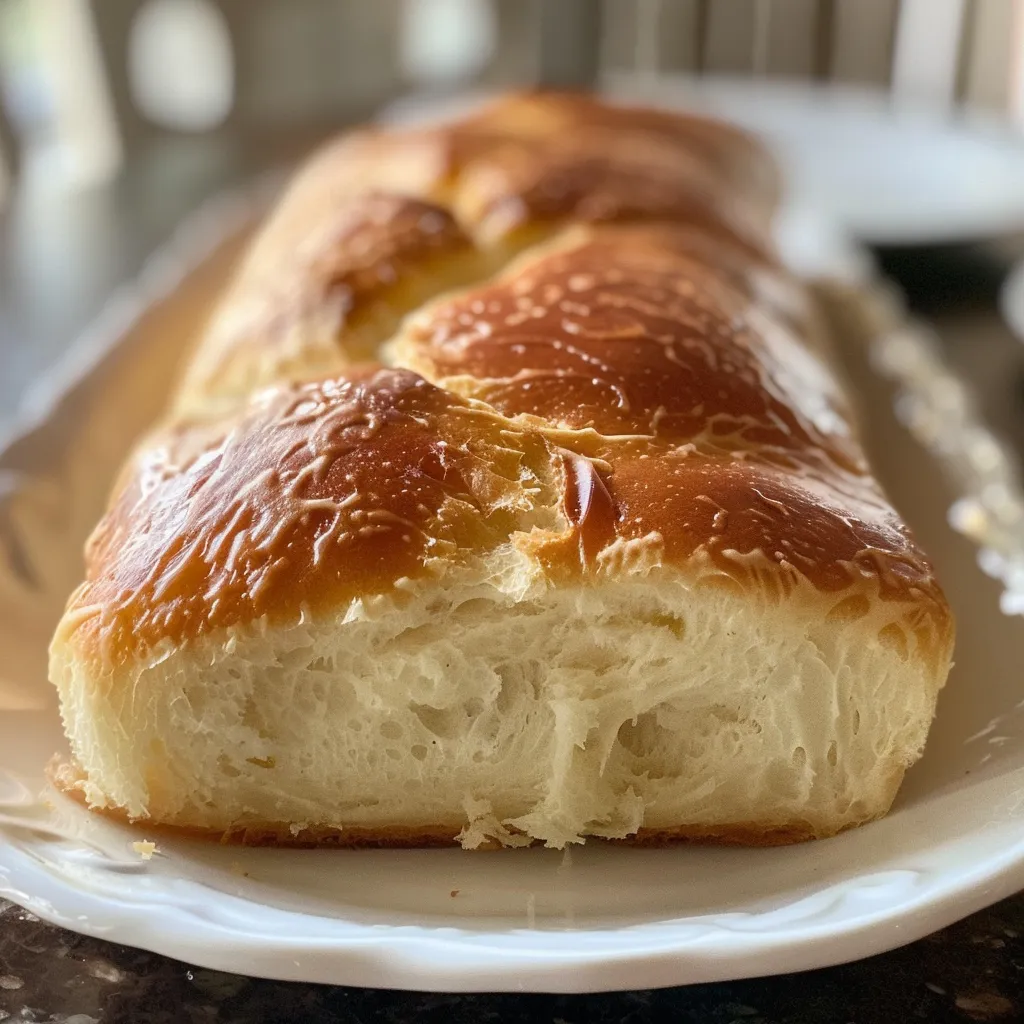
Unlocking the Heart of Homemade Bread
There’s something profoundly comforting about the scent of freshly baked bread wafting through your home. It’s a delightful aroma that tugs at our heartstrings, evoking memories of family gatherings, cherished moments in the kitchen, and the simple joys of life. In this guide, we’re diving deep into the art of making homemade bread, a process that’s not just about the ingredients but about weaving love and tradition into every loaf. This recipe will equip you with the knowledge to create a fluffy, golden loaf that’s perfect for sandwiches, toasting, or simply enjoying with a pat of butter. Let’s get started on this delicious journey!
Why You’ll Love This Recipe
- Simple Ingredients: All you need are basic pantry staples like flour, sugar, and yeast, making this recipe accessible for everyone.
- Quick and Easy: The step-by-step instructions are straightforward, making it perfect for both beginners and seasoned bakers.
- Versatile Loaf: This bread can be enjoyed in various ways, whether it’s for breakfast, lunch, or dinner.
- Health Benefits: Homemade bread allows you to control the ingredients, ensuring freshness and avoiding preservatives found in store-bought options.
- A Family Tradition: Baking bread can become a cherished family activity, creating memories to pass down through generations.
Essential Ingredients for Homemade Bread
Before we dive into the baking process, let’s talk about the ingredients that make this homemade bread so special:
- 1 cup warm water (110-120°F): This temperature is crucial for activating the yeast. If the water is too hot, it can kill the yeast, so be mindful of the temperature.
- 1/3 cup granulated sugar: Not only does it add a hint of sweetness, but it also helps to feed the yeast, promoting a good rise.
- 1 packet (2 1/4 teaspoons) instant yeast: This is the magic ingredient that makes the dough rise beautifully.
- 3 cups all-purpose flour: The foundation of your bread, providing structure and texture.
- 3/4 teaspoons salt: Salt enhances the flavor of the bread and regulates the yeast activity.
- 2 tablespoons vegetable or canola oil: This adds moisture to the bread and helps keep it soft.
- 2 tablespoons unsalted butter, melted: Brushing the crust with butter gives it a beautiful golden finish and adds a rich flavor.
Step-by-Step Instructions
Now, let’s roll up our sleeves and get baking! Follow these simple steps to create your very own loaf of homemade bread:
- Activate the Yeast: In a small bowl, stir together the warm water, sugar, and yeast. Let it sit for about 10 minutes until it becomes bubbly and frothy.
- Mix the Ingredients: In the bowl of a stand mixer fitted with the dough hook attachment, combine the flour, salt, and vegetable oil. Pour in the yeast mixture. Turn the mixer to medium and knead until the dough pulls away from the sides of the bowl, about 8-10 minutes. The dough should feel soft and elastic.
- First Rise: Roll the dough into a tight ball and transfer it to a greased bowl. Cover it loosely with plastic wrap and let it rise in a dark, warm, draft-free place for 60-90 minutes, or until it has doubled in size.
- Shape the Loaf: Once risen, gently deflate the dough and shape it into a log that fits a 9×5 loaf pan. Cover loosely again with plastic wrap and let rise for another 50-60 minutes, until doubled.
- Preheat the Oven: About 20 minutes before the second rise is complete, preheat your oven to 350°F.
- Bake: Bake for 25-30 minutes, until the top is golden brown and sounds hollow when tapped.
- Finish with Butter: Brush the crust with melted butter. Let the bread cool for 10 minutes in the pan before removing it and transferring it to a cooling rack to cool completely.
Pro Tips for Perfect Homemade Bread
To elevate your bread-making skills, here are some expert insights:
- Use Fresh Ingredients: Ensure your yeast is fresh for the best rise. If unsure, proof it before starting.
- Don’t Rush the Rises: Allowing the dough to rise properly is crucial for achieving that fluffy texture.
- Keep it Warm: Yeast loves warmth. If your kitchen is cool, consider preheating your oven for a few minutes and then turning it off to create a warm environment.
- Monitor the Dough: The dough should feel soft but not sticky. Adjust flour or water as needed during kneading.
- Experiment with Flour: Try using whole wheat or bread flour for different flavors and textures.
- Shape with Care: When shaping your loaf, try to create surface tension by gently pulling the dough towards you.
- Storage Matters: To keep your bread fresh, store it in a bread box or wrapped in a towel. Avoid plastic wrap if possible, as it can make the crust soggy.
- Don’t Forget the Cooling: Let the bread cool completely before slicing to maintain its structure and prevent it from becoming gummy.
Common Mistakes and Troubleshooting
Even the best bakers can encounter hiccups. Here are some common mistakes and how to avoid them:
- Dense Bread: If your bread turns out heavy, it might be due to insufficient rising time or too much flour. Ensure your dough doubles in size during the first rise.
- Dry Bread: This can happen if you overbake your loaf. Keep a close eye on it during the last few minutes of baking.
- Crust Too Hard: If your crust is overly tough, try reducing the baking time or adding a pan of water in the oven to create steam.
- Yeast Not Activating: If your yeast doesn’t bubble, it might be expired or the water temperature might be incorrect.
Variations on the Classic Recipe
Once you master this basic bread recipe, you can play around with different flavors and ingredients. Here are some delightful variations:
- Herbed Bread: Add dried herbs like rosemary or thyme to the dough for a fragrant twist.
- Cheese Bread: Fold in shredded cheese like cheddar or mozzarella for a cheesy delight.
- Cinnamon Raisin Bread: Incorporate cinnamon and raisins for a sweet, breakfast-friendly loaf.
- Seeded Bread: Top your dough with a mix of sesame, poppy, or sunflower seeds before baking.
Storage and Make-Ahead Instructions
To keep your homemade bread fresh, here are some storage tips:
- Room Temperature: Store loaf wrapped in a kitchen towel at room temperature for up to 3 days.
- Freezing: To freeze, wrap the cooled loaf in plastic wrap and then aluminum foil. It can last up to 3 months in the freezer.
- Thawing: To thaw, leave it at room temperature for a few hours or slice and toast straight from the freezer.
- Make-Ahead Dough: You can prepare the dough a day in advance; let it rise in the refrigerator overnight and proceed the next day.
Frequently Asked Questions
Here are some common questions and answers to help you along your bread-making journey:
- Can I use active dry yeast instead of instant yeast? Yes, but you’ll need to proof it in warm water first.
- Why is my dough too sticky? If it’s too sticky, gradually add more flour until it reaches the right consistency.
- Can I substitute whole wheat flour? Absolutely! Just be aware that it may yield a denser loaf.
- How do I know when my bread is done? The bread should be golden brown and sound hollow when tapped on the bottom.
- What if my bread doesn’t rise? Check your yeast’s freshness and ensure your dough is kept in a warm place.
- Can I make this recipe without a mixer? Yes! You can knead the dough by hand for about 10-15 minutes.
- How do I store leftover bread? Wrap it in a kitchen towel or store it in a bread box to keep it fresh.
- Can I add nuts or seeds? Yes, fold in nuts or seeds during the mixing step for added texture and flavor.
Nutritional Tips and Dietary Adaptations
Here are some tips to make your homemade bread healthier:
- Whole Wheat Flour: Substitute part or all of the all-purpose flour with whole wheat flour for more fiber.
- Reduce Sugar: Cut back on sugar if you prefer a less sweet loaf; try using honey as a natural sweetener.
- Dairy-Free Version: Use olive oil instead of butter for a dairy-free option.
Recommended Equipment
While you can make bread with minimal tools, having the right equipment can make the process smoother:
- Stand Mixer: A mixer with a dough hook can save you time and effort.
- Loaf Pan: A 9×5 inch loaf pan is ideal for shaping your bread.
- Thermometer: A kitchen thermometer ensures your water is the right temperature for yeast activation.
- Cooling Rack: Helps cool your bread evenly and prevents soggy bottoms.
Serving Suggestions
There are countless ways to enjoy your freshly baked bread:
- Classic Toast: Enjoy slices toasted with butter or your favorite jam.
- Sandwiches: Create delicious sandwiches with deli meats, cheeses, and fresh veggies.
- Bruschetta: Top toasted slices with tomatoes, basil, and mozzarella for a delightful appetizer.
- French Toast: Use your homemade bread for a rich and flavorful French toast breakfast.
Conclusion
Making homemade bread is not just about the ingredients; it’s about the love and memories you create along the way. Whether you’re baking for yourself, your family, or friends, each loaf is a token of affection, a slice of tradition shared around the table. I hope this guide inspires you to dust off your apron, gather your loved ones, and embark on this heartwarming culinary adventure. Remember, every loaf tells a story—let yours be one of love, warmth, and cherished memories. Happy baking!
Homemade Bread
Ingredients
Dough
- 1 cup warm water (110-120°F)
- 1/3 cup granulated sugar
- 1 packet (2 1/4 teaspoons) instant yeast
- 3 cups all-purpose flour
- 3/4 teaspoon salt
- 2 tablespoons vegetable or canola oil
- 2 tablespoons unsalted butter, melted
Instructions
- Mix warm water, sugar, and yeast; let sit 10 mins until bubbly.
- Combine flour, salt, and oil; add yeast mixture and knead until soft and elastic, about 8-10 mins.
- Shape dough into a ball, let rise in a warm place for 60-90 mins until doubled.
- Deflate, shape into a log, and let rise for another 50-60 mins.
- Preheat oven to 350°F; bake bread for 25-30 mins until golden and hollow-sounding.
- Brush with melted butter, cool 10 mins in pan, then transfer to rack to cool completely.