
A Warm Embrace of Chocolate: Why This Recipe Will Steal Your Heart
Welcome to a delightful culinary journey that will envelop you in the warmth of nostalgia and the rich aroma of chocolate. My High-Protein Brownie Cookie Skillet recipe doesn’t just satisfy your sweet tooth; it’s a celebration of love, memories, and togetherness. Each bite is a hug from the past, reminding us of cozy kitchen moments spent with family and friends. Perfect for those who cherish the balance of indulgence and health, this recipe is crafted to bring joy to your table.
Why You’ll Love This Recipe
There’s something special about a skillet dessert, and this one is no exception. Here are some reasons why you’ll absolutely adore my High-Protein Brownie Cookie Skillet:
- Nutritious Indulgence: Packed with protein from the chocolate whey casein blend, it satisfies cravings without the guilt.
- Quick and Easy: Whip this up in just under 30 minutes—perfect for when sweet cravings hit unexpectedly.
- One-Skillet Wonder: Minimal cleanup means more time enjoying with loved ones and less time scrubbing dishes.
- Customizable: Whether you prefer it with nuts, extra chocolate chips, or a fruit twist, this recipe adapts beautifully.
- Fudgy Goodness: The combination of dark chocolate, peanut butter, and applesauce creates a rich, gooey texture that’s utterly irresistible.
Ingredients Breakdown
Let’s dive into the heart of our recipe—the ingredients! Each component plays a crucial role in crafting the perfect brownie cookie skillet.

★ Recommended Kitchen Tool
Silicone Baking Cups Set
Make this recipe even easier with a quality Silicone Baking Cups Set — a must-have kitchen staple!
- 99g (3 Scoops) Chocolate Whey/Casein Blend Protein Powder: This is the star ingredient, providing a protein boost while maintaining the rich chocolate flavor. You can use any brand you love; I recommend PEScience for its blend.
- 60g (½ Cup) Oat Flour: A gluten-free option that adds a beautiful texture. Substitute with almond flour for a nutty twist.
- 10g (About 1 Tbsp) Almond Flour: Adds moisture and a hint of nuttiness. You can replace it with coconut flour if you prefer.
- 20g (¼ Cup) Unsweetened Cocoa Powder: I love using Hershey’s Special Dark for a deep flavor. Feel free to adjust based on your chocolate preference.
- 75g (About 6 Tbsp) Brown Sugar Substitute: Keep it low-calorie without sacrificing sweetness. Regular brown sugar works just as well.
- ½ tsp Baking Soda: This helps our skillet brownie rise perfectly.
- Pinch of Salt: Balances the sweetness and enhances flavors.
- 30g (2 Tbsp) Dark Chocolate Chips: Because chocolate never hurts, right? Use dairy-free chips for a vegan option.
- 64g (¼ Cup) Creamy Peanut Butter: Adds richness and depth; feel free to swap it for almond or sunflower seed butter.
- 56g (¼ Cup) Light/Spreadable Butter: I use Country Crock for a buttery flavor without the heaviness.
- 100g (4oz Single-Serve Cup) Unsweetened Applesauce: Keeps the brownie moist and adds natural sweetness.
How to Make Your High-Protein Brownie Cookie Skillet
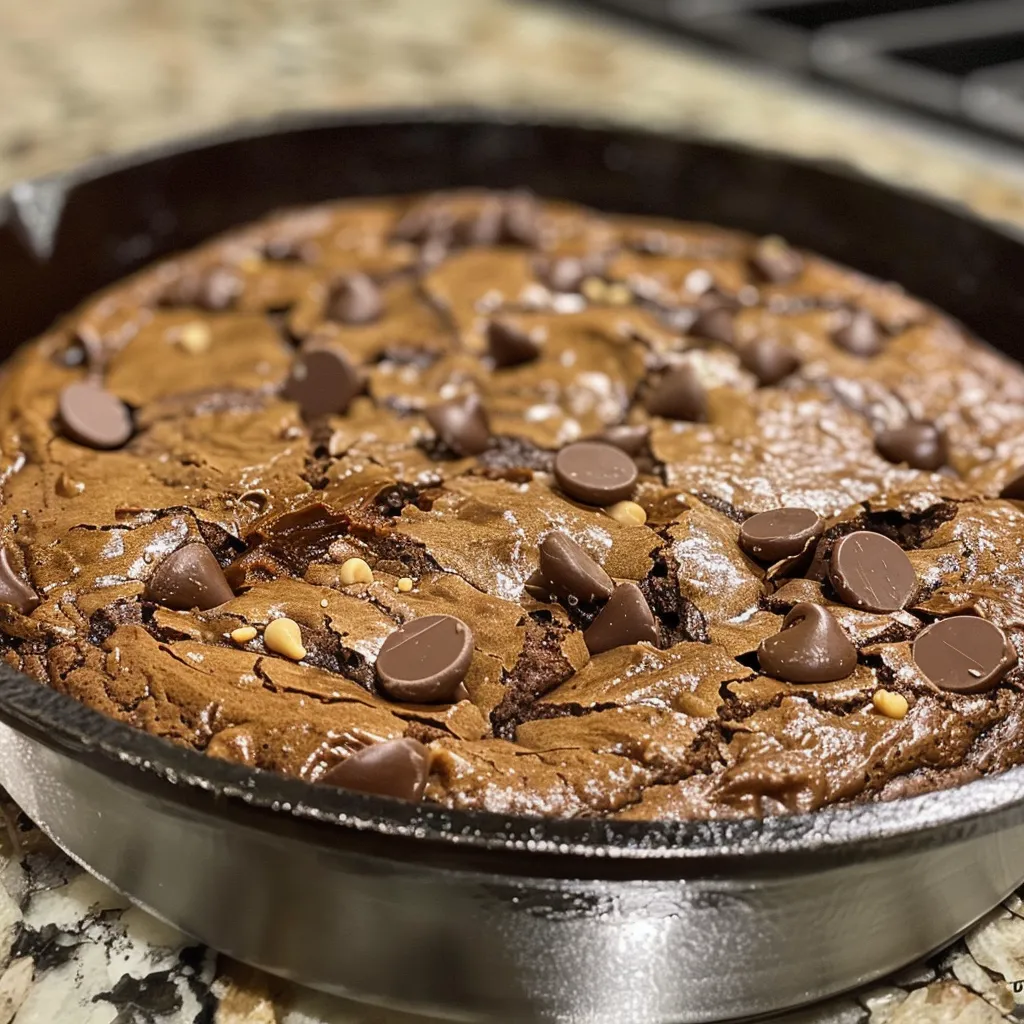
Now that we have our ingredients laid out, let’s embark on this cooking adventure together!
- Preheat your oven to 325° F.
- In a large mixing bowl, combine your wet ingredients: butter, peanut butter, and applesauce. Stir until smooth.
- Add all dry ingredients, except for the protein powder, and mix until you have a thick brownie batter.
- Incorporate the protein powder last to avoid a dry mixture. Mix until a thick cookie dough forms.
- Fold in the dark chocolate chips gently.
- Lightly spray a 10″ skillet with cookie spray, then evenly spread the cookie dough within it, pressing it down to reach the edges. For an extra touch, sprinkle sea salt on top.
- Bake in the preheated oven for 12 minutes. Remember, under-baking slightly is perfectly fine as all ingredients are safe to eat raw.
- Once baked, remove from oven and allow to cool for about an hour. This cooling period is essential for achieving that perfect fudgy texture.
- Slice into 8 pieces, and enjoy as is or top with a scoop of ice cream for a decadent finish!
Expert Tips for Perfecting Your Skillet Brownie Cookie
Let’s make sure your baking experience is smooth sailing! Here are some tips to keep in mind:
- Don’t Overmix: Once you combine your wet and dry ingredients, mix just until combined to preserve the brownie’s tenderness.
- Check for Doneness: Ovens vary; check for doneness at the 10-minute mark to avoid overbaking.
- Texture Matters: Let the brownie cool completely for the best fudgy texture.
- Experiment with Add-Ins: Feel free to throw in nuts, dried fruits, or even a swirl of caramel for a unique twist.
- Use Quality Ingredients: Using high-quality chocolate and nut butters elevates the flavor significantly.
- Adjust Sweetness: If you prefer a sweeter treat, add a bit more brown sugar or maple syrup.
- Store Properly: Keep leftovers in an airtight container at room temperature or chilled for up to 3 days.
- Garnish Creatively: Top with whipped cream, fresh berries, or a drizzle of chocolate sauce for a beautiful presentation.
Common Mistakes and Troubleshooting
Even the best of us can have hiccups in the kitchen. Here are some common mistakes and how to avoid them:
- Dry Texture: This can happen if you overbake or add too much protein powder. Always check for doneness early.
- Too Sweet: If your brownie is overly sweet, reduce the sugar next time, or try using unsweetened cocoa powder.
- Not Setting Properly: Ensure your oven is preheated, and give your brownie enough cooling time to set.
- Sticking to the Skillet: Always grease your skillet properly. Alternatively, use parchment paper for easy removal.
Delicious Variations of Your Brownie Cookie Skillet
Want to mix things up? Here are some delightful variations you can try:
- Nutty Delight: Add chopped walnuts or pecans for a crunchy texture contrast.
- Chocolate Chip Cookie Combination: Layer chocolate chip cookie dough on top of the brownie batter for a brookie-style treat.
- Fruit-Infused: Stir in fresh berries or banana slices into the batter for a fruity twist.
- Mint Chocolate: Add a few drops of peppermint extract for a refreshing minty flavor.
Storage and Make-Ahead Instructions
For those busy days, here’s how to store your skillet brownie cookie:
- Room Temperature: Keep it in an airtight container for up to 3 days.
- Refrigerator: Store it in the fridge for up to a week. Just reheat in the microwave for a few seconds before serving.
- Freezing: Wrap slices in plastic wrap and place them in a freezer bag. They can last up to 3 months. Thaw overnight in the fridge before enjoying.
Frequently Asked Questions about High-Protein Brownie Cookie Skillet
Here are some common questions I get about this delightful dish:
- Can I use plant-based protein powder? Yes, just ensure it’s a blend for the best texture.
- Is this recipe gluten-free? Yes, if you use gluten-free oat flour and ensure all other ingredients are gluten-free.
- Can I substitute peanut butter? Absolutely! Almond butter or sunflower seed butter works beautifully.
- How can I make this lower in calories? Use a sugar substitute and reduce the amount of chocolate chips.
- What if I don’t have a skillet? You can use any oven-safe dish; just adjust baking time accordingly.
- Can I add protein bars into the mix? Chopped protein bars can be a fun addition for texture and flavor!
- What’s the best way to enjoy this? Warm with a scoop of your favorite ice cream or a dollop of whipped cream.
- How do I know when it’s done baking? The edges should look set, and the center should be slightly soft but not wet.
Nutritional Tips and Dietary Adaptations
For those watching their diet, here’s how to enjoy your brownie cookie skillet while staying healthy:
- High Protein: Each serving packs a protein punch, perfect for post-workout recovery.
- Low Sugar: With just a touch of brown sugar substitute, you can satisfy your cravings without the sugar crash.
- Vegan Option: Replace the butter with coconut oil and use a flax egg in place of the eggs.
Essential Equipment You’ll Need
Before you start, gather these kitchen essentials:
- 10″ Skillet: An oven-safe skillet is key for this recipe.
- Mixing Bowls: Have a large one for the wet ingredients and a smaller one for dry.
- Measuring Cups and Spoons: Accurate measurements ensure perfect results.
- Spatula: For folding in those chocolate chips and spreading the batter evenly.
Serving Suggestions to Delight Your Guests
Here are some delightful ways to serve your brownie cookie skillet:
- Top with Ice Cream: A scoop of vanilla or chocolate ice cream melts perfectly into the warm brownie.
- Garnish with Fresh Berries: Strawberries or raspberries add a refreshing touch and a pop of color.
- Drizzle with Chocolate Sauce: For chocolate lovers, a drizzle of chocolate sauce is an absolute must.
- Serve with Whipped Cream: Light and fluffy whipped cream elevates the dish.
In conclusion, my High-Protein Brownie Cookie Skillet is more than just a dessert; it’s a heartwarming experience that invites you to create, share, and enjoy with loved ones. Whether you’re indulging on a cozy night in or celebrating a special occasion, this recipe brings a touch of home and happiness to every gathering. So gather your ingredients, preheat that oven, and let’s bake some memories together!
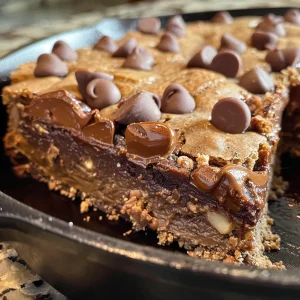
High-Protein Brownie Cookie Skillet
Ingredients
dry ingredients
- 99 g Chocolate Whey/Casein Blend Protein Powder code "Matt" to save on PEScience brand
- 60 g Oat Flour
- 10 g Almond Flour
- 20 g Unsweetened Cocoa Powder Hershey's Special Dark for intense flavor
- 75 g Brown Sugar Substitute or regular brown sugar
- 0.5 tsp Baking Soda
- Pinch Salt
- 30 g Dark Chocolate Chips
- 64 g Creamy Peanut Butter or any nut butter
- 56 g Light/Spreadable Butter Country Crock Original recommended
- 100 g Unsweetened Applesauce single-serve cup
Instructions
- Preheat oven to 325°F (160°C).
- Mix wet ingredients (butter, peanut butter, applesauce) in a large bowl.
- Add dry ingredients (except protein powder) and mix into a thick batter.
- Stir in protein powder until dough forms, then fold in chocolate chips.
- Press dough into a greased 10" skillet, sprinkle with sea salt if desired, then bake for 12 minutes.
- Cool for 1 hour, then cut into 8 slices and serve.