
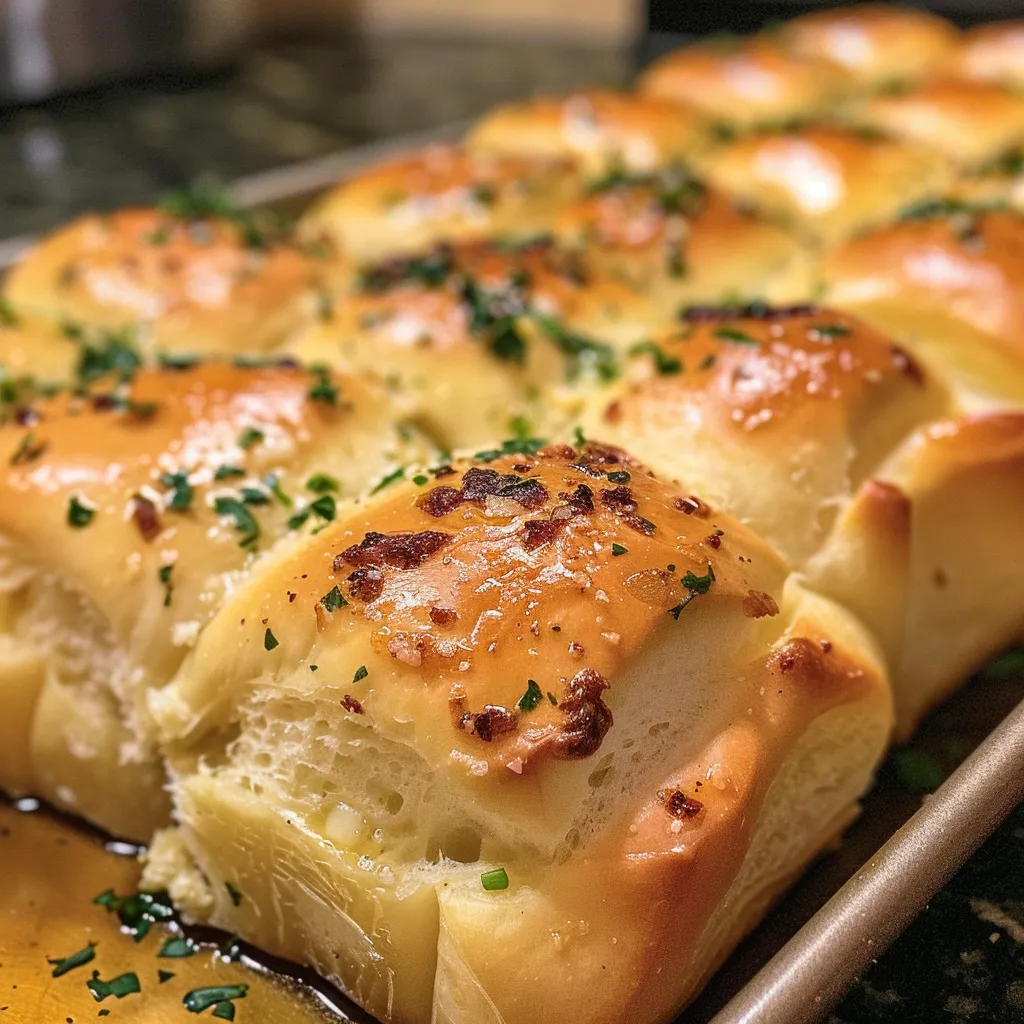
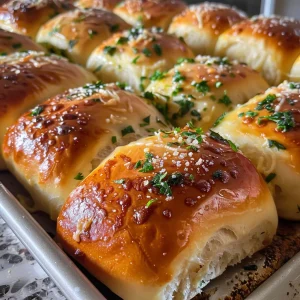
Embrace the Comfort of Garlic Bread Rolls
Welcome to a culinary journey that takes you back to the heart of your home. Today, we’re diving into the delightful world of garlic bread rolls—a simple yet enchanting recipe that brings warmth, flavor, and nostalgia to your dining table. These rolls are not just a side dish; they are a declaration of love, infused with the rich aroma of garlic and a sprinkle of fresh herbs. Perfect for family gatherings or cozy dinners, they evoke memories of laughter, shared meals, and the joy of cooking together.
In this article, we’ll explore everything you need to know about making these heavenly rolls, from the ingredients to the techniques that ensure they come out fluffy and golden every time. Let’s make cooking a beautiful experience that fills your home with warmth.
Why You’ll Love This Recipe
- Irresistibly Soft and Fluffy: Each roll boasts a tender texture that melts in your mouth, making them perfect for sopping up sauces or enjoying on their own.
- Double Garlic Goodness: Infused with fresh minced garlic in both the dough and the garlic butter topping, these rolls are a garlic lover’s dream!
- Versatile Accompaniment: They pair beautifully with a variety of dishes—from hearty pasta to savory soups, making them a staple for any meal.
- Make-Ahead Convenience: Prepare the dough the night before, allowing you to enjoy warm, fresh rolls with minimal effort on busy days.
- Sharing Tradition: Each bite of these rolls carries the essence of family gatherings, reminding us of the joy of sharing food made with love.
Ingredients You’ll Need
Gathering the right ingredients is key to achieving the best results. Here’s what you’ll need for these garlic bread rolls:
- 3 ½ cups all-purpose flour (or bread flour for chewier rolls)
- 2 ¼ tsp active dry yeast
- 1 cup warm milk (about 110°F)
- 2 tbsp sugar
- 1 tsp salt
- ¼ cup unsalted butter (melted)
- 1 large egg
- ½ cup unsalted butter (melted)
- 3 cloves garlic (minced)
- 2 tbsp fresh parsley (chopped)
- ½ tsp salt
- 2 tbsp grated Parmesan cheese (optional)
Feel free to make substitutions based on your preferences or what you have on hand. For a dairy-free version, you can use plant-based milk and butter.
Step-by-Step Instructions
Now that we have our ingredients ready, let’s walk through the process of making these delightful rolls.
1. Prepare the Dough
In a large mixing bowl, combine the warm milk, sugar, and yeast. Allow it to sit for about 5-10 minutes until it becomes frothy. This step is crucial as it activates the yeast, ensuring your rolls rise beautifully.
2. Mix Dry Ingredients
In another bowl, whisk together the flour and salt. Once the yeast mixture is ready, add the melted butter and egg, then gradually incorporate the dry ingredients until the dough forms.
3. Knead the Dough
Turn the dough onto a floured surface and knead for about 5-7 minutes until smooth and elastic. This step develops the gluten, which is essential for fluffy rolls.
4. First Rise
Place the kneaded dough in a lightly greased bowl, cover it with a clean cloth, and let it rise in a warm place for about 1 hour, or until it doubles in size.
5. Shape the Rolls
After the first rise, punch down the dough and divide it into equal portions. Shape each piece into a ball and place them on a greased baking sheet, leaving space for them to rise.
6. Second Rise
Cover the shaped rolls with a cloth and let them rise again for about 30 minutes. This second rise will make them light and airy.
7. Bake to Golden Perfection
Preheat your oven to 375°F (190°C). Bake the rolls for 15-20 minutes, or until they are golden brown. To ensure maximum flavor, brush them with garlic butter immediately after they come out of the oven.
8. Finish with Garlic Butter
In a small bowl, mix melted butter, minced garlic, parsley, and salt. Brush this mixture generously over the warm rolls for that irresistible garlic flavor.
Pro Tips for Making Garlic Bread Rolls
- Temperature Matters: Ensure your milk is warm (not hot) to activate the yeast properly. Too hot can kill the yeast, while too cold will slow the rise.
- Knead Well: Proper kneading develops gluten, ensuring your rolls are fluffy. Don’t skip this step!
- Use Fresh Garlic: For the best flavor, always opt for fresh minced garlic instead of garlic powder.
- Experiment with Herbs: Add dried oregano or rosemary for an aromatic twist to your garlic butter.
- Check Doneness: Rolls are done when they sound hollow when tapped on the bottom. If you’re unsure, use a thermometer—internal temp should be 190°F (88°C).
- Garlic Butter Variations: Mix in some Parmesan cheese or a pinch of chili flakes for a zesty kick.
- Cover While Rising: Keeping the dough covered during the rising process helps retain moisture and warmth, leading to a better rise.
- Cool Before Storing: Allow rolls to cool completely before storing them in an airtight container to maintain their softness.
Common Mistakes and Troubleshooting
- Dough Doesn’t Rise: Make sure your yeast is fresh and that the environment is warm enough for rising.
- Rolls Are Dense: This could be due to over-kneading or not enough rising time. Ensure you follow the timing closely.
- Burnt Tops: If your rolls are browning too quickly, cover them loosely with foil during baking.
Variations to Try
- Cheesy Garlic Rolls: Add shredded mozzarella or cheddar cheese into the dough for a gooey surprise inside.
- Herbed Garlic Rolls: Mix dried Italian herbs into the dough for an aromatic flavor boost.
- Spicy Garlic Rolls: Incorporate red pepper flakes into the garlic butter for a delightful kick!
- Sweet Garlic Rolls: Try adding a touch of honey or sugar to the dough for a sweet twist that pairs beautifully with savory dishes.
Storage and Make-Ahead Instructions
These rolls can be made in advance, making them a convenient addition to your meal prep:
- Make Ahead: Prepare the dough, shape the rolls, and place them in the refrigerator overnight. Allow them to come to room temperature and rise before baking.
- Freezing: After baking, let the rolls cool completely, then freeze in a single layer. Once frozen, transfer to a zip-top bag. Reheat directly from frozen in the oven for a quick side.
- Storing: Keep leftover rolls in an airtight container at room temperature for up to 2 days or in the fridge for up to a week.
Frequently Asked Questions
- Can I use whole wheat flour? Yes, you can substitute up to half of the all-purpose flour with whole wheat flour for a nuttier flavor.
- What can I pair these rolls with? They pair wonderfully with soups, pasta dishes, or as a side for grilled meats.
- Can I add cheese to the dough? Absolutely! Cheese can be mixed into the dough for added flavor.
- How do I reheat leftover rolls? You can reheat them in a preheated oven at 350°F (175°C) for about 10 minutes.
- Can I make these rolls gluten-free? Yes, use a gluten-free flour blend and adjust the liquid as needed.
- What type of garlic is best? Fresh garlic yields the best flavor, but you can use roasted garlic for a sweeter taste.
- How long do they take to bake? Typically, they take about 15-20 minutes, depending on your oven.
- Can I make them vegan? For vegan rolls, substitute the egg with flaxseed meal and use plant-based butter and milk.
Nutritional Insights and Dietary Adaptations
These garlic bread rolls are not only delicious but can be easily adapted to fit various dietary needs:
- Caloric Considerations: Each roll contains approximately 150 calories, but this can vary based on portion size and added ingredients.
- Low-Carb Option: For a low-carb version, consider using almond flour or coconut flour with appropriate adjustments to moisture content.
- Adding Nutrients: You can boost the nutritional profile by adding seeds (like flaxseeds) or incorporating vegetables into the dough.
Equipment Recommendations
- Mixing Bowls: A set of nesting mixing bowls for various stages of dough preparation.
- Baking Sheet: Use a sturdy baking sheet to ensure even baking.
- Kitchen Towel: A clean kitchen towel for covering the dough during rising.
- Oven Thermometer: To ensure your oven temperature is accurate, which is vital for baking success.
Serving Suggestions
These garlic bread rolls shine on their own, but here are some delightful ways to serve them:
- With Olive Oil: Serve them warm with a side of olive oil for dipping, perhaps with a sprinkle of balsamic vinegar.
- Soup Companion: Pair with your favorite soup, like a hearty tomato basil or creamy potato leek.
- Pasta Night: They make an excellent side for pasta dishes, soaking up all the delicious sauce.
- As a Snack: Enjoy them as a snack with a smear of creamy butter or a slice of cheese.
As we conclude this heartwarming journey of making garlic bread rolls, remember that cooking is about creating memories and sharing love. Each roll you bake is a step towards filling your home with warmth and joy. So gather your loved ones, embrace the process, and enjoy the delightful experience of sharing these rolls that truly bring us together.
Garlic Bread Rolls
Ingredients
Dough
- 3 ½ cups all-purpose flour or bread flour for chewier rolls
- 2 ¼ tsp active dry yeast
- 1 cup warm milk about 110°F
- 2 tbsp sugar
- 1 tsp salt
- ¼ cup unsalted butter melted
- 1 large egg
- ½ cup unsalted butter melted, for filling
- 3 cloves garlic minced
- 2 tbsp fresh parsley chopped
- ½ tsp salt
- 2 tbsp grated Parmesan cheese optional
Instructions
- Mix warm milk, yeast, and sugar; let sit until frothy.
- Add flour, salt, melted butter, and egg; knead into a smooth dough.
- Let dough rise until doubled, about 1 hour.
- Divide dough, roll into balls, and place in a baking dish.
- Mix melted butter, garlic, parsley, salt, and Parmesan; brush over rolls.
- Bake at 375°F (190°C) for 15 minutes until golden.