
Embrace the Comfort of Baking: Discover My Cherished Brown Butter Brownies
Baking has always been more than just a task for me; it’s a way to connect with my roots, my family, and the warmth of home. Today, I invite you to join me in creating a batch of Brown Butter Brownies that are rich, fudgy, and laced with nostalgia. These brownies are not just a treat; they symbolize love, shared memories, and the joy of gathering around the kitchen table.
In this article, we’ll explore the magic of brown butter, the secrets to achieving the perfect brownie texture, and how to infuse your baking with a little bit of heart. Whether you’re a seasoned baker or a curious beginner, this recipe is designed to bring warmth and joy to your kitchen. Let’s dive in!
Why You’ll Love This Recipe
- Irresistibly Rich Flavor: The brown butter adds a nutty depth that elevates the traditional brownie, making these brownies unforgettable.
- Simple Ingredients: You’ll find that most ingredients are pantry staples, so you can whip these up anytime the craving strikes.
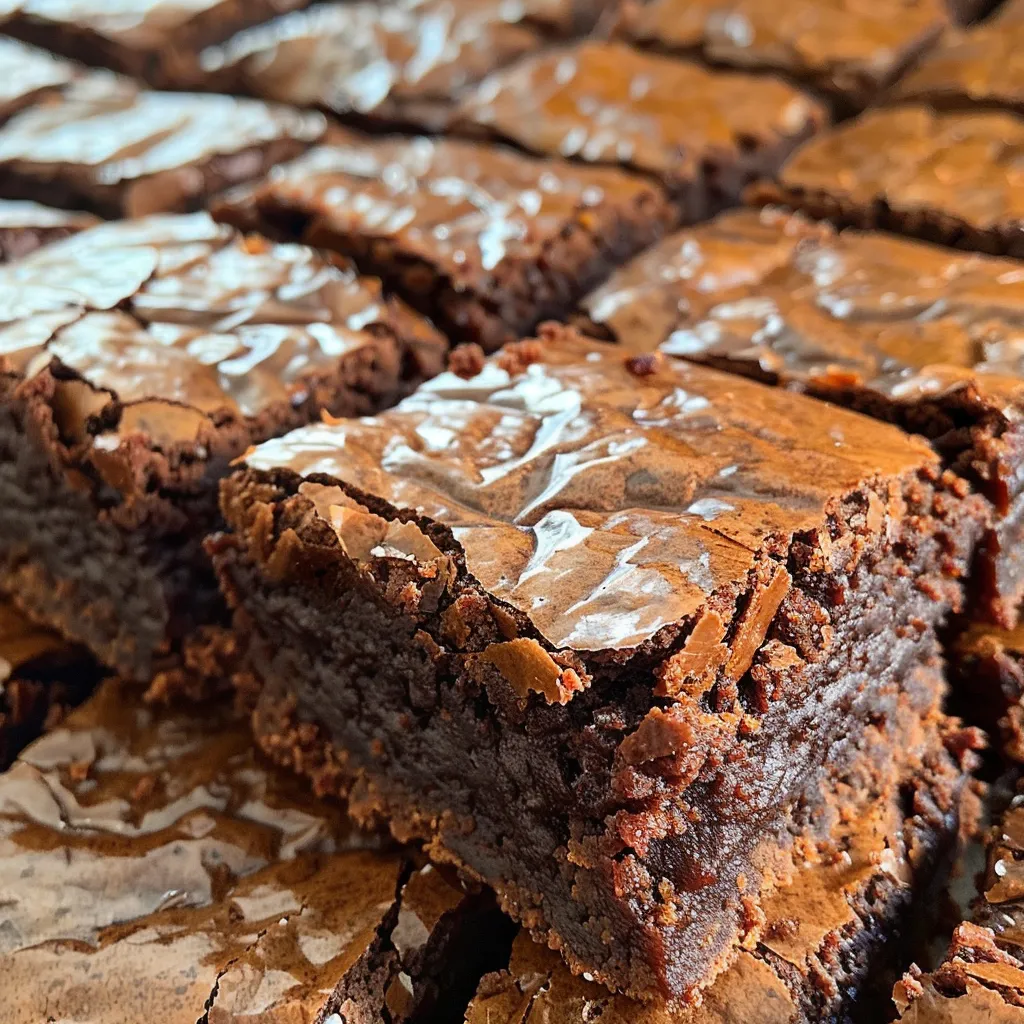
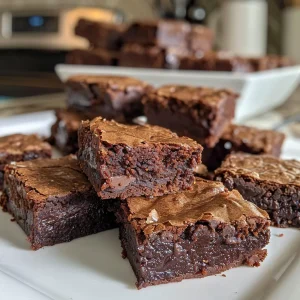
- Perfectly Fudgy Texture: With a gooey center and slightly crisp edges, these brownies are the epitome of what a brownie should be.
- Adaptable Recipe: Feel free to customize with your favorite mix-ins, from nuts to chocolate chips, making it uniquely yours.
- Shareable Delight: These brownies are perfect for gatherings, ensuring that every bite brings people together.
Ingredient Breakdown: What You Need
Gathering the right ingredients is key to creating delicious brown butter brownies. Here’s what you’ll need:
- Unsalted Butter: Essential for rich flavor. If you only have salted butter, reduce the added salt in the recipe.
- Dark Chocolate: Use high-quality chocolate for a deep, rich flavor. You can also mix in some milk chocolate for sweetness.
- Eggs: Three large eggs provide structure and moisture to your brownies.
- Dark Brown Sugar: This sugar enhances the caramel flavor profile. Light brown sugar can be used as a substitute.
- Granulated Sugar: Balances the flavors and helps achieve that shiny crust on top.
- Vanilla Extract: An optional ingredient that adds warmth and complexity to the flavor.
- Plain Flour (All-Purpose Flour): Provides the necessary structure without making the brownies too dense.
- Salt: A pinch to enhance all the flavors.
- Chopped Chocolate or Milk Chocolate Chips: Optional add-ins that melt beautifully within the batter.
Step-by-Step Instructions to Craft Your Brownies
Now that you have your ingredients ready, let’s get baking! Follow these steps to create your brown butter brownies:
- Preheat the oven: Set your oven to 350°F (175°C). Grease and line an 8×8-inch baking tray with parchment paper.
- Prepare the Chocolate: Break dark chocolate into small pieces and place them in a bowl.
- Brown the Butter: In a medium saucepan, melt the butter over medium heat. Stir continuously until it turns golden brown and gives off a nutty aroma. Be careful not to burn it!
- Combine Butter and Chocolate: Pour the browned butter over the chocolate pieces, mixing until fully melted and combined. Set aside.
- Mix Eggs and Sugars: In a separate bowl, whisk together the eggs, brown sugar, and granulated sugar until well combined and slightly frothy.
- Add Vanilla: If using, mix in the vanilla extract.
- Incorporate Chocolate Mixture: Add the chocolate and butter mixture into the egg mixture, stirring until smooth.
- Fold in Dry Ingredients: Gently fold the flour and salt into the wet mixture until just combined. Don’t overmix!
- Add Optional Mix-ins: If desired, fold in chopped chocolate or chocolate chips for added richness.
- Pour into the Baking Tray: Spread the brownie batter evenly in the prepared tray and smooth the top.
- Bake: Place in the oven and bake for 35-40 minutes. The brownies should be set but still slightly gooey in the center.
- Cool and Slice: Allow the brownies to cool in the pan for about 30 minutes before lifting them out and slicing into squares.
Pro Tips for Brownie Perfection
- Check for Doneness: Insert a toothpick in the center—if it comes out with a few moist crumbs, your brownies are perfect.
- Let Them Cool: Allowing your brownies to cool completely enhances their fudgy texture.
- Experiment with Flavors: Consider adding espresso powder to intensify the chocolate flavor or swirl in peanut butter for a delightful twist.
- Storage Tips: Keep brownies in an airtight container at room temperature for up to a week, or freeze for longer storage.
- Don’t Overmix: Mix just until combined to keep brownies fudgy rather than cake-like.
- Use Quality Ingredients: High-quality chocolate and butter make all the difference in flavor.
- Make Ahead: These brownies can be made a day in advance; they taste even better the next day!
- Customize Your Brownies: Add nuts, caramel, or white chocolate chips for different flavor profiles.
Common Mistakes and Troubleshooting
Even the best bakers make mistakes! Here are some common pitfalls and how to avoid them:
- Overbaking: Watch the baking time closely. Brownies should be fudgy, not dry.
- Using Cold Ingredients: Make sure your eggs and butter are at room temperature for better mixing.
- Not Browning the Butter Enough: The butter should be golden brown with a nutty aroma—this enhances flavor!
- Skipping the Cooling Time: Patience is key; cooling helps set the texture.
Delicious Variations to Try
Want to mix things up? Here are some fun variations of the classic brown butter brownies:
- Nutty Brownies: Add chopped walnuts or pecans for a crunchy texture.
- Mint Chocolate: Stir in peppermint extract and chocolate chips for a refreshing twist.
- Caramel Swirl: Drizzle caramel sauce into the brownie batter before baking for a gooey surprise.
- Spicy Brownies: Add a pinch of cayenne or chili powder for a surprising kick!
Storage and Make-Ahead Instructions
You can easily make these brownies ahead of time:
- At Room Temperature: Store in an airtight container for up to 1 week.
- Freezing: Wrap brownies tightly in plastic wrap and foil. They can be frozen for up to 3 months. Thaw at room temperature before enjoying.
FAQ: Your Brown Butter Brownie Questions Answered
- Can I use regular butter instead of unsalted? Yes, but reduce the added salt in the recipe.
- What can I substitute for dark chocolate? You can use semi-sweet chocolate, but it will alter the flavor slightly.
- How do I know when my brownies are done? The edges should be set, and the center should be slightly soft.
- Can I add frosting to these brownies? Yes, a simple chocolate ganache or cream cheese frosting pairs beautifully.
- Can I double the recipe? Absolutely! Just use a larger baking pan and adjust the baking time accordingly.
- What’s the best way to cut brownies? Use a sharp knife and wipe it clean between cuts for neat edges.
- Do these brownies need to be refrigerated? No, they can be stored at room temperature unless you live in a very hot climate.
- Can I make these gluten-free? Yes, substitute all-purpose flour with a gluten-free blend.
Nutrition Tips and Dietary Adaptations
For those mindful of nutrition, consider these adaptations:
- Lower Sugar Options: Substitute some sugar with applesauce or a sugar substitute.
- Vegan Adaptation: Use vegan butter and flax eggs instead of regular eggs.
- Dark Chocolate Benefits: Using dark chocolate can provide antioxidants and lower sugar content.
Essential Equipment for Success
Here’s what you’ll need to get started:
- Mixing Bowls: A set of various sizes for mixing wet and dry ingredients.
- Whisk and Spatula: For mixing and folding ingredients smoothly.
- 8×8-inch Baking Pan: The perfect size for thick, fudgy brownies.
- Parchment Paper: To prevent sticking and make for easy removal.
Serving Suggestions: Share the Love
These brownies shine when shared. Here are some serving ideas:
- Warm with Ice Cream: Serve warm with a scoop of vanilla ice cream for a delightful contrast.
- With Fresh Berries: Pair with strawberries or raspberries for a fresh, tangy twist.
- Gift-Worthy: Wrap in parchment and ribbon for a heartfelt homemade gift.
Final Thoughts: Bake with Love
As you embark on your baking journey with these brown butter brownies, remember that the heart of cooking lies in the love you pour into each step. May your kitchen be filled with laughter, warmth, and the sweet aroma of brownies baking in the oven. Share your creations with family and friends, and let each bite tell a story of connection and care. Happy baking!
Brown Butter Brownies
Ingredients
Dairy
- 0.5 cup unsalted butter or salted butter
- 100 grams dark chocolate
- 3 large eggs
- 0.75 cup dark brown sugar or light brown sugar
- 0.75 cup granulated sugar
- 1 teaspoon vanilla extract optional
- 1.5 cups plain flour all-purpose flour
- 0.5 teaspoon salt
- 0.5 cup chopped chocolate optional
- 0.5 cup milk chocolate chips optional
Instructions
- Brown the butter in a pan until golden, then mix with chopped chocolate until melted.
- Whisk eggs, brown sugar, and granulated sugar until combined, then add vanilla.
- Combine the chocolate-butter mixture with the egg mixture, then fold in flour and salt.
- Gently fold in chopped chocolate and chocolate chips, then pour batter into a lined tray.
- Bake at 350°F (175°C) for 35-40 minutes, cool, then slice and enjoy.