
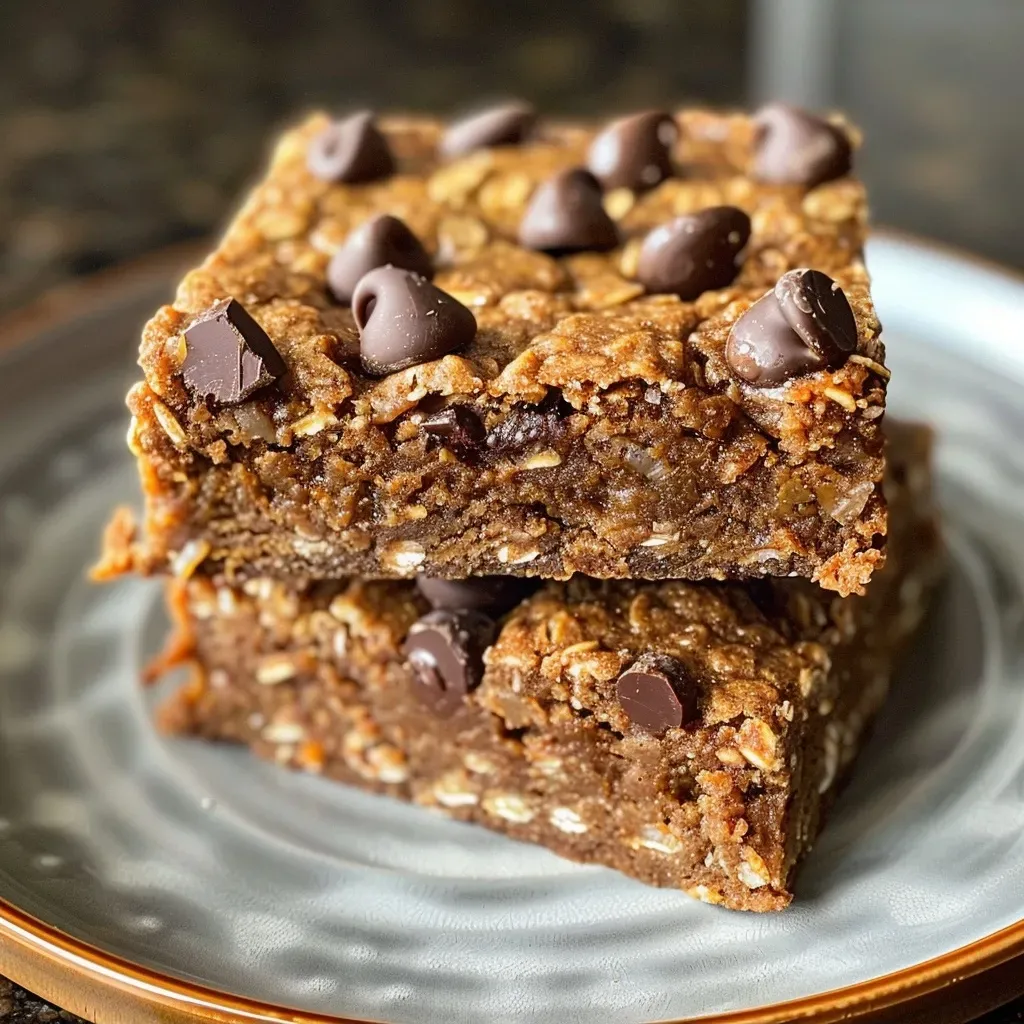
Welcome to a delicious journey that captures the essence of fall with every bite! These banana pumpkin bars are not just a treat; they are a celebration of warmth, comfort, and love, perfect for sharing with family and friends. As the leaves turn golden and the air becomes crisp, the aroma of these bars baking in your oven will remind you of cherished memories spent in the kitchen with loved ones, just like the warm afternoons I spent with my grandmother. With wholesome ingredients like pumpkin puree and ripe bananas, these bars are the perfect blend of nutrition and indulgence. Let’s dive in and discover why you’ll want to make them today!
Why You’ll Love This Recipe
- Perfect for Fall: The combination of pumpkin and banana embodies the spirit of the season, making these bars a delightful addition to your autumn gatherings.
- Nutritious and Delicious: Packed with wholesome oats and natural sweetness, these bars are a guilt-free treat that your whole family will enjoy.
- Easy to Make: With simple steps and minimal prep time, these bars fit perfectly into your busy lifestyle while still bringing joy to your kitchen.
- Versatile Enjoyment: Whether as a breakfast option, snack, or dessert, these bars can be enjoyed any time of day, and they’re great for kids and adults alike.
- Perfect for Sharing: Bake a batch and share with friends, family, or neighbors. These bars are sure to spread smiles and warmth!
Ingredients Breakdown
Let’s take a closer look at the ingredients that make these banana pumpkin bars so special. Understanding each component ensures you can customize or substitute as needed:
- Rolled Oats: 2 cups provide a hearty base, offering fiber and energy. You can substitute with gluten-free oats if needed.
- Oat Flour: 1/2 cup helps bind the bars while keeping them tender. If you don’t have oat flour, you can make your own by blending rolled oats in a food processor.
- Cinnamon & Pumpkin Pie Spice: 1 teaspoon each adds warmth and a cozy flavor profile that perfectly complements the pumpkin.
- Baking Powder: 1 teaspoon ensures the bars rise beautifully, giving them a light texture.
- Salt: 1/4 teaspoon enhances the flavors and balances the sweetness.
- Chocolate Chips: 1/3 cup (plus extra for sprinkling) adds richness and indulgence. Use dark or dairy-free chips for a healthier twist.
- Egg: 1 large egg binds the ingredients and adds moisture. For a vegan option, you can substitute with flax egg (1 tablespoon ground flaxseed mixed with 2.5 tablespoons water).
- Pumpkin Puree: 1 cup of 100% pure pumpkin puree is the star ingredient, providing moisture and flavor. Make sure to use pure puree, not pumpkin pie filling.
- Mashed Ripe Banana: 1/2 cup (about 1 medium banana) brings natural sweetness and moisture. Overripe bananas work best for this recipe.
- Pure Maple Syrup: 1/4 cup adds a touch of sweetness and enhances the flavor without refined sugars.
- Vanilla Extract: 1 teaspoon rounds out the flavors beautifully.
Step-by-Step Instructions
Now that we have our ingredients ready, let’s walk through the process of making these delightful banana pumpkin bars:

★ Recommended Kitchen Tool
Professional Chef Knife Set
Make this recipe even easier with a quality Professional Chef Knife Set — a must-have kitchen staple!
- Preheat the oven: Set your oven to 350°F (175°C) and line an 8×8-inch square baking pan with parchment paper.
- Mix dry ingredients: In a large mixing bowl, combine the rolled oats, oat flour, baking powder, pumpkin pie spice, cinnamon, and salt. Stir well to combine.
- Combine wet ingredients: In a separate medium bowl, whisk the egg, then add the pumpkin puree, mashed banana, maple syrup, and vanilla extract. Mix until smooth and well combined.
- Combine wet and dry mixes: Pour the wet ingredients into the bowl with the dry ingredients. Mix until everything is evenly incorporated. Gently fold in the chocolate chips.
- Bake the bars: Spread the mixture evenly into the prepared baking pan, smoothing out the top. Sprinkle a few extra chocolate chips on top for added indulgence.
- Bake: Place in the oven and bake for 20–25 minutes, or until a toothpick inserted in the center comes out clean.
- Cool and slice: Allow the bars to cool in the pan for at least 15 minutes. Then lift the baked oatmeal out using the parchment paper and slice into 12–16 bars.
Pro Tips for Perfect Banana Pumpkin Bars
- Use Overripe Bananas: The riper your banana, the more natural sweetness and moisture it will provide. My kids love these bars even more when I use bananas that are almost too ripe!
- Don’t Overmix: When combining wet and dry ingredients, mix just until incorporated to keep the bars tender.
- Check for Doneness: Ovens vary, so check the bars a few minutes before the suggested bake time to prevent overbaking.
- Cool Completely: Let the bars cool completely before slicing; this helps them set and makes for easier cutting.
- Experiment with Mix-ins: Feel free to add nuts, seeds, or dried fruits for added texture and flavor.
- Serving Warm: For a cozy treat, warm the bars slightly in the oven before serving. It enhances the chocolatey goodness!
- Store Wisely: Keep the bars in an airtight container in the fridge for up to 4 days, or freeze for longer storage.
- Make Ahead: These bars are perfect for meal prep! Bake a batch to enjoy throughout the week.
Common Mistakes and Troubleshooting
Even the best of us can run into a few hiccups in the kitchen. Here are some common mistakes to avoid when making these banana pumpkin bars:
- Using the Wrong Pumpkin: Ensure you use pure pumpkin puree, not pumpkin pie filling, which contains added sugars and spices.
- Skipping the Parchment Paper: Lining the baking pan with parchment paper makes it easier to lift out the bars and slice them without sticking.
- Not Measuring Ingredients Correctly: Accurate measurements are crucial; using too much flour or oats can lead to dry bars.
- Baking at the Wrong Temperature: If your oven runs hot or cold, it might affect the baking time. Consider using an oven thermometer for accuracy.
Variations to Try
Want to switch things up? Here are some delightful variations you can try with your banana pumpkin bars:
- Nutty Pumpkin Bars: Add 1/2 cup of chopped walnuts or pecans for a crunchy texture.
- Chocolate Chip-Free: Omit the chocolate chips for a more wholesome bar, or try adding dried cranberries or raisins instead.
- Spiced Up: Enhance the flavor by adding a pinch of nutmeg or ginger to the spice blend.
- Vegan Version: Use flax eggs instead of regular eggs and maple syrup to keep it plant-based.
Storage and Make-Ahead Instructions
These bars are fantastic for meal prep! Here are some tips for storing and making them ahead:
- Refrigeration: Store cooled bars in an airtight container in the fridge for up to 4 days.
- Freezing: For longer storage, slice the bars, place them in a single layer on a baking sheet to freeze, then transfer them to a freezer bag for up to 3 months.
- Thawing: To enjoy frozen bars, simply thaw them in the fridge overnight or warm them slightly in the microwave.
Frequently Asked Questions (FAQ)
Here are some questions you might have about making banana pumpkin bars:
- Can I use fresh pumpkin instead of canned? Yes, you can use homemade pumpkin puree, just ensure it’s well-cooked and blended!
- Are these bars gluten-free? Yes, by using gluten-free oats and oat flour, these bars can be gluten-free!
- Can I add protein powder? Absolutely! Just replace a small portion of the oat flour with your favorite protein powder.
- What can I use instead of maple syrup? Honey or agave nectar can be used as substitutes for sweetness.
- How do I know when the bars are done? Insert a toothpick into the center; if it comes out clean, they’re ready!
- Can I skip the egg? Yes, you can substitute with a flax egg or applesauce for a vegan option.
- Can I make them in a larger batch? Yes, simply double the recipe and use a larger baking pan.
- What’s the best way to serve them? Enjoy them warm, with a dollop of yogurt, or as is for a quick snack!
Nutritional Tips and Dietary Adaptations
These banana pumpkin bars are not just delicious; they’re also packed with nutrients. Here are some tips to enhance their nutritional value:
- Add Seeds: Incorporating chia seeds or flaxseeds can boost omega-3 fatty acids and fiber.
- Use Whole Ingredients: Opt for whole, unprocessed ingredients whenever possible to maximize health benefits.
- Control Sweetness: Adjust the amount of maple syrup based on your preference for sweetness. These bars are naturally sweetened by the bananas and pumpkin.
Equipment Recommendations
To make your baking experience smoother, here’s a list of equipment you might find helpful:
- Mixing Bowls: A set of various sizes will help in organizing your ingredients.
- Baking Pan: An 8×8-inch square pan is ideal for even baking of these bars.
- Whisk: A good whisk is essential for combining wet ingredients smoothly.
- Parchment Paper: This will help in easy removal of the bars after baking.
- Measuring Cups and Spoons: Accurate measurements are key to success in baking.
Serving Suggestions
These banana pumpkin bars can be enjoyed in various delightful ways:
- Morning Boost: Pair them with a cup of coffee or tea for a cozy breakfast.
- On-the-Go Snack: Wrap a bar in parchment paper for a nutritious snack while you’re out and about.
- With Yogurt: Serve with a dollop of Greek yogurt or a scoop of your favorite ice cream for dessert.
- Shared with Love: Bring them to gatherings or potlucks, and watch as they disappear!
In conclusion, these banana pumpkin bars are so much more than just a recipe; they are a way to connect, share, and create lasting memories. So, roll up your sleeves, gather your ingredients, and let’s make something beautiful together. Remember, cooking is about love and generosity—let’s embrace that spirit with every delicious bite!
![['Close-up view of Banana Pumpkin Bars with chocolate chips on top.', 'Side view of moist Banana Pumpkin Bars showcasing a rich texture.', 'Deliciously baked Banana Pumpkin Bars with bits of chocolate visible.', 'Appetizing slice of Banana Pumpkin Bars highlighting its golden color and ingredients.']](https://timetocooks.com/wp-content/uploads/2026/07/banana-pumpkin-bars_1_U1-300x300.webp)
Banana Pumpkin Bars
Ingredients
Dry ingredients
- 2 cups rolled oats
- 1/2 cup oat flour
- 1 teaspoon cinnamon
- 1 teaspoon pumpkin pie spice
- 1 teaspoon baking powder
- 1/4 teaspoon salt
- 1/3 cup mini or regular-sized chocolate chips (plus a few extra for sprinkling on top)
Wet ingredients
- 1 large egg
- 1 cup 100% pure pumpkin puree
- 1/2 cup mashed ripe banana about 1 medium-sized banana
- 1/4 cup pure maple syrup
- 1 teaspoon vanilla extract
Instructions
- Preheat oven to 350°F and line an 8×8-inch pan with parchment.
- Mix dry ingredients in a bowl. Whisk wet ingredients in a separate bowl.
- Combine wet and dry, then fold in chocolate chips. Spread into pan and sprinkle extra chips on top.
- Bake for 20–25 minutes, cool for 15 minutes, then cut into bars.