
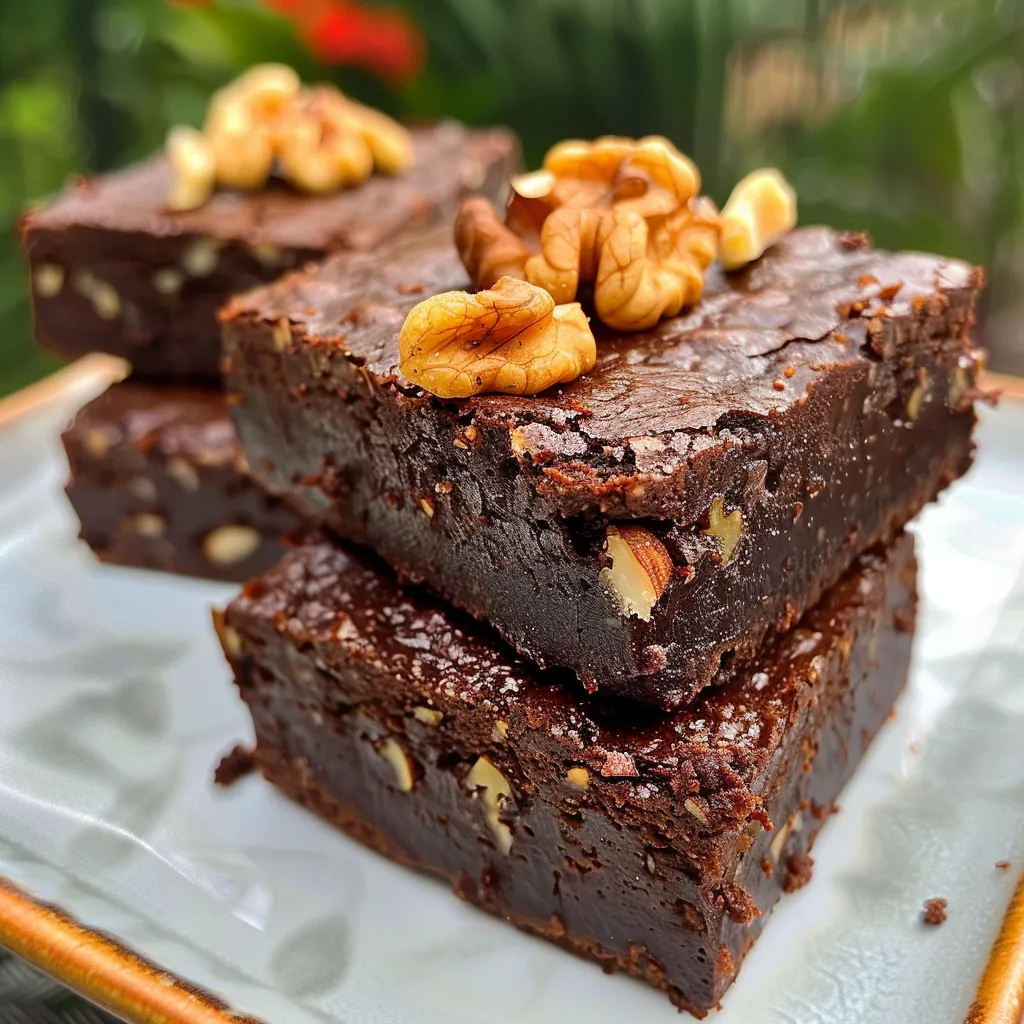
Welcome to the World of Raw Chocolate Brownies
There’s something truly heartwarming about the smell of chocolate wafting through the kitchen as you prepare a batch of raw chocolate brownies. These no-bake treats capture the essence of love and generosity, making them perfect for sharing with family and friends. The combination of wholesome ingredients, luscious chocolate, and the nostalgia of grandma’s kitchen makes this recipe not just a dessert but a cherished memory in the making. Join me as we explore this beautiful journey of creating mouthwatering raw chocolate brownies that are simple, healthy, and utterly delicious.
Why You’ll Love This Recipe
These brownies are not just a treat; they are a testament to the magic of cooking with love. Here’s why you’ll fall head over heels for this recipe:
- Healthy Indulgence: Made with raw unsalted walnuts and medjool dates, these brownies are rich in nutrients while satisfying your sweet tooth.
- No Baking Required: With just a few pulses in a food processor and some chilling time, you can whip up these brownies without ever turning on an oven.
- Quick to Prepare: In less than 30 minutes, you can have these brownies ready to chill in the fridge, making them a perfect last-minute dessert.
- Customizable Options: Enjoy the freedom to add your twist, whether it’s extra nuts, dried fruits, or even a hint of spice.
- Perfect for Any Occasion: Whether it’s a family gathering, a friendly get-together, or a cozy movie night, these brownies fit right in, bringing smiles to everyone.
Ingredients You’ll Need
Before you dive into the kitchen, let’s gather everything you need. Here’s a detailed breakdown of the ingredients and some substitutions you can consider:
- 2 cups raw unsalted walnuts: These provide a buttery texture and a healthy fat base for the brownies.
- 2 cups packed pitted medjool dates: The natural sweetness and sticky nature of these dates are essential for binding the brownies together.
- 1/3 cup walnuts (optional): For those who enjoy a bit of crunch, adding chopped walnuts elevates the texture.
- 1/2 cup cocoa powder: This is where the chocolatey goodness comes from. Use high-quality cocoa powder for the best flavor.
- 1 tsp vanilla extract: A splash of vanilla adds depth to the chocolate flavor.
- Pinch of salt: Just a hint to balance the sweetness.
- 1/4 cup coconut oil: This helps to create a rich, fudgy texture and brings a subtle coconut flavor.
- 1/3 cup cocoa powder: For the chocolate topping, this ensures every bite is decadently chocolatey.
- 1/4 tsp vanilla extract: To enhance the chocolate topping further.
- 2 tbsp maple syrup: For added sweetness, especially if you prefer your brownies on the sweeter side.
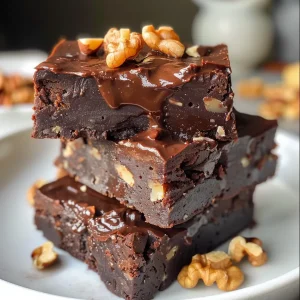
How to Make Raw Chocolate Brownies
Now, let’s get cooking! Follow these simple steps to create your raw chocolate brownies:
- Line an 8×8-inch pan with parchment paper and set aside. (Alternatively, use a mini silicone muffin pan for delightful two-bite brownies.)
- In a food processor, pulse the 2 cups of walnuts, medjool dates, cocoa powder, vanilla, and salt until a sticky dough forms. Scrape down the sides as needed. If using the optional 1/3 cup of walnuts for chunks, add them now and pulse just a few times to incorporate.
- Press the mixture firmly into the prepared pan, smoothing the top with your hands or a spatula. If using a mini muffin pan, press a spoonful of the mixture into each well and flatten the tops.
- Melt the dark chocolate with coconut oil in the microwave or over a double boiler until smooth. Pour the melted chocolate over the brownies and spread evenly.
- Place in the fridge or freezer for at least 1 hour to set.
- Remove from the pan and slice into squares (or pop out of the muffin pan). Store in the fridge for up to 1 week or in the freezer for up to 3 months.
Expert Tips for Perfect Raw Chocolate Brownies
To ensure your brownies turn out perfectly every time, here are some expert insights:
- Use Fresh Ingredients: Ensure your walnuts and medjool dates are fresh for the best flavor and texture.
- Adjust Sweetness: Taste your mixture before pressing it into the pan. Feel free to add more maple syrup if you prefer a sweeter brownie.
- Chill Time Matters: Allowing the brownies to chill long enough helps them set properly, giving you that perfect fudgy texture.
- Experiment with Flavors: Don’t hesitate to add a pinch of cinnamon or a splash of almond extract for a unique flavor twist.
- Keep it Simple: Less is often more. Stick to the core ingredients for the best results.
- Consider Storage: If you live in a warm climate, keep the brownies in the fridge to maintain their shape and consistency.
- Presentation is Key: Dust with cocoa powder or drizzle with extra melted chocolate before serving for a beautiful presentation.
- Share the Love: These brownies make excellent gifts for friends and family, showcasing your love through your cooking.
Common Mistakes and Troubleshooting
Even the best of us can make a mistake in the kitchen. Here are some common pitfalls and how to avoid them:
- Too Dry?: If your brownie mixture feels too dry, add a splash of water or a bit more maple syrup to moisten it.
- Not Sticky Enough?: If your mixture isn’t sticking together, try adding a few more dates or a touch of coconut oil to help bind it.
- Chocolate Topping Not Smooth?: Ensure you melt your chocolate gently to prevent it from seizing. If it does, add a bit more coconut oil and stir until smooth.
- Chilling Too Long?: If left too long in the fridge, the brownies can become too firm. Limit the chill time to 1-2 hours for optimal texture.
Variations to Try
One of the joys of making these brownies is the ability to customize them. Here are a few delightful variations:
- Nutty Delight: Add in chopped pecans or almonds for an extra crunch.
- Fruit Fusion: Mix in some dried cranberries or chopped apricots for a sweet and tangy twist.
- Minty Fresh: Add a few drops of peppermint extract to the brownie mixture for a refreshing flavor.
- Spiced Cocoa: Sprinkle in a dash of cayenne pepper or cinnamon to give your brownies a warm kick.
Storage and Make-Ahead Instructions
These brownies are perfect for make-ahead treats. Here’s how to store them:
- Fridge Storage: Store in an airtight container in the fridge for up to 1 week. The cool temperature helps maintain their fudgy texture.
- Freezer Storage: For longer storage, freeze the brownies in an airtight container for up to 3 months. Simply thaw in the fridge overnight before serving.
- Make-Ahead: You can prepare the brownie base and chocolate topping separately a day ahead. Assemble and chill on the day of serving.
Frequently Asked Questions
Here are some common questions about making raw chocolate brownies:
- Can I substitute walnuts with another nut? Yes, feel free to use almonds or cashews if you prefer.
- What if I can’t find medjool dates? You can substitute with other dried fruits, but the sweetness and texture may vary.
- Are these brownies gluten-free? Absolutely! All ingredients used are naturally gluten-free.
- Can I make these brownies nut-free? Yes, use sunflower seeds or pumpkin seeds instead of nuts.
- How do I make these brownies vegan? This recipe is already vegan-friendly, using only plant-based ingredients.
- Can I add protein powder? Yes, feel free to mix in your favorite protein powder for an extra boost.
- What’s the best way to cut these brownies? Use a warm knife for clean cuts, wiping it after each slice.
- How can I enhance the chocolate flavor? Use high-quality cocoa powder and consider adding a touch of espresso powder.
Nutritional Tips and Dietary Adaptations
These brownies are not just delicious; they can also fit into various dietary needs:
- Low Sugar Option: Reduce the amount of maple syrup to decrease sugar content.
- High Protein Variation: Add protein powder to the mixture for a post-workout treat.
- Raw and Vegan: All ingredients are raw and vegan, making this a guilt-free indulgence.
- Low Carb Alternative: Substitute medjool dates with chopped dried figs or use a sugar substitute.
Equipment Recommendations
To make your brownie-making experience seamless, here’s a handy list of equipment:
- Food Processor: A high-quality food processor is essential for blending the ingredients into a smooth, sticky dough.
- Baking Pan: An 8×8-inch square pan is perfect for traditional brownies, while silicone muffin pans are great for bite-sized treats.
- Spatula: A silicone spatula helps in pressing the mixture evenly into the pan and spreading the chocolate topping.
- Measuring Cups and Spoons: Accurate measurements ensure consistency in your brownies.
Serving Suggestions
These brownies can be enjoyed in various delightful ways:
- With a Scoop of Ice Cream: Serve warm brownies topped with your favorite vanilla or chocolate ice cream.
- Garnished with Fresh Berries: Add a handful of raspberries or strawberries for a fresh, fruity twist.
- Drizzled with Caramel Sauce: A touch of homemade caramel elevates these brownies to gourmet status.
- As a Cake Base: Use these brownies as a base for a rich chocolate cake, layering with whipped cream and strawberries.
In Conclusion
As you embark on this delightful journey of making raw chocolate brownies, remember that cooking is not just about the ingredients but the love and memories you create along the way. With every bite, you and your loved ones will savor not just the rich chocolate and nutty goodness but the warmth of sharing something made from the heart. Thank you for joining me in this adventure, and I hope these brownies bring as much joy to your kitchen as they do to mine!
Raw Chocolate Brownies
Ingredients
Main ingredients
- 2 cups raw unsalted walnuts
- 2 cups pitted medjool dates
- 1/3 cup walnuts (optional, if you want some walnut chunks) optional
- 1/2 cup cocoa powder
- 1 tsp vanilla extract
- pinch salt
- 1/4 cup coconut oil
- 2 tbsp maple syrup
Instructions
- Line an 8×8-inch pan with parchment paper.
- Pulse walnuts, dates, cocoa powder, vanilla, and salt until sticky dough forms. Add optional walnuts and pulse briefly.
- Press mixture into the pan and smooth the top.
- Melt chocolate with coconut oil, then pour over the brownies and spread evenly.
- Refrigerate for at least 1 hour to set, then slice and serve.