
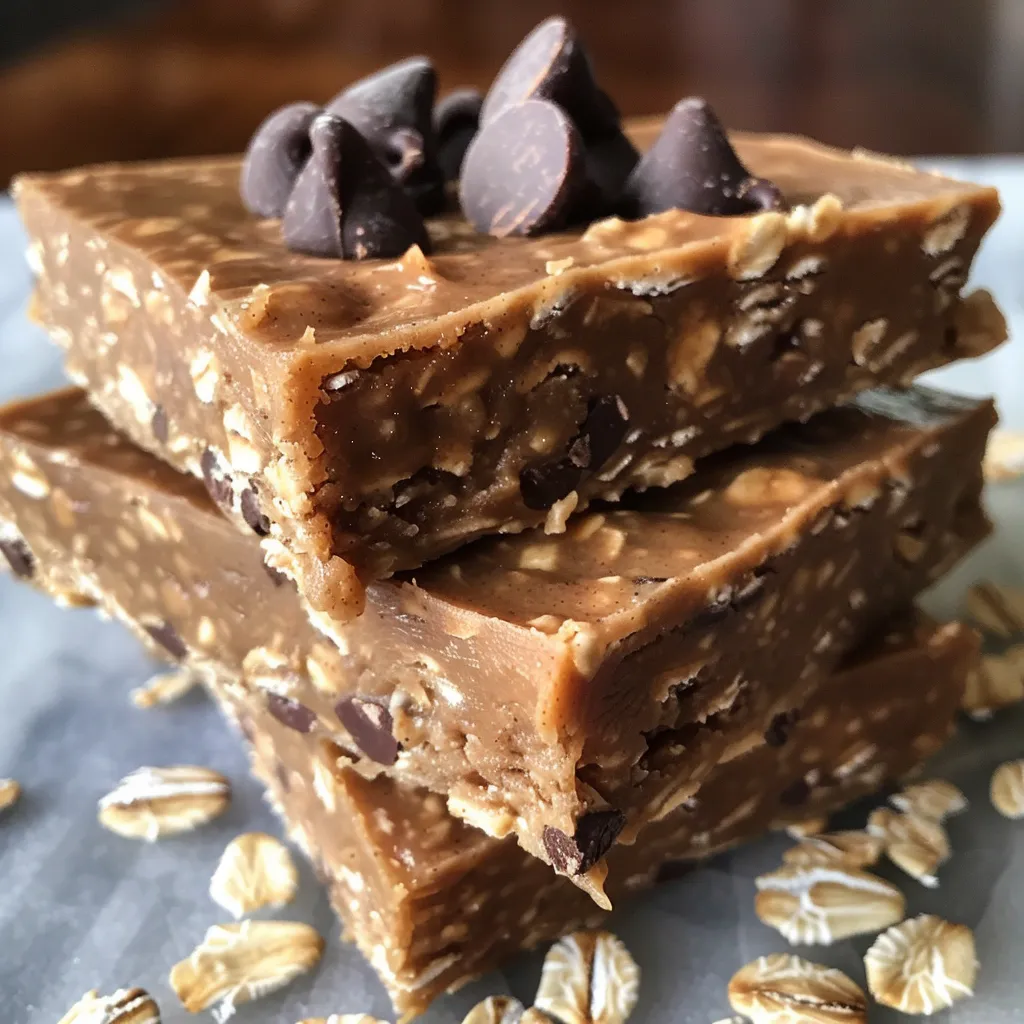
Welcome, dear friends! Today, I’m inviting you to join me in the kitchen as we create a delightful no-bake protein bar recipe. This isn’t just any recipe; it’s one infused with love and memories, a treat that’s perfect for sharing with family and friends. Whether you’re looking for a quick snack post-workout or a sweet pick-me-up during the day, these protein bars blend wholesome ingredients with a touch of sweetness. Let’s dive into this heartwarming journey!
Why You’ll Love This Recipe
These protein bars are not just about taste; they tell a story of comfort, health, and love. Here are a few reasons to fall in love with this recipe:
- Wholesome Ingredients: Made with natural peanut butter, oats, and a touch of honey, these bars are rich in nutrients that nourish your body.
- No Baking Required: Perfect for those busy days, you can whip these up without turning on the oven, saving time and energy.
- Customizable Flavors: Feel free to switch out ingredients! Add your favorite nuts or dried fruits for a personal touch.
- Family-Friendly: Kids love them! These bars are a sweet treat that parents can feel good about giving their little ones.
- Perfect for Sharing: Cut them into bite-sized pieces and share with friends—these bars are meant to be enjoyed together!
What You’ll Need
Gather your ingredients! Here’s what you’ll need for our lovely no-bake protein bars:
- 1 cup Natural peanut butter (or almond butter): Choose a nut butter that’s smooth and creamy for a delightful texture.
- 1/3 cup Honey or maple syrup: This adds just the right amount of sweetness to balance the flavors.
- 1 cup Vanilla protein powder: Feel free to use any flavor you prefer—chocolate works too!
- 1 cup Rolled oats: Old-fashioned oats create a chewy texture that’s simply irresistible.
- 1/4 cup Mini chocolate chips (optional): For those who love a little extra sweetness in the base.
- 1 cup Dark chocolate chips: For the topping, use good-quality chocolate for a rich finish.
- 2 tablespoons Coconut oil: This helps the chocolate melt smoothly and gives a lovely sheen.
- 1 pinch Salt: A little salt enhances the flavors beautifully.
Step-by-Step Instructions
Now, let’s get to the fun part—making these delicious protein bars!
- Mix the Base: In a large bowl, stir together the peanut butter and honey until smooth and well combined. Add the protein powder, oats, and a pinch of salt. Mix until everything is evenly combined and forms a thick, sticky dough.
- Press into the Pan: Line an 8×8-inch pan with parchment paper. Transfer the mixture to the pan and press it down firmly and evenly with your hands or the back of a spoon. Make sure it’s compact and level.
- Add Chocolate Layer: In a microwave-safe bowl, combine the dark chocolate chips and coconut oil. Microwave in 30-second intervals, stirring between each, until completely melted and smooth. Pour the chocolate over the pressed base and spread evenly.
- Chill and Cut: Place the pan in the refrigerator for at least 2 hours, or until the chocolate is completely set and the bars are firm. Once chilled, lift the parchment paper out of the pan and cut into 12 bars.
Pro Tips for Perfect Protein Bars
- Room Temperature Ingredients: Make sure your peanut butter is at room temperature for easier mixing.
- Press Firmly: When pressing the mixture into the pan, make sure it’s compact to prevent the bars from crumbling.
- Adjust Sweetness: Taste the mixture before pressing it into the pan; feel free to add more honey if you prefer it sweeter.
- Use Quality Chocolate: A rich dark chocolate will elevate the flavors and make each bite special.
- Experiment with Mix-Ins: Try adding nuts, dried fruits, or seeds to give your bars an extra crunch and flavor.
- Keep Them Cool: These bars are best stored in the refrigerator to maintain their shape and freshness.
- Use Parchment Paper: Lining your pan with parchment paper makes it easier to lift out the bars once they’re set.
- Slice with a Warm Knife: For cleaner cuts, run your knife under hot water, dry it, and then slice through the bars.
Common Mistakes and Troubleshooting
Even the best of us make little mishaps in the kitchen. Here are a few common mistakes and how to avoid them:
- Too Crumbly? If your bars are falling apart, it may be that you didn’t press them firmly enough. Next time, try pressing harder!
- Too Sweet? If the bars are too sweet, you can balance it by adding a bit more protein powder or oats to the mixture.
- Chocolate Not Setting? Ensure you refrigerate them long enough. If they’re still soft, give them a bit more chill time.
- Flavor Lacking? Don’t hesitate to add spices like cinnamon or vanilla extract to elevate the flavor profile!
Variations for Your Protein Bars
Get creative! Here are a few variations to try:
- Chocolate Chip Cookie Dough: Add mini chocolate chips and a touch of vanilla extract for a cookie dough flavor.
- Nutty Delight: Incorporate chopped nuts like almonds or walnuts for a crunchy texture.
- Fruit & Nut: Mix in dried fruits like cranberries or apricots for a fruity burst.
- Chocolate Mint: Add a few drops of peppermint extract for a refreshing twist.
Storage and Make-Ahead Instructions
These protein bars are perfect for meal prep! Here’s how to store them:
- In the Fridge: Store the bars in an airtight container in the refrigerator for up to 1 week. They’ll remain fresh and delicious!
- In the Freezer: For longer storage, freeze the bars individually wrapped in plastic wrap or in a freezer-safe container for up to 3 months. Just thaw them in the fridge before enjoying.
Frequently Asked Questions
Here are some common queries about our no-bake protein bars:
- Can I use other nut butters? Absolutely! Almond butter or cashew butter can be great substitutes.
- What can I use instead of honey? Maple syrup works beautifully as a vegan alternative.
- How do I make them gluten-free? Ensure you use certified gluten-free oats and protein powder.
- Can I use flavored protein powder? Yes, flavored protein powders can add a fun twist to your bars!
- What if I don’t like chocolate? Skip the chocolate topping and try a drizzle of almond butter instead!
- How can I make them lower in sugar? Reduce the amount of honey or opt for a sugar-free syrup.
- What’s the best way to cut the bars? Use a sharp knife and cut while they are chilled for cleaner edges.
- Can I add protein powder to other recipes? Yes! You can incorporate protein powder into smoothies, pancakes, or oatmeal for extra nutrition.
Nutrition Tips and Dietary Adaptations
These protein bars not only satisfy your sweet tooth but can also fit into various dietary needs:
- Vegan Adaptation: Use maple syrup instead of honey and choose a plant-based protein powder.
- Low-Carb Version: Opt for sugar-free chocolate chips and reduce the honey for a keto-friendly option.
- High-Protein Boost: Increase the protein powder for a protein-packed snack perfect for post-workout recovery.
Equipment Recommendations
To make this recipe a breeze, consider these kitchen tools:
- Mixing Bowl: A large bowl for mixing your ingredients thoroughly.
- Measuring Cups: Accurate measurements ensure the best texture and taste.
- Microwave-Safe Bowl: For melting your chocolate easily without burning it.
- Parchment Paper: Essential for easy removal of the bars from the pan.
Serving Suggestions
These protein bars are versatile and can be served in many delightful ways:
- As a Snack: Enjoy them as a quick energy booster during the day.
- For Breakfast: Pair them with a smoothie or yogurt for a wholesome breakfast.
- At Gatherings: Cut them into bite-sized pieces and serve at parties or picnics.
In conclusion, making these no-bake protein bars is not just a cooking task; it’s an opportunity to create a loving experience for yourself and those around you. Remember, cooking is about sharing joy and making memories, just like my grandmother taught me. So gather your loved ones, roll up your sleeves, and let’s make something beautiful together. Happy cooking!
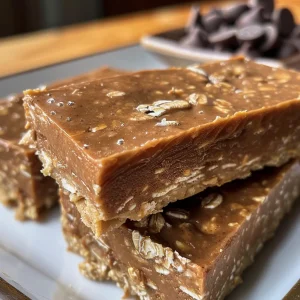
Easy No-Bake Protein Bars
Ingredients
Base
- 1 cup Natural peanut butter (Or almond butter)
- 1/3 cup Honey or maple syrup (For sweetness)
- 1 cup Vanilla protein powder (Any flavor works)
- 1 cup Rolled oats (Old-fashioned oats)
- 1/4 cup Mini chocolate chips (Optional for base)
- 1 cup Dark chocolate chips (For topping)
- 2 tablespoons Coconut oil (Helps chocolate melt smoothly)
- 1 pinch Salt (For flavor balance)
Instructions
- Mix peanut butter and honey until smooth. Add protein powder, oats, and salt; combine into a sticky dough.
- Press mixture into an 8x8-inch pan lined with parchment paper, smoothing the top.
- Melt chocolate chips and coconut oil in microwave, stirring until smooth. Pour over the pressed base.
- Refrigerate for at least 2 hours until set. Cut into 12 bars and serve.