
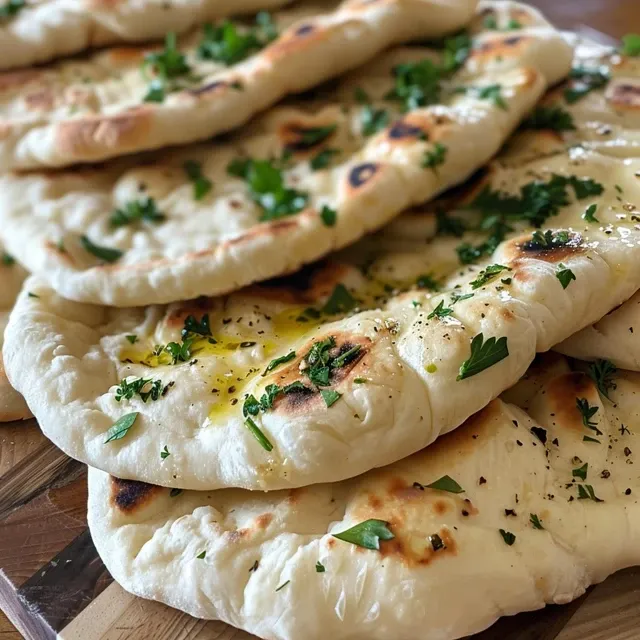
Discover the Joy of Homemade Greek Pita Bread
Welcome to a culinary journey that celebrates the warmth of home and the joy of sharing food with loved ones. Today, we will dive into the delightful world of Greek pita bread—a cherished recipe that transforms any meal into a loving experience. Whether you’re wrapping up your favorite fillings, scooping up dips, or simply enjoying it warm with a drizzle of olive oil, this homemade pita bread will surely become a staple in your kitchen.
In just a few simple steps, you will create soft and fluffy pita bread that evokes memories of family gatherings and shared meals. Join me as we explore the ingredients, techniques, and secrets behind the perfect Greek pita bread.
Why You’ll Love This Recipe
- Unmatched Freshness: Homemade pita bread is far superior to store-bought options. The aroma that fills your kitchen as it cooks will make your heart sing.
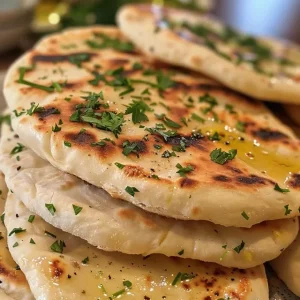
- Soft and Fluffy Texture: This recipe guarantees a light and airy pita, perfect for holding all your delicious fillings without tearing.
- Simple Ingredients: You likely have most of the ingredients in your pantry, making this recipe accessible and convenient.
- Customizable: Feel free to experiment with different flavors and fillings, allowing your creativity to shine.
- A Fun Family Activity: Making pita bread can be a delightful experience to share with your family. Kids love helping out, which makes for great memories in the kitchen.
Ingredient Breakdown
Let’s take a closer look at the ingredients you will need to create this delicious pita bread. Below, I have also included some thoughtful substitutions to accommodate different dietary needs.
- Flour: 2 cups of King Arthur all-purpose flour is recommended for its perfect protein balance, ensuring soft pita. For a whole wheat option, substitute with whole wheat flour; just be aware this may alter the texture slightly.
- Yeast: 1 tablespoon of active dry yeast is essential for that lovely puffiness. If you have instant yeast, you can use the same amount without proofing.
- Salt: 1 teaspoon of salt enhances flavor and strengthens the gluten structure.
- Sugar: ½ teaspoon of sugar helps activate the yeast, giving your bread a little sweetness.
- Lukewarm Milk: ¼ cup of lukewarm milk (around 105°F to 115°F) creates a rich flavor and tender texture. If you’re dairy-free, feel free to use almond or oat milk.
- Water: ½ cup of water balances the dough’s hydration. Adjust slightly depending on your flour type.
- Olive Oil: 2 tablespoons of olive oil contribute to a richer flavor and improved texture. Extra virgin olive oil can be used for cooking for added depth.
- Optional Ingredients: Garlic butter for brushing (for more flavor) and fresh parsley for garnish.
Step-by-Step Instructions
Now that we have our ingredients ready, let’s get to the fun part: making the dough! Follow these steps closely for a successful batch of Greek pita bread.
Step 1: Prepare the Yeast Starter
In a small bowl, combine the lukewarm milk, water, and sugar. Sprinkle the active dry yeast over the liquid and stir gently. Let it sit undisturbed for about 5 to 10 minutes until a thick, frothy foam develops on the surface—this indicates that the yeast is active.
Step 2: Mix the Dough Base
In a large mixing bowl, combine the flour and salt. Create a well in the center and pour in the frothy yeast mixture along with the olive oil. Use a wooden spoon to stir the ingredients together until a shaggy, cohesive dough forms and pulls away from the bowl edges.
Step 3: Knead for Elasticity
Transfer the dough onto a lightly floured work surface. Knead the dough by hand for 5 to 8 minutes, pushing and folding until it transforms from shaggy to smooth and elastic. The dough should feel slightly tacky but not stick to your hands.
Step 4: The First Rise
Lightly oil a clean bowl and place the dough ball inside, turning it to coat with oil. Cover the bowl with a damp cloth and set it in a warm, draft-free area for 60 to 90 minutes, allowing the dough to rise until it has approximately doubled in size.
Step 5: Portion and Shape
After the dough has risen, gently deflate it with your fist and move it back to your workspace. Divide the dough into 8 equal pieces and roll each into a smooth, tight ball. Keep the balls covered with a towel to prevent drying.
Step 6: Roll the Rounds
Take one dough ball at a time and use a rolling pin to flatten it into a circle about 6 to 7 inches wide, aiming for a thickness of roughly ¼ inch. This thickness ensures the pita stays pillowy and soft rather than turning into a thin cracker.
Step 7: Pan Sear the Bread
Heat a heavy skillet or cast-iron pan over medium heat and lightly brush with olive oil. Place a dough round in the hot pan and cook for about 2 minutes until large bubbles form on the surface. Flip the pita and cook the other side for another 1 to 2 minutes until golden brown spots appear.
Step 8: Finish and Serve
Immediately remove the hot pita from the pan and brush with garlic butter if desired. Sprinkle with fresh parsley and stack the finished pitas under a clean kitchen towel to keep them warm and flexible before serving.
Pro Tips for Perfect Pita
Here are some expert insights to ensure your pita bread turns out perfectly every time:
- Temperature Matters: Ensure your liquids are lukewarm (not hot) to prevent killing the yeast.
- Don’t Rush the Rise: Allow the dough to rise until it doubles in size; this is crucial for achieving the fluffy texture.
- Use a Hot Pan: The pan needs to be hot enough to create steam, which helps the pita puff up.
- Experiment with Shapes: Try making larger or smaller pitas based on your needs; just adjust cooking time accordingly.
- Storage: Keep any leftover pitas in an airtight container to maintain softness.
- Extra Flavor: Add herbs or spices to the dough for a unique twist—think garlic powder, oregano, or za’atar.
- Freeze for Later: Pitas freeze well; simply stack them in a zip-lock bag and thaw as needed.
- Join the Fun: Invite friends or family to help shape and cook the pitas for a fun kitchen experience.
Common Mistakes and Troubleshooting
Even the best of us can make mistakes in the kitchen. Here are some common pitfalls and how to avoid them:
- Flat Pitas: If your pitas don’t puff up, the dough may not have risen enough or the pan might not have been hot enough.
- Dry Pitas: This can happen if the dough was over-kneaded or if the cooking time was too long.
- Sticking to the Pan: Make sure to use enough oil or flour on the pan to prevent sticking.
- Yeast Issues: If your yeast doesn’t foam, it may be expired. Always check the expiration date before use.
Variations of Greek Pita Bread
While this recipe is delightful as is, there are many ways to customize your pita experience. Here are some variations to try:
- Whole Wheat Pita: Substitute half or all of the all-purpose flour with whole wheat flour for a heartier version.
- Herbed Pita: Add dried herbs like thyme or oregano to the dough for a flavorful twist.
- Garlic Pita: Mix roasted garlic into the dough for a savory addition that pairs perfectly with dips.
- Spicy Pita: Incorporate chili flakes or ground cumin into the dough for a little heat.
Storage and Make-Ahead Instructions
Creating pita bread in advance can save time during meal prep. Here’s how to store and reheat:
- Room Temperature: Store cooked pitas in an airtight container at room temperature for up to 3 days.
- Refrigeration: For longer storage, refrigerate for up to a week. Just be sure to wrap them tightly to prevent drying.
- Freezing: Pitas can be frozen for up to 3 months. Place parchment paper between each pita before freezing to prevent them from sticking together.
- Reheating: To reheat, place them in a hot pan for 30 seconds on each side or wrap them in a damp paper towel and microwave for 20-30 seconds.
Frequently Asked Questions
Let’s address some common questions about making Greek pita bread:
- Can I use bread flour instead of all-purpose flour? Yes, but the texture may be chewier.
- Why did my pita bread not puff up? This may be due to insufficient rising time or an inadequate cooking temperature.
- How can I make my pita bread softer? Adding a bit more olive oil to the dough can enhance softness.
- Can I make pita bread without yeast? Yes, but it will not have the same texture. You can try a baking powder alternative for a quick version.
- What can I serve with pita bread? Pita is fantastic with dips like hummus, tzatziki, or even as a wrap for grilled meats and veggies.
- How do I know if my yeast is active? If it becomes frothy and bubbly after mixing with warm liquid, it’s active.
- Can I add fillings before cooking? It’s best to fill after cooking to maintain the pita’s structure.
- What’s the best way to store leftover pita bread? Keep them in an airtight container at room temperature or freeze for longer storage.
Nutritional Tips and Dietary Adaptations
This recipe can easily be adapted to suit various dietary needs:
- Gluten-Free: Use a gluten-free all-purpose flour blend to make a gluten-free version of pita.
- Dairy-Free: Substitute milk with plant-based alternatives like almond or oat milk.
- Lower-Carb: Consider using almond flour or coconut flour, but note that the texture will change.
Equipment Recommendations
Here’s a list of essential tools to have on hand for making pita bread:
- Mixing Bowls: A large bowl for mixing dough and a smaller one for yeast.
- Rolling Pin: For rolling out the dough evenly.
- Cast-Iron Skillet: Ideal for cooking the pita to achieve the perfect puff.
- Kitchen Towel: To cover the dough and keep it from drying out.
- Measuring Cups and Spoons: Accurate measurements are crucial for the best results.
Serving Suggestions
Once your pita bread is ready, let’s talk about how to serve it:
- Wrap It Up: Fill with grilled chicken, veggies, and tzatziki for a delicious wrap.
- Dip It: Serve warm with hummus or baba ganoush for a tasty appetizer.
- Make Mini Pizzas: Top with sauce and cheese for a fun twist on traditional pizza.
- Enjoy with Soups: Use pita bread to scoop up hearty soups or stews.
Conclusion
There you have it, dear friends—a comprehensive guide to making your own soft and fluffy Greek pita bread. With love and a little patience, you can create something truly special that brings warmth and joy to your table. Remember, cooking is all about sharing and creating memories, so gather your loved ones around and enjoy every bite. Thank you for joining me on this culinary adventure, and I hope your kitchen is filled with the delightful aroma of freshly baked pita bread!
Soft and Fluffy Greek Pita Bread
Ingredients
Dough
- 2 cups King Arthur all-purpose flour
- 1 tbsp active dry yeast
- 1 tsp salt
- 1/2 tsp sugar
- 1/4 cup lukewarm milk (105°F to 115°F)
- 1/2 cup water
- 2 tbsp olive oil
For cooking
- Extra virgin olive oil for brushing pan
- Garlic butter optional for serving
- Fresh parsley chopped for garnish
Instructions
- Mix warm milk, water, and sugar; add yeast and let foam for 5-10 mins.
- Combine flour and salt; add yeast mixture and olive oil, stir to form dough.
- Knead dough for 5-8 mins until smooth; let rise in oiled bowl for 60-90 mins.
- Divide dough into 8 balls, roll into 6-7 inch circles about 1/4 inch thick.
- Cook each round in a hot skillet with olive oil for 2 mins, flip and cook 1-2 mins until golden.
- Brush with garlic butter, garnish with parsley, and keep warm under a towel before serving.