
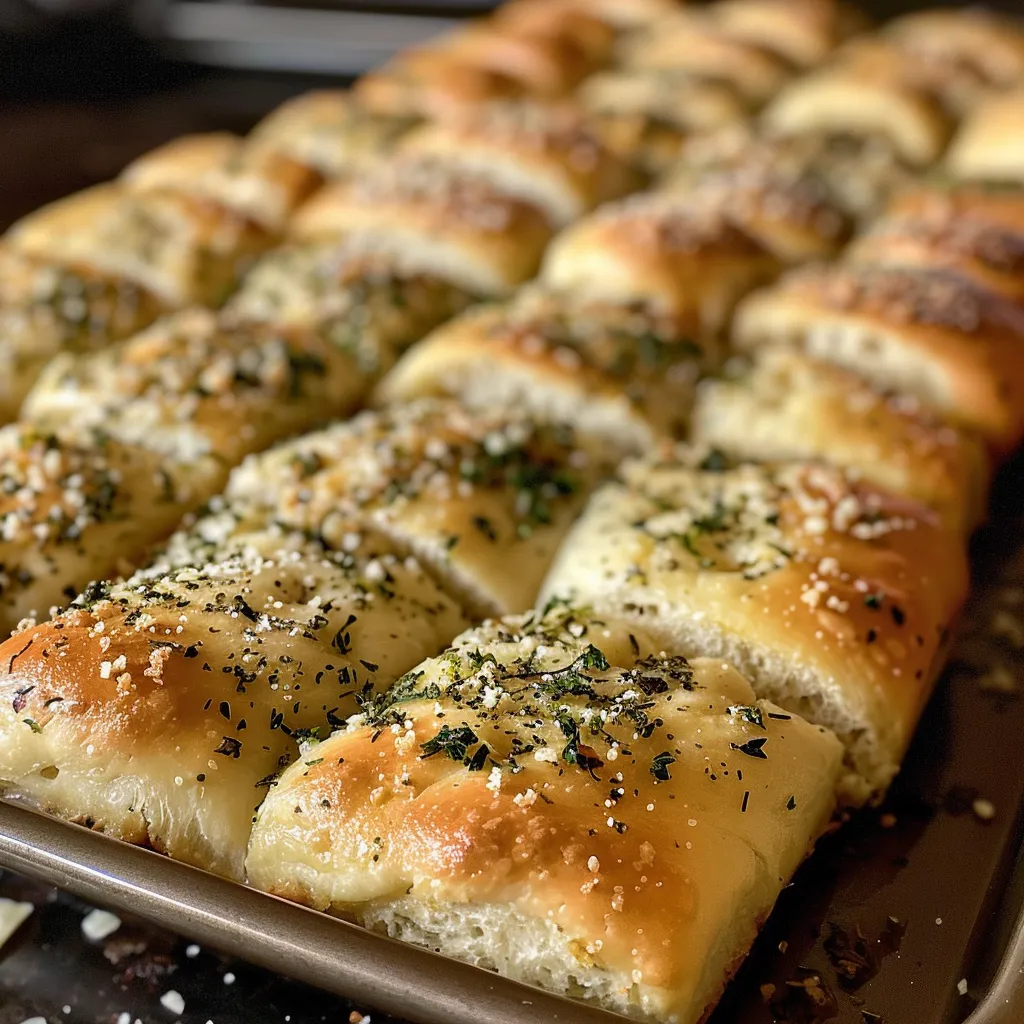
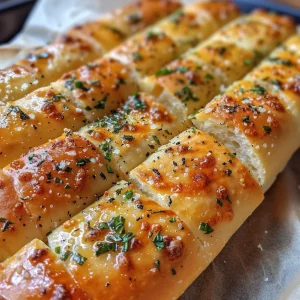
A Whiff of Home: Discover the Magic of Garlic Herb Breadsticks
There’s something truly special about the aroma of fresh bread wafting through a home. It brings back memories of family gatherings, laughter, and the warmth of a shared meal. With just a handful of ingredients and a mere 30 minutes, you can create these delightful Garlic Herb Breadsticks that will fill your kitchen with love and anticipation. Whether you’re enjoying a cozy dinner with your family or hosting friends for a casual get-together, these breadsticks are the perfect addition to any meal. Let’s dive into this recipe that’s all about simplicity, flavor, and a touch of nostalgia!
Why You’ll Love This Recipe
These Garlic Herb Breadsticks are not just a side dish; they’re a heartfelt addition to your table. Here are a few reasons why you’ll adore them:
- Quick and Easy: In just 30 minutes, you can whip up these delightful breadsticks—perfect for those last-minute dinner plans or unexpected guests!
- Flavor-Packed: Fresh garlic and herbs mingle beautifully, creating a burst of flavor in every bite. The optional sprinkle of Parmesan adds a savory finish that’s simply irresistible.
- No Rising Needed: Say goodbye to the waiting game! These breadsticks don’t require any rising time, making them a fantastic option when you’re short on time.
- Versatility: Pair them with pasta, soups, or enjoy them on their own with a side of marinara sauce. They’re a hit for every occasion!
- Family-Friendly: With their soft texture and delicious taste, these breadsticks are loved by both kids and adults alike. Cooking is all about sharing joy, and these will certainly bring smiles to your table.
Gathering Your Ingredients
To make these Garlic Herb Breadsticks, you’ll need just a few simple ingredients. Let’s break them down:
- All-Purpose Flour: 1 1/2 cups is the base for our dough. You can also use whole wheat flour for a healthier twist.
- Baking Powder: 2 teaspoons will give our breadsticks the perfect lift without the need for yeast.
- Salt: 1/2 teaspoon enhances the flavors, but feel free to adjust based on your taste.
- Olive Oil: 1/4 cup adds richness and helps create a tender texture.
- Milk: 3/4 cup brings moisture to the dough. You can substitute with almond or oat milk for a dairy-free version.
- Garlic: 2 cloves, minced, for that aromatic zing.
- Fresh Herbs: 2 tablespoons of your choice, like parsley, oregano, or basil, bring freshness to the breadsticks.
- Parmesan Cheese: Optional, but highly recommended for a delightful cheesy layer on top.
How to Make Amazing Garlic Herb Breadsticks: Step-by-Step Instructions
Now that we have our ingredients ready, let’s get started on making these mouthwatering breadsticks!
- Preheat the oven: Begin by preheating your oven to 400°F (200°C).
- Mix Dry Ingredients: In a large bowl, whisk together the flour, baking powder, and salt until well combined.
- Combine Wet Ingredients: In another bowl, mix the olive oil and milk together until blended.
- Combine Wet and Dry: Pour the wet ingredients into the dry mixture, stirring gently until just combined. Avoid overmixing for soft breadsticks.
- Add Flavor: Stir in the minced garlic and chopped herbs, ensuring they are evenly distributed throughout the dough.
- Shape the Dough: Turn the dough out onto a lightly floured surface. Pat or roll it out to about 1/2-inch thickness, being careful not to overwork it.
- Cut into Shapes: Use a knife or pizza cutter to slice the dough into your desired breadstick shapes. You can make them as thick or thin as you like!
- Bake: Place the breadsticks on a baking sheet lined with parchment paper. Brush them with a little olive oil and sprinkle with Parmesan cheese, if desired. Bake for 12-15 minutes, or until golden brown.
Pro Tips for Perfect Garlic Herb Breadsticks
To ensure your breadsticks turn out perfectly every time, here are some expert tips:
- Use Fresh Herbs: They add vibrant flavor and aroma. If you only have dried herbs, reduce the amount to 1 teaspoon.
- Don’t Overmix: When combining the wet and dry ingredients, mix just until combined to keep the texture light and fluffy.
- Experiment with Flavors: Feel free to add spices like crushed red pepper for a little heat, or swap out the garlic for roasted garlic for a sweeter taste.
- Check Oven Temperature: Ensure your oven is fully preheated to avoid uneven baking. An oven thermometer can help!
- Cool Slightly Before Serving: Let them cool for a few minutes before serving; they’ll be easier to handle and even better to taste.
- Use Quality Ingredients: The better the quality of your olive oil and cheese, the more delicious your breadsticks will be.
- Make Ahead: You can prepare the dough in advance and refrigerate it for up to 24 hours before baking.
- Try Different Shapes: Get creative with your breadstick shapes—twists, knots, or even fun animal shapes can make cooking more enjoyable!
Common Mistakes and Troubleshooting
Even the best cooks encounter hiccups in the kitchen. Here are some common mistakes to watch out for, along with solutions:
- Dense Breadsticks: If your breadsticks turn out heavy, it’s likely due to overmixing or using old baking powder. Make sure your baking powder is fresh!
- Burnt Bottoms: If the bottoms are browning too quickly, try lowering the oven rack or placing parchment paper underneath.
- Dry Texture: This can happen if you add too much flour. Measure flour correctly—spoon it into the measuring cup and level it off.
- Not Rising: If they don’t rise as expected, ensure your baking powder is active and that you’re not packing the flour.
- Flavor Lacking: Adjust seasoning as needed! Taste your dough before baking and tweak the herbs or salt.
Delicious Variations
Want to mix things up? Here are some fun variations on the classic Garlic Herb Breadsticks:
- Cheesy Herb Breadsticks: Add extra shredded cheese to the dough for a cheesy twist.
- Spicy Garlic Breadsticks: Incorporate red pepper flakes into the dough for a hint of spice.
- Herb-Infused Olive Oil: Brush the breadsticks with herb-infused olive oil before baking for extra flavor.
- Sweet Cinnamon Breadsticks: Omit the garlic and herbs, and sprinkle with cinnamon sugar for a sweet treat!
Storage and Make-Ahead Instructions
To keep your breadsticks fresh and delicious:
- Storage: Store leftover breadsticks in an airtight container at room temperature for up to 2 days.
- Reheating: Warm them in the oven at 350°F (175°C) for about 5-7 minutes, or until heated through.
- Make-Ahead: Prepare the dough up to 24 hours in advance and refrigerate. Roll and bake when ready to enjoy!
Nutritional Information & Dietary Adaptations
These breadsticks are not only delicious but can also fit into various dietary needs:
- Vegetarian-Friendly: This recipe is naturally vegetarian, making it a great option for everyone!
- Dairy-Free Adaptation: Substitute milk with almond, soy, or oat milk and omit the cheese.
- Gluten-Free Option: Use a gluten-free all-purpose flour blend to keep this recipe gluten-free.
- Lower-Calorie Option: You can reduce the amount of olive oil used or omit the cheese for a lighter version.
Equipment Recommendations
To ensure a smooth cooking experience, here are a few kitchen essentials:
- Baking Sheet: A sturdy baking sheet helps ensure even cooking.
- Parchment Paper: Lining your baking sheet with parchment makes cleanup a breeze and prevents sticking.
- Mixing Bowls: Use separate bowls for wet and dry ingredients for easier mixing.
- Measuring Cups and Spoons: Accurate measurements are key to perfect breadsticks.
Serving Suggestions
These Garlic Herb Breadsticks shine in many ways. Here are some ideas for serving:
- With Pasta: Serve alongside your favorite pasta dishes, from marinara to creamy Alfredo.
- As an Appetizer: Pair with marinara or garlic butter for dipping before the main course.
- For Soup Nights: They’re perfect for dunking into hearty soups or stews.
- At Gatherings: These breadsticks are great for potlucks and family gatherings, encouraging sharing and conversation.
Frequently Asked Questions
Here are some common queries about making Garlic Herb Breadsticks:
- Can I freeze these breadsticks? Yes! Freeze them in an airtight container for up to 3 months. Thaw and reheat when ready to enjoy.
- What if I don’t have fresh herbs? Dried herbs work just fine—use about 1 teaspoon for every tablespoon of fresh.
- Can I use whole wheat flour? Absolutely! Whole wheat flour adds a nutty flavor and is a healthier option.
- What are some good dips for these breadsticks? Marinara sauce, garlic butter, or even a creamy ranch dip are fantastic choices!
- How do I know when they are done baking? They should be golden brown on the outside and sound hollow when tapped.
- Can I add other flavorings? Yes! Feel free to experiment with different spices and cheese to customize your breadsticks.
- What’s the best way to store leftovers? Keep them in an airtight container at room temperature for up to 2 days.
- How do I make them vegan? Substitute the milk with a plant-based alternative and omit the cheese.
Conclusion
Making Garlic Herb Breadsticks is an experience filled with love and warmth, reminiscent of home-cooked meals shared with family and friends. With their quick preparation time and delightful flavor, these breadsticks are sure to become a staple in your own kitchen. So gather your loved ones, roll up your sleeves, and let the aroma of fresh-baked bread fill your home. Remember, cooking is about sharing joy—so let’s create those beautiful memories together, one breadstick at a time!
Garlic Herb Breadsticks (No Rise): 30-Minute Delight!
Ingredients
Dough
- 1 1/2 cups all-purpose flour
- 2 teaspoons baking powder
- 1/2 teaspoon salt
- 1/4 cup olive oil
- 3/4 cup milk
- 2 cloves garlic, minced
- 2 tablespoons chopped fresh herbs such as parsley, oregano, or basil
- 2 tablespoons grated Parmesan cheese optional
Instructions
- Preheat oven to 400°F (200°C). Whisk dry ingredients, then add wet ingredients and mix.
- Stir in garlic and herbs, then shape dough into breadsticks on a baking sheet.
- Brush with olive oil, sprinkle Parmesan if desired, and bake for 12-15 minutes until golden.