
Welcome to the Heart of Gluten-Free Baking
There’s something magical about the aroma of fresh rolls wafting through your home, a reminder of family gatherings and cozy dinners. If you’re looking for the perfect addition to your table, you’re in the right place. Today, I’m thrilled to share my cherished recipe for Dairy-Free & Gluten-Free Dinner Rolls that not only capture the essence of home but also embrace those with dietary restrictions. These rolls are soft, fluffy, and bursting with love—perfect for any occasion.
As a proud Southern cook, I learned early on that the best meals come from the heart. Each ingredient tells a story, and each preparation method evokes memories of laughter and warmth. So grab your apron, and let’s dive into this delightful journey of baking!
Why You’ll Love This Recipe
- Fluffy texture: These rolls are soft and airy, just like you would expect from traditional dinner rolls, making them a delicious treat for everyone at the table.
- Simple ingredients: Most of the components are pantry staples, so you can whip them up anytime the craving strikes.
- Dairy-free options: Tailored for those who are lactose intolerant or prefer dairy-free cooking, these rolls ensure everyone can enjoy them.
- Perfect for gatherings: Whether it’s a holiday feast or a casual family dinner, these rolls are a crowd-pleaser, adding that warm touch to your meal.
- Versatile and adaptable: This recipe is easy to modify; whether you want to add herbs or make it vegan, the possibilities are endless!
Ingredient Breakdown
Let’s gather our ingredients, making sure we choose the best for our gluten-free dinner rolls. Here’s what you’ll need:
- 3 cups gluten-free flour: I like to use a blend that includes xanthan gum for elasticity. Brands like King Arthur or Bob’s Red Mill work wonders.
- 2 tsp instant yeast: This helps our rolls rise beautifully. Make sure it’s fresh for optimal results.
- 2 tbsp granulated sugar: A touch of sweetness enhances the flavor and helps activate the yeast.
- 1 tsp salt: Essential for enhancing the overall taste of the rolls.
- 2 eggs, at room temperature: They provide structure and moisture. If you’re vegan, you can substitute with flax eggs (1 tbsp ground flaxseed + 2.5 tbsp water per egg).
- 1/4 cup unsalted butter, softened: For a dairy-free option, use a plant-based butter.
- 1 1/4 cups milk, at room temperature: Any milk alternative like almond or oat milk works great here.
- 1 tsp apple cider vinegar or lemon juice: This adds a slight tang and helps with the dough’s texture.
How to Make These Delicious Dinner Rolls
Now that we have everything ready, let’s get to the fun part—baking! Follow these simple steps to create your gluten-free dinner rolls:
Step 1: Prepare Your Dough
In a large bowl, combine the gluten-free flour, instant yeast, sugar, and salt. Mix well so that the ingredients are evenly distributed.
Step 2: Mix Wet Ingredients
In another bowl, whisk together the eggs, melted butter, milk, and apple cider vinegar until well combined. Make sure your liquids are at room temperature for the best results.
Step 3: Combine Wet and Dry
Pour the wet ingredients into the dry mixture. Stir until a thick, sticky dough forms. Don’t worry if it looks different from traditional dough; that’s perfectly normal!
Step 4: First Rise
Cover the bowl with a clean kitchen towel and let the dough rise in a warm place for about 1 hour, or until it has doubled in size. This is where the magic happens!
Step 5: Shape Your Rolls
After the dough has risen, lightly grease your hands and divide the dough into equal portions. Shape each piece into a ball and place them on a baking sheet lined with parchment paper, leaving space between each roll.
Step 6: Second Rise
Cover the shaped rolls with the kitchen towel again and let them rise for another 30 minutes. During this time, preheat your oven to 375°F (190°C).
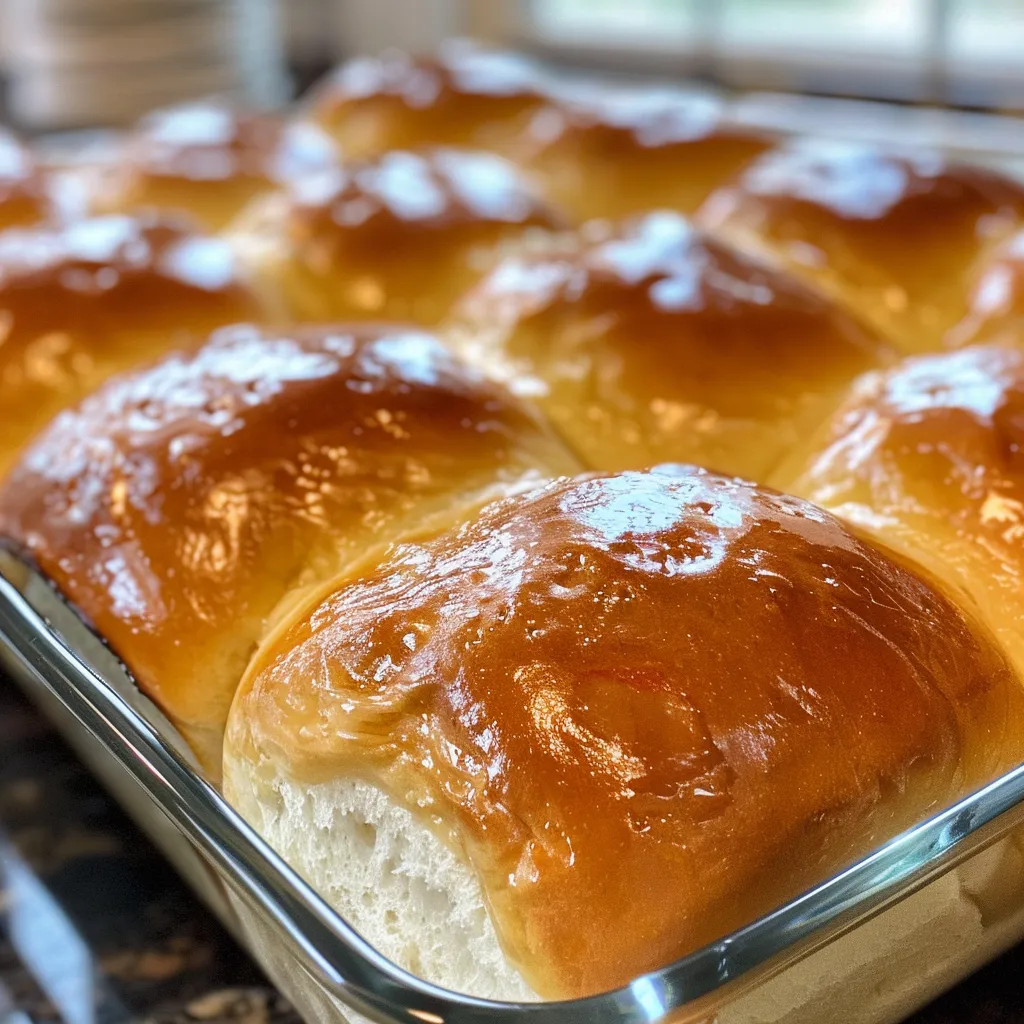
Step 7: Bake
Bake the rolls for 20-25 minutes or until they are golden brown on top. The aroma will fill your kitchen and bring everyone running!
Step 8: Enjoy!
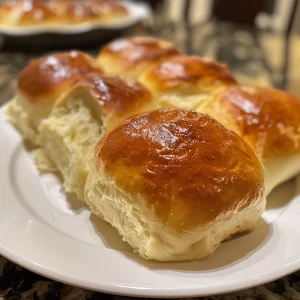
Once baked, allow them to cool slightly before serving. These rolls are best enjoyed warm, with a pat of butter or your favorite spread.
Pro Tips for Perfect Rolls
To help you achieve the best results, here are some expert insights:
- Use quality gluten-free flour: A good blend with xanthan gum is essential for the rolls to rise properly.
- Room temperature ingredients: Ensuring your eggs and milk are at room temperature helps the dough rise more effectively.
- Don’t rush the rising time: Patience is key! Allowing the dough to rise fully will provide the best texture.
- Check your oven temperature: Use an oven thermometer to ensure that your oven is baking at the right temperature.
- Experiment with flavors: Try adding herbs, garlic powder, or cheese for a savory twist!
- Storage tips: These rolls can be stored in an airtight container for up to 3 days at room temperature or frozen for longer shelf life.
- Reheat gently: If you have leftovers, reheat them in the oven to restore their fluffiness.
- Get creative: Use these rolls as bases for sliders or serve them alongside soups and salads.
Avoiding Common Mistakes
Every baker has their share of mishaps. Here are some common mistakes to watch out for:
- Using expired yeast: Always check your yeast’s expiration date to ensure it activates properly.
- Overmixing the dough: Mixing too much can lead to dense rolls. Just mix until combined.
- Not measuring flour correctly: Always spoon the flour into your measuring cup and level it off with a knife for accuracy.
- Skipping the second rise: This step is crucial for achieving a light texture.
- Ignoring the texture: If the dough feels too dry, add a bit more milk; if too wet, sprinkle a little extra flour.
Variations to Try
Feeling adventurous? Here are some delightful variations you can try with this recipe:
- Herbed Rolls: Add 1 tsp of dried herbs like thyme or rosemary for a fragrant twist.
- Garlic Rolls: Mix in minced garlic or garlic powder to the dough for a savory flavor.
- Cheese-Stuffed Rolls: Incorporate small pieces of your favorite cheese into the center of each roll before baking.
- Sweet Rolls: Add cinnamon and sugar into the dough for a sweet breakfast treat.
Storage and Make-Ahead Instructions
These rolls are versatile and can be made ahead of time:
- Make-ahead: Prepare the dough and shape it into rolls. Freeze them before the second rise. When ready to bake, let them thaw and rise at room temperature before baking.
- Storage: Store baked rolls in an airtight container for up to 3 days or freeze for up to 3 months. Reheat in the oven before serving.
Frequently Asked Questions (FAQs)
Let’s address some common questions about gluten-free baking:
- Can I use regular flour instead of gluten-free flour? No, this recipe is specifically designed for gluten-free flour, which behaves differently than regular flour.
- What can I substitute for eggs? For a vegan option, use flax eggs or applesauce as a binding agent.
- How do I know when the rolls are done baking? The tops should be golden brown, and tapping the bottom should sound hollow.
- Can I make these rolls vegan? Yes, simply substitute the eggs and butter with suitable alternatives.
- What can I serve with these rolls? They pair beautifully with soups, salads, or as a side for your main dishes.
- How long will the rolls stay fresh? They can be stored at room temperature for up to 3 days, or frozen for longer storage.
- Can I double the recipe? Absolutely! Just ensure you have enough space on your baking sheets!
- What’s the best way to reheat leftovers? Wrap them in foil and heat in the oven for about 10 minutes to restore their fluffiness.
Nourishing with Nutrition Tips
These dinner rolls not only taste great but can also be part of a balanced diet:
- Fiber boost: Consider adding ground flaxseeds or chia seeds to the dough for extra fiber.
- Whole grain options: Experiment with whole grain gluten-free flours for added nutrients.
- Healthy fats: Use olive oil in place of butter for a heart-healthy option.
Essential Equipment for Success
To ensure your baking journey is smooth, here are some helpful tools:
- Mixing bowls: A set of various sizes will help with ingredient prep.
- Measuring cups and spoons: Accurate measurements are key in baking.
- Baking sheets: Use heavy-duty sheets for even baking.
- Parchment paper: This prevents sticking and makes cleanup easier.
- Kitchen towel: Perfect for covering dough while it rises.
Serving Suggestions
These dinner rolls are incredibly versatile; here are a few ideas to serve them:
- As a side: Pair them with your favorite soups or stews for a comforting meal.
- With dips: Serve alongside hummus or a savory spread for a delicious appetizer.
- For sliders: Use them as a base for mini sandwiches filled with your choice of fillings.
Conclusion
As we gather around the table, let these Dairy-Free & Gluten-Free Dinner Rolls serve as a reminder that food is about connection, love, and sharing. I hope you enjoy making and savoring these delightful rolls as much as I do. Remember, the kitchen is a space of warmth and joy, where every meal is a chance to create memories. Happy baking, my friends!
Dairy-Free & Gluten-Free Dinner Rolls - Alrightwithme
Ingredients
Dry Ingredients
- 3 cups gluten-free flour
- 2 tsp instant yeast
- 2 tbsp granulated sugar
- 1 tsp salt
Wet Ingredients
- 2 eggs eggs, room temperature
- 1/4 cup unsalted butter, softened (dairy-free optional)
- 1 1/4 cups milk, room temperature (dairy-free or lactose-free possible)
- 1 tsp apple cider vinegar or lemon juice
Instructions
- In a large bowl, combine gluten-free flour, yeast, sugar, and salt.
- In a separate bowl, whisk eggs, dairy-free butter, milk, and apple cider vinegar.
- Gradually add wet ingredients to dry ingredients, mixing until a dough forms.
- Divide dough into 8 equal portions and shape into rolls.
- Place rolls on a baking sheet and let rise for 10 minutes.
- Bake at 375°F (190°C) for 20 minutes until golden brown.