
Welcome to the Heart of Homemade Dinner Rolls
There’s something truly magical about homemade dinner rolls. Picture this: the warm, inviting aroma of freshly baked bread fills your home, transporting you back to your grandmother’s kitchen, where every loaf was a labor of love. This recipe for soft and fluffy homemade dinner rolls is not just about baking; it’s about creating memories, sharing love, and bringing your family together around the dinner table. In this guide, we’ll walk you through every step of the process to ensure your rolls turn out perfect every time. So, if you’re looking for the ultimate recipe that combines tradition with a sprinkle of personal touch, you’ve come to the right place.
\n
Why You’ll Love This Recipe
- Impossibly Soft Texture: These rolls are fluffy and tender, melting in your mouth with every bite.
- Perfect for Any Occasion: Whether it’s a weeknight dinner or a holiday feast, these rolls are versatile enough to complement any meal.
- Simple Ingredients: Made with pantry staples, you can whip these up anytime you want a comforting treat.
- Family-Friendly Fun: Involve your kids in the process! Kneading dough is a wonderful way to create shared memories in the kitchen.
- Make Ahead Options: With the right techniques, you can prepare these rolls ahead of time, making your life easier when hosting.
\n
Essential Ingredients for Fluffy Homemade Bread
Let’s break down the ingredients that make these rolls not just good, but extraordinary:
- 1 cup warm milk (about 110°F): This activates the yeast, creating a perfect rise.
- 2 1/4 teaspoons active dry yeast: The star ingredient that gives your rolls that delightful fluffiness.
- 1/4 cup granulated sugar: Sweetens the dough and feeds the yeast for a better rise.
- 1 large egg (room temperature): Adds richness and helps bind the ingredients.
- 1/4 cup unsalted butter (melted): For that rich, buttery flavor that makes every bite heavenly.
- 1 teaspoon salt: Enhances flavor and controls yeast activity.
- 3 1/2 cups all-purpose flour, plus more for dusting: Gives structure to your rolls.
- 1/2 cup unsalted butter (melted, for brushing): Adds a beautiful finish and extra flavor.
- Optional topping: 2 tablespoons honey mixed with 1 tablespoon melted butter: A sweet glaze that takes these rolls to the next level.
\n
Step-by-Step Instructions to Make Your Dinner Rolls
Now, let’s dive into the process! Follow these simple steps to achieve the perfect dinner rolls:
- 1. Activate the Yeast: In a large bowl, combine the warm milk and yeast. Let it sit for 5 minutes until foamy. This proves your yeast is active.
- 2. Mix the Ingredients: Add the sugar, egg, 1/4 cup melted butter, and salt to the yeast mixture. Whisk until combined.
- 3. Form the Dough: Gradually add the flour, one cup at a time, mixing until a shaggy dough forms.
- 4. Knead the Dough: Turn the dough out onto a lightly floured surface. Knead for 6 to 8 minutes until the dough is smooth and elastic. It should spring back when lightly poked.
- 5. First Rise: Place the dough in a lightly oiled bowl, turning to coat. Cover the bowl with plastic wrap or a clean kitchen towel. Let it rise in a warm spot for 1 to 1.5 hours, or until doubled in size.
- 6. Shape the Rolls: Gently punch down the risen dough. Divide the dough into 12 equal pieces. Roll each piece into a smooth ball.
- 7. Second Rise: Arrange the dough balls in a greased 9×13 inch baking pan, leaving about 1 inch between them. Cover the pan loosely and let the rolls rise again for 30 to 45 minutes.
- 8. Preheat the Oven: Preheat your oven to 375°F (190°C).
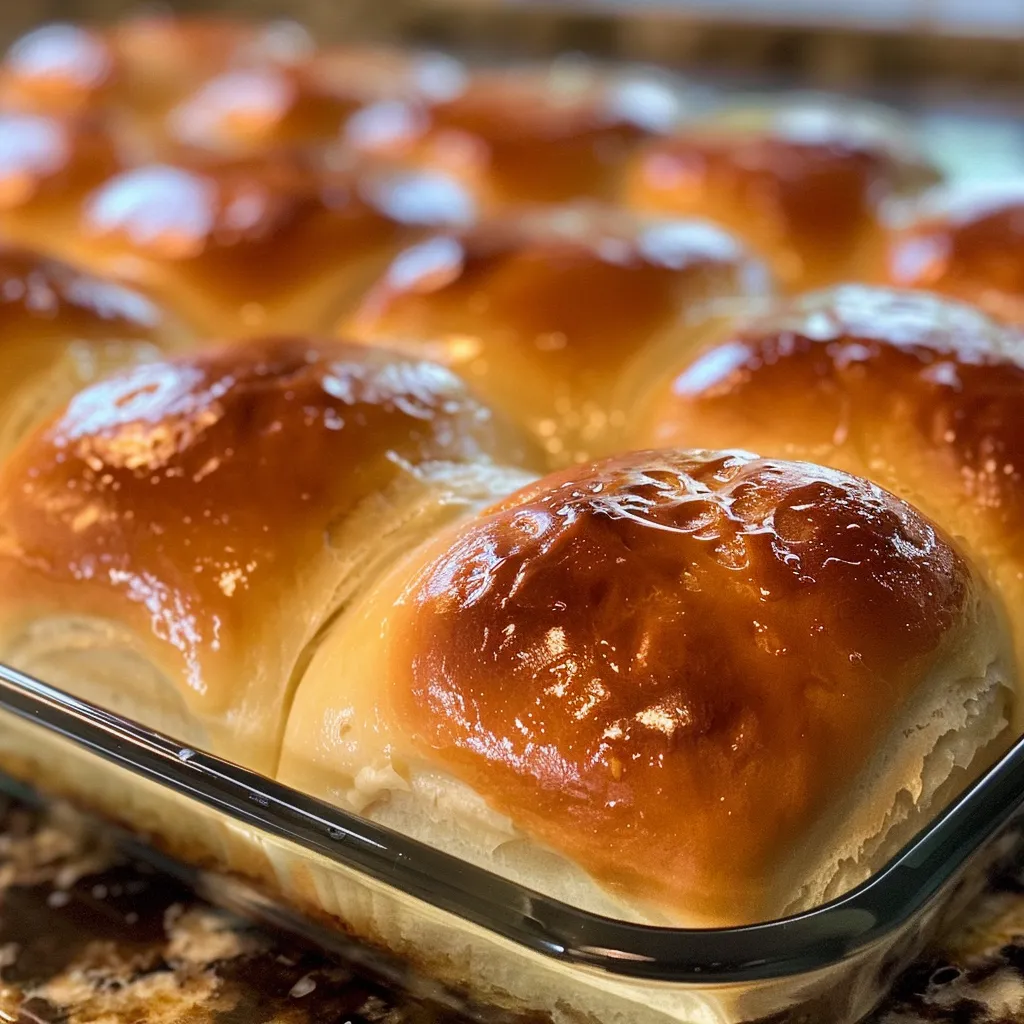
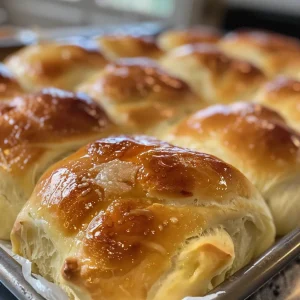
- 9. Bake the Rolls: Bake for 15 to 18 minutes, or until golden brown on top.
- 10. Brush with Butter: Immediately after removing the rolls from the oven, brush the tops generously with melted butter or the honey-butter mixture.
- 11. Serve Warm: These soft dinner rolls are best enjoyed warm, right out of the oven!
\n
Pro Tips for Success with Your Dinner Rolls Baking
- Use the Right Temperature: Ensure your milk is warm, but not hot. Too hot can kill the yeast, and too cold can slow its activation.
- Don’t Rush the Rise: Allowing the dough to rise adequately is key. If you’re in a hurry, try placing it in a warm oven (turned off) for a faster rise.
- Knead Thoroughly: Proper kneading develops gluten, which is essential for the structure of your rolls.
- Brush with Butter: Brushing the rolls with melted butter right out of the oven adds flavor and keeps them soft.
- Keep Them Covered: Cover your rolls while they rise to prevent the dough from drying out.
- Experiment with Flavors: Feel free to add herbs, cheese, or spices for a unique twist on the classic recipe.
\n
Common Mistakes and Troubleshooting
Even the best bakers can encounter issues. Here are some common mistakes and how to avoid them:
- Dense Rolls: This often indicates that the dough wasn’t kneaded enough or that the yeast was inactive. Always check your yeast before starting!
- Dry Rolls: Make sure to brush with enough melted butter, and store them properly after baking.
- Uneven Baking: If your rolls are browning unevenly, rotate the pan halfway through baking.
\n
Variations on the Classic Recipe
While this classic recipe is beloved, you can easily tailor it to your taste:
- Garlic Butter Rolls: Add minced garlic to the melted butter for a fragrant twist.
- Herb-Infused Rolls: Mix in dried herbs like rosemary or thyme into the dough for a savory flavor.
- Sweet Cinnamon Rolls: Add cinnamon and sugar to the dough before rolling to create delightful cinnamon rolls.
- Cheese-Stuffed Rolls: Place a small cube of cheese in the center of each dough ball for a cheesy surprise.
\n
Storage and Make-Ahead Instructions
To keep your rolls fresh, consider these storage tips:
- Room Temperature: Store in an airtight container at room temperature for up to 3 days.
- Freezing: Freeze baked rolls by placing them in a zip-top bag. They will last up to 3 months. Reheat in a warm oven before serving.
- Make Ahead: You can prepare the dough and let it rise, then shape and refrigerate overnight. Take them out to rise before baking.
\n
Comprehensive FAQ
- Can I use instant yeast instead of active dry yeast? Yes, but you can skip the proofing step and add it directly to the dry ingredients.
- What if my dough isn’t rising? Check the yeast freshness, and ensure your environment is warm enough for rising.
- Can I add whole wheat flour? Yes, you can substitute part of the all-purpose flour with whole wheat flour for a healthier option.
- How can I make them sweeter? Increase the sugar to your desired sweetness level, or add honey to the dough.
- Is it possible to double this recipe? Absolutely! Just make sure you have a large enough bowl for mixing and a bigger baking pan.
- Can I make these rolls gluten-free? Yes! Use a gluten-free all-purpose flour blend.
- What should I serve with these rolls? They pair wonderfully with soups, stews, or as a side to your favorite entrees.
- What’s the best way to reheat these rolls? Place them in a warm oven or microwave briefly until just heated through.
\n
Nutritional Tips and Dietary Adaptations
For those watching their diet, consider these modifications:
- Lower Sugar: Reduce the sugar content for a less sweet roll.
- Butter Substitutes: Use coconut oil or a plant-based butter alternative for a dairy-free option.
- Whole Grain Option: Incorporate whole wheat flour for added fiber.
\n
Equipment Recommendations
Having the right tools can make a world of difference:
- Mixing Bowl: A large bowl for mixing the dough is essential.
- Measuring Cups and Spoons: Accurate measurements are crucial for baking success.
- Oven Thermometer: Ensures your oven is at the right temperature for baking.
- Silicone Baking Mat: Helps prevent sticking and makes cleanup a breeze.
- Kitchen Towel: For covering dough while it rises, keeping it warm and preventing drying out.
\n
Serving Suggestions to Delight Your Family
When it’s time to serve, consider these delightful ideas:
- Warm with Butter: Serve the rolls warm with a pat of butter melting on top.
- Honey Drizzle: A drizzle of honey or a sprinkle of cinnamon sugar can elevate the flavor beautifully.
- Accompanied by Jams: Offer a selection of jams or preserves for a sweet touch.
So there you have it—your complete guide to mastering the art of making soft and fluffy homemade dinner rolls. As you prepare these rolls, remember that each step is an opportunity to create cherished memories. Baking is not just about the end product; it’s about the love and care that you put into it. Enjoy every moment in your kitchen, and may your rolls bring warmth and joy to your family gatherings.
The Ultimate Soft and Fluffy Homemade Dinner Rolls (Classic Buttery Recipe)
Ingredients
Dough
- 1 cup warm milk (about 110°F)
- 2 1/4 teaspoons active dry yeast
- 1/4 cup granulated sugar
- 1 large egg, room temperature
- 1/4 cup unsalted butter, melted
- 1 teaspoon salt
- 3 1/2 cups all-purpose flour, plus more for dusting
- 1/2 cup unsalted butter, melted, for brushing
- 2 tablespoons honey Optional topping
- 1 tablespoon melted butter for honey mixture
Instructions
- Combine warm milk and yeast; let sit 5 min until foamy.
- Add sugar, egg, melted butter, and salt; whisk to combine.
- Gradually mix in flour until a shaggy dough forms; knead 6-8 min until smooth.
- Let dough rise in oiled bowl, covered, for 1-1.5 hours until doubled.
- Punch down dough, divide into 12 balls, arrange in greased pan, and let rise 30-45 min.
- Preheat oven to 375°F (190°C); bake rolls 15-18 min until golden. Brush with melted butter or honey-butter mixture.