
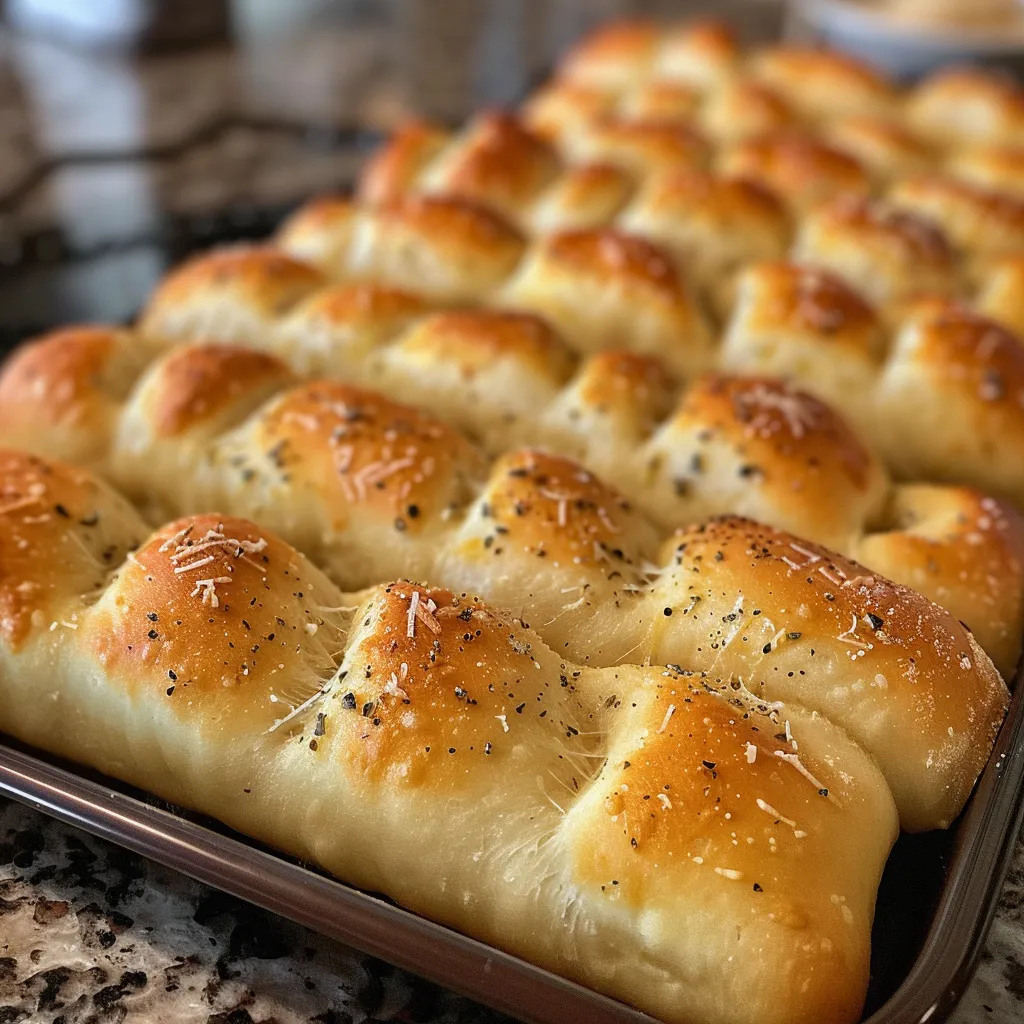
Welcome to the heart of comfort food! Today, we’re diving into a cherished recipe that will bring the familiar warmth of Olive Garden right into your kitchen. These copycat Olive Garden breadsticks are not just about the taste; they evoke memories of family dinners, laughter, and love shared over a meal. With each bite, you’ll be transported to a place filled with nostalgia and joy. Let’s embark on this delicious journey together and create something truly special!
Why You’ll Love This Recipe
This isn’t just any breadstick recipe; it’s a labor of love. Here are five reasons why you’ll adore making these breadsticks:
- Easy to Make: With simple ingredients you probably have on hand, this recipe is straightforward and perfect for bakers of all levels.
- Customizable: Feel free to personalize the flavor with your favorite herbs or spices to truly make this recipe your own!
- Perfect for Sharing: These breadsticks are best enjoyed fresh out of the oven and shared with loved ones, making them a great addition to any meal.
- Memorable Taste: The combination of garlic butter and Parmesan cheese creates a rich flavor profile that’s sure to please everyone at the table.
- Great for Any Occasion: Whether it’s a casual family dinner or a festive gathering, these breadsticks are a hit!
Ingredients: A Closer Look
Before we start, let’s gather our ingredients. Here’s what you’ll need to create those delightful breadsticks:
- 4 cups all-purpose flour: Essential for the structure of your breadsticks. You can substitute with bread flour for a chewier texture.
- 1 tablespoon sugar: This helps activate the yeast, contributing to that perfect rise.
- 1 tablespoon salt: Adds flavor and balances the sweetness of the sugar.
- 2 teaspoons instant yeast: Instant yeast allows for a quicker rise, making your baking process smoother.
- 1 ½ cups warm water: The warmth (about 110°F) is crucial for activating your yeast without killing it.
- ¼ cup unsalted butter (melted): This adds richness and flavor to your dough.
- 2 tablespoons garlic powder: A must for that signature garlic flavor.
- 2 tablespoons Italian seasoning: Infuses the breadsticks with a delightful herbaceous note.
- ½ cup grated Parmesan cheese: Sprinkle it on top for that extra layer of flavor.
- Extra melted butter for brushing: This is what makes your breadsticks glossy and irresistible!
Step-by-Step Instructions
Now, let’s roll up our sleeves and get started! Follow these steps to craft your breadsticks:
- In a large mixing bowl, combine warm water, sugar, and instant yeast. Let it sit for about 5-10 minutes until frothy. This is your yeast mixture.
- In another bowl, whisk together the flour and salt.
- Once the yeast mixture is frothy, add the melted butter. Gradually add the flour mixture, stirring until a dough forms.
- Transfer the dough to a floured surface and knead for about 5-7 minutes until smooth and elastic.
- Place the dough in a greased bowl, cover with a damp cloth, and let it rise in a warm place for about 1 hour until doubled in size.
- Punch the dough down, divide into 12 equal pieces, and roll each into a long stick, about 6-8 inches long.
- Cover the shaped breadsticks with a cloth and let them rise for another 30 minutes.
- Preheat your oven to 400°F (200°C).
- Bake the breadsticks for 12-15 minutes or until golden brown.
- Melt about ¼ cup of butter in a small saucepan, stir in garlic powder, Italian seasoning, and a pinch of salt.
- Brush the baked breadsticks with the garlic butter mixture and sprinkle with grated Parmesan cheese.
- Serve warm with marinara sauce or your favorite dipping sauce.
Pro Tips for Perfect Breadsticks
To ensure your breadsticks come out perfectly every time, consider these expert tips:
- Warm water: Ensure it’s between 100-110°F to activate the yeast without killing it.
- Measure flour correctly: Use a digital kitchen scale or the spoon-and-level method to avoid using too much flour.
- Knead well: Proper kneading develops gluten, which gives the breadsticks their chewy texture.
- Don’t rush the rises: Allow the dough to rise fully for the best texture and flavor.
- Experiment with toppings: Try adding different herbs or cheese to the dough for unique flavors.
- Brush immediately: Apply the garlic butter mixture right after baking for maximum flavor absorption.
- Store properly: Keep leftovers in an airtight container to maintain freshness.
- Use parchment paper: Lining your baking sheet can help prevent sticking and make cleanup easier.
Common Mistakes and Troubleshooting
Even the best bakers encounter hiccups. Here are common issues and how to fix them:
- Dough not rising: Ensure your yeast is fresh and the water temperature is correct.
- Dense breadsticks: This can happen from over-kneading or using too much flour. Aim for a soft, elastic dough.
- Burnt tops: If your breadsticks are browning too quickly, cover them loosely with foil halfway through baking.
- Too salty or bland: Adjust the salt in your recipe based on your taste preferences and dietary needs.
Delicious Variations
Feeling adventurous? Here are some scrumptious variations to try:
- Cheesy Garlic Breadsticks: Incorporate shredded mozzarella cheese into the dough for a gooey center.
- Herb-Infused Breadsticks: Mix in fresh herbs like rosemary or thyme for an aromatic twist.
- Spicy Breadsticks: Add crushed red pepper flakes to the garlic butter for a spicy kick.
- Sweet Cinnamon Breadsticks: Replace garlic with cinnamon and sugar for a sweet treat, perfect for dessert!
Storage and Make-Ahead Instructions
Want to enjoy these breadsticks later? Here’s how to store and prepare in advance:
- Room Temperature: Store leftover breadsticks in an airtight container for up to 3 days.
- Refrigerator: For longer freshness, you can store them in the fridge for up to a week.
- Freezer: Freeze the uncooked shaped breadsticks for up to 3 months. Just thaw and bake when you’re ready!
- Reheating: Warm leftover breadsticks in the oven for about 5-7 minutes at 350°F to regain their softness.
Frequently Asked Questions
Let’s tackle some common questions about making these delightful breadsticks:
- Can I use active dry yeast instead of instant yeast? Yes, but you’ll need to proof it first in warm water with sugar before adding.
- Can I make these breadsticks vegan? Substitute the butter with a plant-based option and use non-dairy milk.
- What if my dough is too sticky? Gradually add more flour until it reaches a manageable consistency.
- How can I make them fluffier? Ensure you let the dough rise fully and do not over-knead it.
- Can I double the recipe? Absolutely! Just ensure you have enough space for the dough to rise.
- What should I serve with these breadsticks? They pair wonderfully with marinara sauce, Alfredo, or even a hearty soup.
- How do I know when the breadsticks are done? They should be golden brown and sound hollow when tapped on the bottom.
- Can I add toppings before baking? Yes, sprinkle toppings like cheese or herbs before baking for an extra flavor boost.
Nutrition Tips and Dietary Adaptations
For those mindful of dietary needs, here are a few adaptations:
- Gluten-Free: Substitute all-purpose flour with a gluten-free blend designed for baking.
- Low-Carb: Use almond flour or coconut flour for a low-carb version.
- Lower Sodium: Reduce the amount of salt in the dough and the garlic butter for a healthier option.
Essential Equipment
Having the right tools can make your baking experience smoother. Here’s what I recommend:
- Mixing Bowls: A set of varying sizes is great for managing different steps.
- Measuring Cups and Spoons: Accurate measurements are key to baking success.
- Rolling Pin: Helps in shaping your breadsticks evenly.
- Baking Sheet: A sturdy sheet lined with parchment paper will prevent sticking.
- Kitchen Towel: Use it to cover the dough while it rises, keeping it warm.
Serving Suggestions
Finally, let’s talk about how to enjoy your freshly baked breadsticks:
- With Dipping Sauces: Serve with marinara, Alfredo, or a zesty olive oil and vinegar mix.
- As a Side Dish: Pair with soups, salads, or pasta for a complete meal.
- On a Charcuterie Board: Include them among cheeses, meats, and olives for a lovely appetizer spread.
Every time you bake these breadsticks, you’re creating not just a dish but a memory to share with those you love. So gather your ingredients, channel your inner chef, and let’s make magic happen in the kitchen. Happy baking!
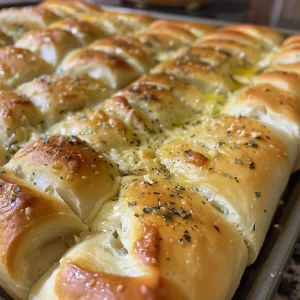
The Perfect Copycat Olive Garden Breadsticks
Ingredients
Dough
- 4 cups all-purpose flour
- 1 tablespoon sugar
- 1 tablespoon salt
- 2 teaspoons instant yeast
- 1 ½ cups warm water
- ¼ cup unsalted butter (melted)
- 2 tablespoons garlic powder
- 2 tablespoons Italian seasoning
- ½ cup grated Parmesan cheese
Garlic butter
- ¼ cup melted butter
- 2 teaspoons garlic powder
- 2 teaspoons Italian seasoning
- to taste salt pinch
Instructions
- Mix warm water, sugar, and yeast; let sit until frothy.
- Combine flour and salt; add to yeast mixture with melted butter, knead into a dough.
- Let dough rise in a warm place for 1 hour, then divide into 12 sticks.
- Shape into sticks, let rise for 30 minutes, then bake at 400°F (200°C) for 12-15 minutes.
- Melt butter, stir in garlic, Italian seasoning, brush on baked breadsticks, sprinkle Parmesan.