
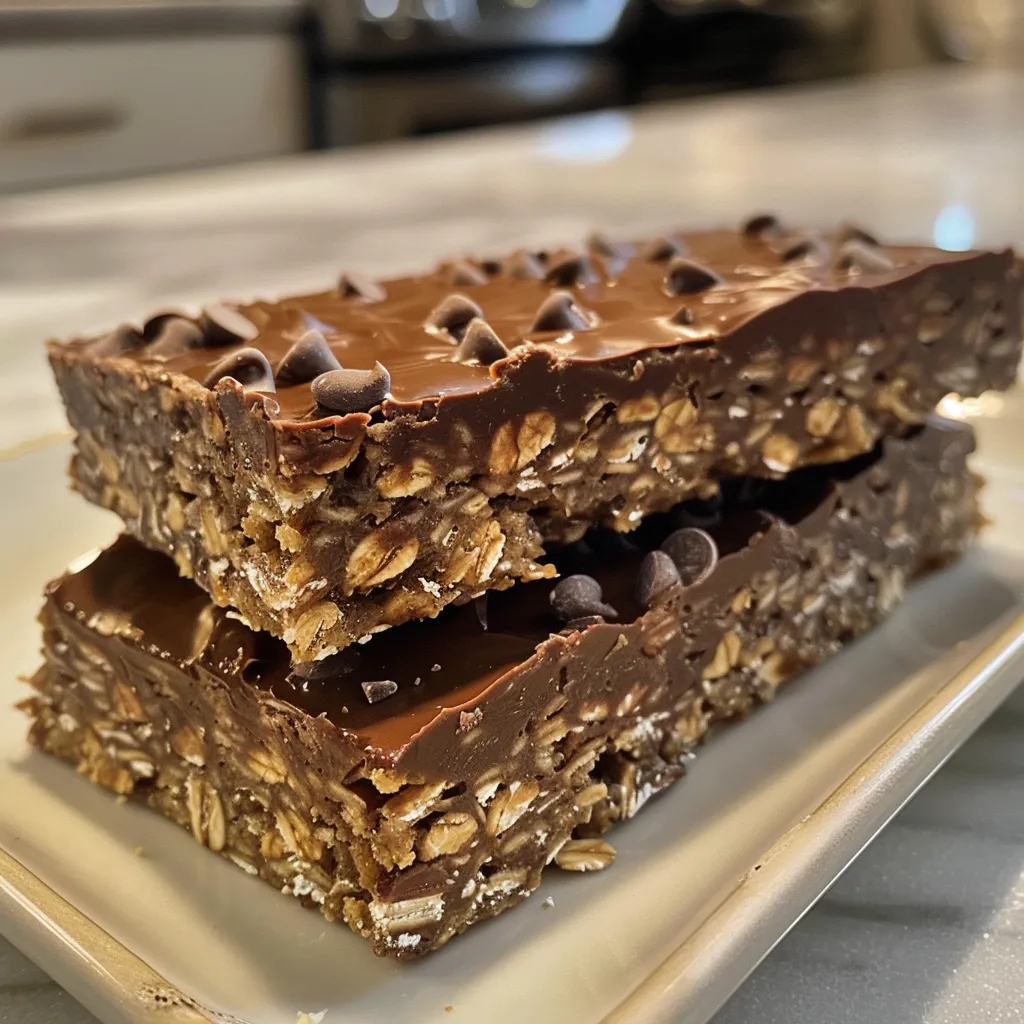
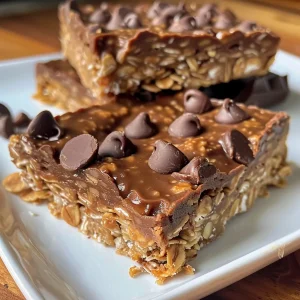
Why No Bake Chocolate Oat Bars Will Steal Your Heart
In the whirlwind of life, where every moment counts, there’s something incredibly soothing about whipping up a batch of no bake chocolate oat bars. These bars, with their rich chocolatey goodness and hearty oats, are more than just a snack; they’re a love letter to simplicity and comfort. Whether you’re looking for a quick treat for a gathering or a nostalgic reminder of childhood, these bars are sure to bring joy and warmth to your kitchen.
Why You’ll Love This Recipe
As we gather around the table to share homemade delights, these no bake chocolate oat bars offer a multitude of reasons to fall in love with them:
- Quick and Easy: Whip these up in under 30 minutes—no baking required!
- Perfect for Sharing: A delightful treat that’s perfect for potlucks, picnics, or cozy family gatherings.
- Customizable: Easily adjust ingredients to fit dietary preferences or what you have on hand.
- Healthy Indulgence: Packed with oats and peanut butter, they provide a nutritious twist to satisfy your sweet tooth.
- Kid-Friendly: A fun recipe that kids can help with, creating cherished memories in the kitchen.
Ingredients Breakdown
Let’s dive into the heart of our no bake chocolate oat bars recipe. Here’s what you’ll need:
- 1 cup butter: This rich ingredient is essential for a creamy texture and helps bind everything together.
- 1/2 cup packed brown sugar: Adds sweetness and a gentle hint of molasses flavor.
- 1 teaspoon vanilla extract: A splash of vanilla enhances the flavor, giving a warm and inviting aroma.
- 3 cups quick cooking oats: The star ingredient, offering chewiness and heartiness to each bite.
- 1 cup semisweet chocolate chips: For a luscious, chocolatey layer that will melt in your mouth.
- 1/2 cup peanut butter: Provides a nutty depth and richness, making these bars a satisfying treat.
Ingredient Substitutions
If you’re looking to tailor this recipe to your needs or preferences, here are some substitutions:
- Butter: Use coconut oil for a dairy-free option.
- Brown Sugar: Substitute with maple syrup for a natural sweetener.
- Peanut Butter: Almond or cashew butter works beautifully as alternatives.
- Oats: If you prefer a gluten-free version, make sure to use certified gluten-free oats.
Step-by-Step Instructions
Now that we have our ingredients ready, let’s get cooking! Follow these simple steps to create your no bake chocolate oat bars:
- Grease a 9×9 inch square pan with butter or cooking spray to prevent sticking.
- Melt the butter in a large saucepan over medium heat. Stir in the brown sugar and vanilla, mixing until well combined.
- Add the quick oats to the saucepan and cook over low heat for 2-3 minutes, ensuring everything is blended nicely.
- Press half of the oat mixture into the bottom of the prepared pan, creating a solid base.
- In a separate saucepan, melt the chocolate chips and peanut butter over low heat, stirring frequently until smooth.
- Pour the chocolate mixture over the oat crust, spreading it evenly with a knife or the back of a spoon.
- Crumble the remaining oat mixture over the chocolate layer, pressing gently to adhere.
- Cover the pan and refrigerate for 2-3 hours or until set. For best results, let it chill overnight.
- Before serving, bring to room temperature and cut into squares. Enjoy!
Pro Tips for Success
To ensure your no bake chocolate oat bars turn out perfect every time, consider these expert tips:
- Chill Time: Allow ample chilling time; overnight is best for a well-set bar.
- Uniform Cutting: Use a sharp knife to cut neat squares, and wipe the blade between cuts for clean edges.
- Texture Preference: Adjust the oats to your liking—more oats will yield a chewier bar.
- Experiment with Flavors: Add a pinch of sea salt on top for a sweet-savory contrast or incorporate spices like cinnamon for extra warmth.
- Store Properly: Keep bars stored in an airtight container in the fridge to maintain freshness.
- Freezing: These bars freeze well! Wrap individual portions in plastic wrap for a quick treat on the go.
- Layering: Get creative with layers—consider adding a layer of nuts or dried fruits for added texture.
- Give as Gifts: Package these bars in a beautiful tin to share with friends and family as a heartfelt gift.
Common Mistakes and Troubleshooting
Even the best cooks can encounter hiccups. Here are some common mistakes to avoid and how to troubleshoot them:
- Bars Falling Apart: Ensure that your mixture is well-combined and pressed firmly into the pan.
- Chocolate Not Melting: Use low heat and stir continuously to prevent burning.
- Too Sweet: Balance sweetness by reducing sugar or using dark chocolate instead of semisweet.
- Sticky Bars: If they’re too sticky, they may need more oats or a longer chill time.
Delicious Variations to Try
Feeling adventurous? Here are some delightful variations to customize your no bake chocolate oat bars:
- Nutty Delight: Add chopped nuts like almonds or walnuts for a crunchy texture.
- Fruit Fusion: Incorporate dried fruits such as cranberries or raisins for a burst of flavor.
- Mint Chocolate: Add mint extract to the chocolate layer for a refreshing twist.
- Spicy Kick: A sprinkle of cayenne or chili powder can add an unexpected heat to your bars.
Storage and Make-Ahead Instructions
These bars are perfect for meal prep! Here’s how to store and prepare them ahead of time:
- Refrigerator: Store in an airtight container in the fridge for up to one week.
- Freezer: Wrap and freeze individual bars for up to three months—ideal for a quick snack!
- Make-Ahead: Prepare the bars a day or two in advance to allow flavors to meld and enhance.
Comprehensive FAQ
Here are some frequently asked questions about our no bake chocolate oat bars:
- Can I use old-fashioned oats instead of quick oats? Yes, but the texture will be chewier. Adjust cooking time accordingly.
- How do I make these bars gluten-free? Simply use certified gluten-free oats and ensure all other ingredients are gluten-free.
- Can I substitute chocolate chips? Absolutely! Use dark chocolate, white chocolate, or even carob chips for a fun twist.
- What’s the best way to cut these bars? Use a sharp knife and cut while they’re slightly warm for cleaner edges.
- How can I enhance the flavor? Try adding spices or flavor extracts like almond or coconut for a unique taste.
- What’s the nutrition breakdown? Each bar provides a good balance of carbohydrates and protein, thanks to the oats and peanut butter.
- Can I add protein powder? Yes, you can mix in protein powder for a nutritional boost!
- Are these bars suitable for kids? Definitely! They’re a wholesome snack that kids will love.
Nutrition Tips and Dietary Adaptations
For those mindful of nutrition, here are some tips on adapting this recipe:
- Reduce Sugar: Use less brown sugar or substitute with a natural sweetener like honey or agave.
- Protein Boost: Add a scoop of protein powder into the oat mixture for a filling snack.
- Healthy Fats: Consider using nut butters that are unsweetened for a healthier fat option.
- Vegan Version: Replace butter with coconut oil and honey with maple syrup for a vegan treat.
Essential Equipment Recommendations
To make the cooking process seamless, here are some kitchen essentials:
- 9×9 Inch Square Pan: Ideal for setting the bars perfectly.
- Large Saucepan: For melting and mixing ingredients.
- Spatula: Useful for spreading chocolate and pressing down the oat mixture.
- Sharp Knife: For cutting the bars into perfect squares.
Serving Suggestions
When it comes to serving your no bake chocolate oat bars, consider these delightful options to elevate your experience:
- With Ice Cream: Serve warm with a scoop of vanilla or chocolate ice cream for an indulgent dessert.
- On a Cheese Board: Pair with fresh fruits and nuts for a charming cheese board presentation.
- With a Cup of Coffee: Enjoy alongside your morning brew for a satisfying start to the day.
- Gift Idea: Package in a decorative box for a thoughtful homemade gift.
Conclusion
As you gather around the table to enjoy these no bake chocolate oat bars, remember that cooking is more than just the food—it’s about the moments shared and the love poured into every bite. So, grab your ingredients and make these bars today, creating not just a treat, but a memory that will linger long after the last crumb is gone. Happy cooking!
No Bake Chocolate Oat Bars
Ingredients
Dough
- 1 cup butter
- 1/2 cup packed brown sugar
- 1 teaspoon vanilla extract
- 3 cups quick cooking oats
- 1 cup semisweet chocolate chips
- 1/2 cup peanut butter
Instructions
- Grease a 9×9 inch pan. Melt butter, stir in sugar and vanilla, then mix in oats. Press half into pan.
- Melt chocolate chips and peanut butter until smooth. Spread over oat crust.
- Top with remaining oat mixture, press gently. Refrigerate for 2-3 hours before cutting.