
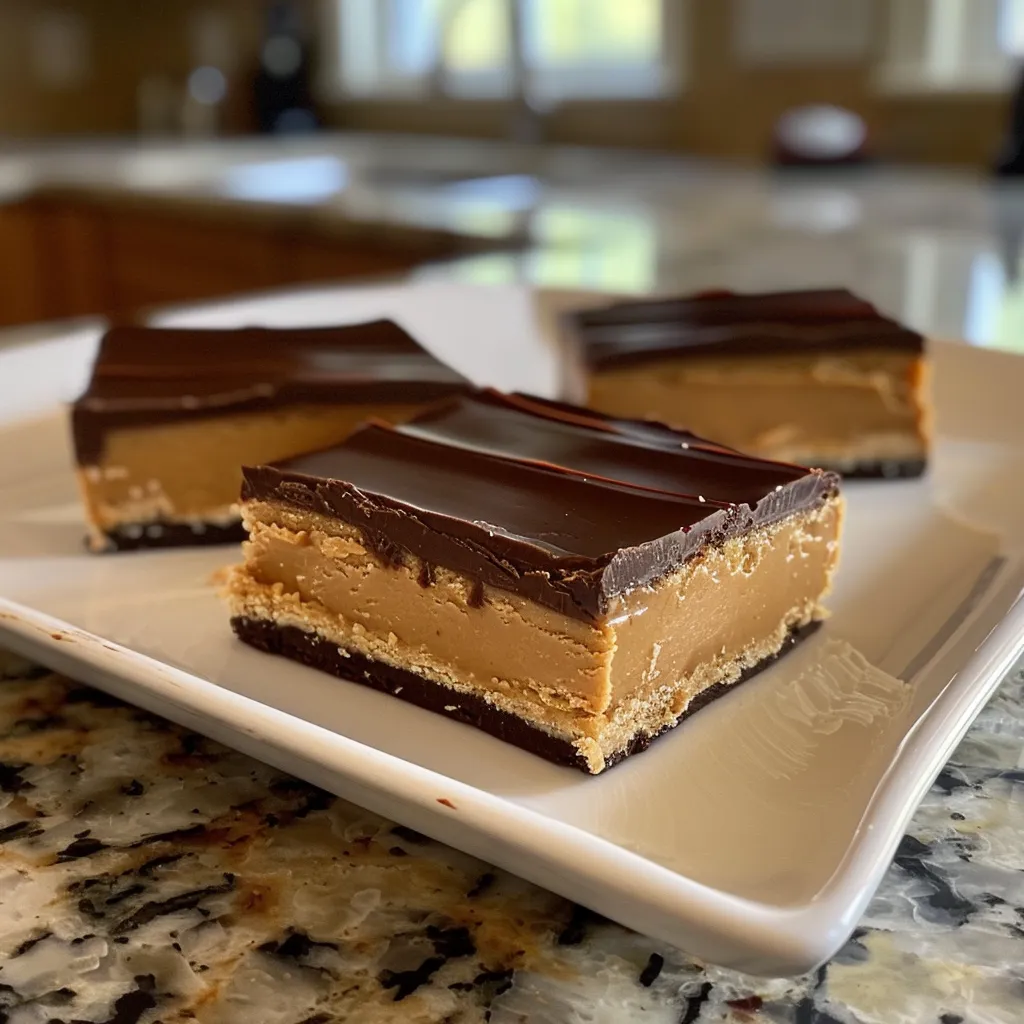
Welcome to the Heart of the Kitchen: Making No Bake Peanut Butter Buckeye Bars
There’s something incredibly special about a dessert that not only satisfies your sweet tooth but also wraps you in the warmth of cherished memories. Today, we’re diving into the delightful world of No Bake Peanut Butter Buckeye Bars. This recipe isn’t just a treat; it’s a sweet tribute to home and the love we share around the kitchen table. With its rich layers of creamy peanut butter and velvety chocolate, these bars are perfect for family gatherings, potlucks, or simply enjoying with a cup of tea at the end of a long day.
In this article, we’ll explore everything you need to know to create these delicious bars, from the key ingredients to troubleshooting tips. So, whether you’re a seasoned chef or a kitchen novice, grab your apron, and let’s make some magic together!
Why You Will Love This Recipe
- No baking required: The beauty of these buckeye bars is that they come together effortlessly without an oven, making them perfect for warm days or quick gatherings.
- Simple ingredients: You’ll find that the ingredients are staples in most kitchens, ensuring you can whip these up anytime a craving strikes.
- Family-friendly: Kids can help with mixing and pressing, making this a fun family activity that can inspire future bakers in your home.
- Customizable: With a few simple tweaks, you can create variations that cater to different tastes and dietary needs.
- Perfect for sharing: These bars are easy to cut into squares, making them ideal for sharing with friends and loved ones, spreading the joy of home-cooked treats.
Key Ingredients
Before we dive into the steps, let’s take a closer look at the ingredients that will make these bars a hit:
- 1/2 cup butter (softened): This is the base of our peanut butter layer, adding richness and smoothness. You can substitute with coconut oil for a dairy-free option.
- 2 cups creamy peanut butter: The star of this recipe! Choose a good quality peanut butter for the best flavor. Natural peanut butter can be used, just ensure it’s well stirred.
- 3 1/2 cups powdered confectioners sugar: This sweetens the peanut butter layer and helps bind it together. If you’re looking to reduce sugar, consider using a sugar alternative.
- 1 1/2 teaspoons vanilla extract: Adds a warm, comforting flavor that complements the peanut butter beautifully.
- 2 cups chocolate chips or chunks (12 ounces): Choose semi-sweet or dark chocolate for a richer taste. Dairy-free chocolate options are available for those with dietary restrictions.
- 1 tablespoon butter (or coconut oil): Used to help melt the chocolate smoothly. If you’re avoiding dairy, stick with coconut oil.
How to Make No Bake Peanut Butter Buckeye Bars
Now that we have our ingredients ready, let’s get to the heart of the matter: making these delicious bars!
1) Make the Peanut Butter Layer
In a large mixing bowl, combine the softened butter, creamy peanut butter, powdered sugar, and vanilla extract. Using an electric mixer, beat the mixture until it is smooth and creamy. You’ll notice that the dough will be thick and slightly crumbly, but that’s just perfect.
2) Press Into Pan
Line a 9×13-inch baking pan with parchment paper, leaving a bit of an overhang on the sides. This makes it easier to lift the bars out later. Transfer the peanut butter mixture into the prepared pan, pressing it down firmly to create an even layer.
3) Make the Chocolate Mixture
In a microwave-safe bowl, combine the chocolate chips and the remaining tablespoon of butter (or coconut oil). Microwave in 30-second intervals, stirring in between, until the chocolate is completely melted and smooth. Be careful not to overheat it!
4) Set the Bars
Pour the melted chocolate over the peanut butter layer, spreading it evenly. Allow the bars to sit at room temperature for about 30-60 minutes until the chocolate has set. To make it faster, you can place them in the refrigerator.
5) Slice and Serve
Once the chocolate has set, carefully lift the bars out of the pan using the parchment paper. Place them on a cutting board and slice into squares with a sharp knife. Enjoy these bars chilled or at room temperature!
Expert Tips for Success
- Choose quality ingredients: The flavor of your bars will greatly depend on the quality of the peanut butter and chocolate you use. Look for natural brands without added sugars or preservatives.
- Be patient with chocolate: When melting chocolate, stir frequently and don’t rush the process to avoid burning it.
- Use a sharp knife: For clean cuts, use a sharp, warm knife, dipping it in hot water and wiping it dry before slicing.
- Chill before serving: For the best texture, refrigerate the bars for at least an hour before slicing to ensure they hold their shape.
- Experiment with toppings: Feel free to sprinkle chopped nuts, sea salt, or even a drizzle of caramel on top of the chocolate for added flavor.
- Make it a family affair: Involve your kids in the process. They can help with mixing and pressing, which makes for wonderful memories!
- Store correctly: Keep your buckeye bars in an airtight container in the fridge to maintain freshness and prevent them from getting too soft.
- Cut into different shapes: Want a fun twist? Use cookie cutters to create different shapes for special occasions!
Common Mistakes and Troubleshooting
Even the best of us can run into a hiccup while baking! Here are some common mistakes and how to fix them:
- Too crumbly? If your peanut butter layer is too crumbly, try adding a touch more melted butter or peanut butter to help bind it together.
- Chocolate won’t set? If your chocolate layer is still soft after chilling, it may need a bit longer in the fridge. Sometimes, letting it sit overnight can do wonders.
- Bars are too sweet? If you find the bars too sweet, you can balance it out by serving with a sprinkle of sea salt or pairing it with unsweetened whipped cream.
- Chocolate layer cracking? If the chocolate layer cracks when cutting, it may be due to the chocolate being too cold. Let it sit at room temperature for a few minutes before slicing.
Variations to Try
Feeling adventurous? Here are some delightful variations to make this recipe your own:
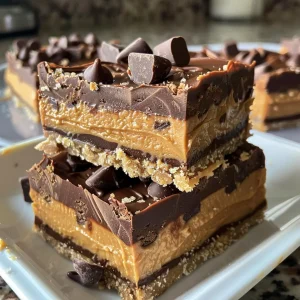
- Crunchy Peanut Butter Buckeye Bars: Use crunchy peanut butter instead of creamy for added texture and a nutty bite.
- Chocolate Drizzled Bars: After pouring the chocolate layer, drizzle melted white chocolate on top for a beautiful contrast and extra sweetness.
- Nut-Free Version: Swap peanut butter for sunbutter or almond butter to create a nut-free treat that everyone can enjoy.
- Protein-Packed Bars: Mix in protein powder or crushed nuts into the peanut butter layer for a nutritious boost.
Storage and Make-Ahead Instructions
These No Bake Peanut Butter Buckeye Bars are perfect for making ahead of time! Here’s how to store them:
- Refrigerator: Store in an airtight container in the refrigerator for up to 1 week. They may last longer, but they are best enjoyed fresh!
- Freezer: For longer storage, you can freeze the bars. Wrap individual pieces in plastic wrap and place them in a freezer-safe container. They will keep well for up to 3 months. To enjoy, simply thaw in the fridge overnight.
Comprehensive FAQ
- Can I use natural peanut butter? Yes, natural peanut butter works great! Just ensure it’s well stirred before measuring.
- What can I substitute for powdered sugar? You can use a sugar alternative like powdered erythritol or make your own by blending granulated sugar in a blender until fine.
- Can I make these bars vegan? Absolutely! Use coconut oil instead of butter and dairy-free chocolate chips.
- What if my chocolate layer is too thick? If your chocolate is too thick to spread, add a little coconut oil to thin it out.
- How do I know when the bars are ready to cut? The chocolate should be set and firm to the touch, and the peanut butter layer should hold its shape.
- Can I add other flavors? Yes! Consider adding a pinch of sea salt or a sprinkle of cinnamon for an extra kick.
- How do I serve these bars? These bars can be served chilled or at room temperature, and they pair wonderfully with coffee or hot cocoa!
- Can I double the recipe? Yes, feel free to double the ingredients and use a larger pan for a bigger batch!
Nutritional Tips and Dietary Adaptations
While these No Bake Peanut Butter Buckeye Bars are an indulgent treat, there are ways to make them a bit healthier:
- Whole grain options: For a fiber boost, consider adding oats or using oat flour in the peanut butter layer.
- Protein-packed: Incorporate protein powder to turn these bars into a post-workout snack.
- Reduced sugar: Use a sugar alternative to cut down on the sweetness while still enjoying delicious flavors.
Essential Equipment Recommendations
To make your baking experience smooth and enjoyable, here’s a list of essential tools:
- Mixing bowls: A good set of mixing bowls in various sizes is essential for combining your ingredients effortlessly.
- Electric mixer: While you can mix by hand, an electric mixer will save time and ensure a smooth consistency.
- Microwave-safe bowls: For melting chocolate, use bowls that can withstand heat without warping.
- Parchment paper: This makes for easy cleanup and helps the bars lift out of the pan seamlessly.
- Sharp knife: A sharp knife is crucial for cutting clean slices without crumbling the bars.
Serving Suggestions
When it comes to serving these delightful bars, consider pairing them with:
- Fresh fruit: Berries or banana slices provide a refreshing contrast to the richness of the bars.
- Coffee or tea: A warm beverage enhances the experience, making for a cozy treat.
- Ice cream: For a decadent dessert, serve a square of the buckeye bars alongside a scoop of vanilla or chocolate ice cream.
Conclusion
These No Bake Peanut Butter Buckeye Bars are more than just a sweet indulgence; they are a celebration of love, family, and memories made in the kitchen. Whether you enjoy them as a treat after dinner or share them with friends at gatherings, each bite is a reminder of the joy that cooking and sharing can bring. So gather your ingredients, invite your loved ones, and create some beautiful memories around your kitchen table. Happy baking!
No Bake Peanut Butter Buckeye Bars
Ingredients
Dough
- 0.5 cup butter (softened)
- 2 cups creamy peanut butter
- 3.5 cups powdered confectioners sugar
- 1.5 teaspoons vanilla extract
- 2 cups chocolate chips or chunks (12 ounces)
- 1 tablespoon butter (or coconut oil)
Instructions
- Mix butter, peanut butter, powdered sugar, and vanilla until smooth. Press into a parchment-lined 9x13-inch pan.
- Microwave chocolate chips and butter until smooth, about 1.5 minutes, stirring every 30 seconds.
- Pour melted chocolate over the peanut butter layer and spread evenly. Chill for 30-60 minutes until set.
- Remove from pan, cut into bars, and refrigerate for at least 1 hour before serving.