
Discover the Joy of Homemade No Bake Granola Bars
There’s something magical about the aroma of fresh ingredients coming together in the kitchen, isn’t there? Making no bake granola bars is not just a cooking task; it’s a heartfelt experience that brings warmth and love to your family table. These delightful snacks are simple to prepare, and they offer a world of customization to suit every taste and dietary need. In just a few easy steps, you’ll create a delicious treat that’s perfect for lunchboxes, afternoon snacks, or even a quick breakfast on the go. Let’s dive into this nourishing recipe that celebrates the joy of cooking and sharing!
Why You’ll Love This Recipe
- Easy to Make: No baking required! Just mix, chill, and you’re done.
- Customizable: Add your favorite mix-ins, from chocolate chips to dried fruits.
- Healthy Ingredients: Control what goes in, ensuring there are no hidden sugars or preservatives.
- Cost-Effective: Making your own bars is often cheaper than buying store-bought options.
- Great for Sharing: Perfect for family gatherings, snacks, or as homemade gifts to loved ones.
Ingredient Breakdown
Let’s take a closer look at the ingredients that make these bars so special, along with some substitutions to cater to your taste buds or dietary requirements.
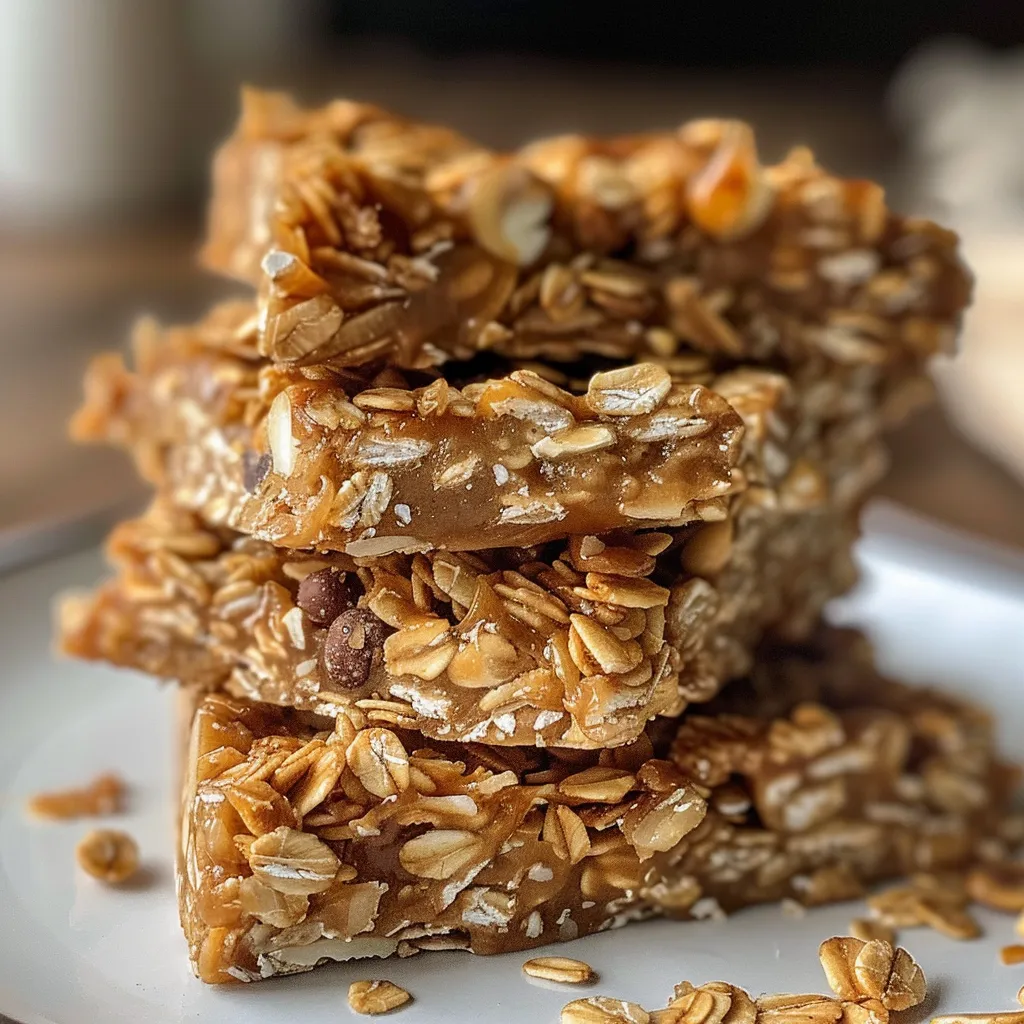
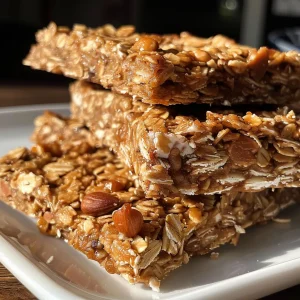
- 2 cups old-fashioned rolled oats: These provide the base and are packed with fiber.
- 1/2 cup nut butter: Choose between peanut butter, almond butter, or cashew butter for creaminess and flavor.
- 1/3 cup honey: This acts as a natural sweetener; you can also use maple syrup or agave for a vegan option.
- 1/2 cup mix-ins: Think chocolate chips, dried fruits, seeds, or nuts. The sky’s the limit!
- 1 teaspoon vanilla extract: Optional, but it adds a lovely depth of flavor.
- Pinch of salt: Just a little to enhance all the flavors.
Pro Tips for Perfect No Bake Granola Bars
Here are some expert insights to ensure your granola bars turn out perfectly every time:
- Coat the Oats Well: Make sure every oat is coated with the nut butter mixture to bind them together.
- Use Parchment Paper: Lining your pan with parchment paper makes it easier to lift the bars out once they’re set.
- Press Firmly: Don’t skip this step! Press the mixture down firmly to avoid crumbly bars.
- Chill Adequately: Allowing the bars to chill for at least two hours helps them firm up nicely.
- Experiment with Flavors: Don’t be afraid to try different nut butters or sweeteners for unique flavors!
- Store Properly: Keep them in an airtight container in the fridge for maximum freshness.
- Watch the Mix-Ins: Be mindful of the total amount of mix-ins. Too many can make it difficult for the bars to hold together.
- Use a Sharp Knife: When cutting the bars, a sharp knife will give you clean edges.
Avoid These Common Mistakes
Even the best of us can make a few missteps in the kitchen. Here’s how to avoid those pitfalls:
- Not Enough Binding: If your mixture is too dry, add more nut butter or sweetener to help it stick.
- Not Pressing Enough: If the mixture isn’t packed tightly, the bars will fall apart when cut.
- Overloading on Sweeteners: Balance is key; too much honey or syrup can make them overly sweet.
- Skipping the Chill Time: Patience is a virtue! Don’t rush this crucial step.
Delicious Variations to Try
Feel free to change things up with these tasty variations:
- Chocolate Lover’s Delight: Add more chocolate chips and drizzle melted dark chocolate on top.
- Nut-Free Option: Substitute nut butter with sunflower seed butter and ensure your mix-ins are nut-free.
- Fruit and Nut Medley: Mix in dried cranberries, apricots, and chopped almonds for a fruity twist.
- Spiced Pumpkin Bars: Add 1/2 cup of pumpkin puree and pumpkin spice for a seasonal flavor.
Storing and Make-Ahead Instructions
These bars can be made ahead and stored for convenience:
- In the Fridge: Keep in an airtight container for up to one week.
- In the Freezer: Wrap individual bars in plastic wrap and store in a freezer-safe bag for up to three months. Just thaw in the fridge overnight before enjoying.
Frequently Asked Questions
Here are some common questions that might come to mind:
- Can I store them at room temperature? Yes, but they may become softer. For the best texture, keep them in the fridge.
- How do I prevent the bars from falling apart? Ensure all ingredients are well combined and press the mixture firmly into the pan.
- What are some great add-ins for these bars? Try dried fruits, chocolate chips, seeds, or even coconut flakes.
- Can I use quick oats instead of rolled oats? Yes, but the texture will be slightly different; rolled oats are best for a chewier bar.
- How do I know when they are set? They should feel firm to the touch after chilling for at least two hours.
- Can I double the recipe? Absolutely! Just use a larger pan and adjust the chilling time if necessary.
- Is this recipe vegan? Yes, if you use maple syrup or agave and a plant-based nut butter.
- Can I bake these bars? This recipe is designed for no-bake, but you can experiment by baking at a low temperature for a chewy texture.
Nourishment and Nutrition Tips
These homemade granola bars aren’t just delicious; they can also be a healthy addition to your diet. Here are some nutrition tips:
- Whole Grains: Rolled oats are rich in fiber, which helps keep you full longer.
- Healthy Fats: Nut butters provide healthy fats essential for heart health.
- Natural Sweetness: Using honey or maple syrup ensures you’re not consuming refined sugars.
- Protein Boost: Add protein powder or chia seeds for an extra nutritional punch.
Essential Equipment for This Recipe
Having the right tools can make your cooking experience smoother:
- 8×8-inch Baking Dish: Perfect for setting the bars evenly.
- Parchment Paper: Helps in easy removal of the bars once set.
- Mixing Bowls: A large bowl for mixing dry ingredients and a saucepan for melting wet ingredients.
- Spatula: Great for mixing the ingredients and pressing them into the pan.
Serving Suggestions
Once your granola bars are set, here are a few ways to enjoy them:
- On-the-Go: Perfect for a quick breakfast or snack while rushing out the door.
- With Yogurt: Crumble over Greek yogurt for added texture and flavor.
- As a Lunchbox Treat: A great addition to kids’ lunches for a sweet yet healthy snack.
- With a Cup of Tea: Enjoy them alongside your favorite hot beverage for a comforting treat.
In the end, these no bake granola bars are more than just a recipe; they’re a way to share love and create cherished memories. So gather your ingredients, put on your favorite music, and let’s make something beautiful together! Thank you for joining me in this delicious journey. Happy cooking!
Homemade No Bake Granola Bars
Ingredients
Dry Ingredients
- 2 cups old-fashioned rolled oats
- 1/2 cup nut butter (peanut, almond, or cashew)
- 1/3 cup honey (maple syrup or agave)
- 1/2 cup mix-ins (chocolate chips, dried fruit, seeds, or nuts)
- 1 teaspoon vanilla extract (optional)
- Pinch salt
Instructions
- Line an 8x8-inch dish with parchment paper.
- Mix oats and mix-ins in a bowl.
- Heat nut butter and honey until smooth, then stir in vanilla and salt.
- Pour wet mixture over dry ingredients and combine.
- Press mixture into the pan and chill for 2 hours.
- Cut into bars and enjoy or store for later.